
Installing LED light strips is one of the most versatile ways to elevate your home’s aesthetic. Whether you want to create a cozy warm glow behind your bedhead, cast clean task lighting under kitchen cabinets, or set a vibrant gaming mood, these flexible strips offer an accessible DIY path to customized light decoration. The process is straightforward, but achieving a professional, long-lasting finish requires careful planning, meticulous surface preparation, and correct mounting techniques.
By understanding the steps to measure, cut, stick, and power your light strips safely, you can avoid common pitfalls like peeling tape, flickering segments, or messy, exposed cables. This guide walks you through the entire installation process, tailored specifically for local homes, ensuring your decorative lighting looks polished and operates reliably for years to come.
Gather Your Tools and Materials Before Starting
Before unboxing your new lighting setup, gathering the correct tools and verifying your component specifications will save you time and prevent mid-project interruptions. The foundation of your project is the LED light strip kit, which typically includes the flexible LED tape, a controller receiver (for remote or smart app commands), and a compatible power adapter.
Products mentioned in this guide
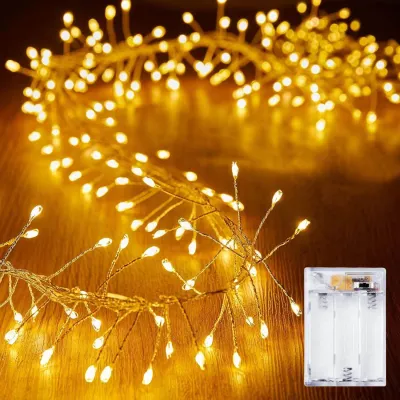
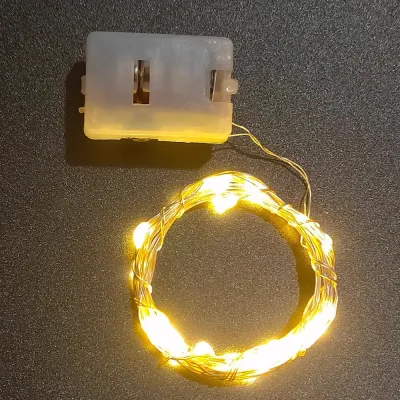
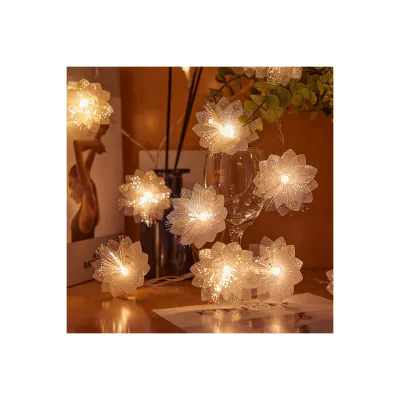
Prices are valid at publication and may change. Please refer to the product page for the latest price.
When purchasing your kit in Singapore, always verify the electrical specifications. The power adapter must be compatible with the local 230V, 50Hz electrical grid and feature a standard Type G three-pin plug. To guarantee electrical safety and prevent fire hazards, check that the power adapter carries the Enterprise Singapore Safety Mark, indicating it has been tested and certified for safe domestic use.
For preparation and installation, you will need a reliable measuring tape to plan your layout, a pair of sharp household scissors (only to be used if the strips are explicitly marked as cuttable), rubbing alcohol (isopropyl alcohol), and a clean microfiber cloth. These cleaning items are essential, as even an invisible film of dust will ruin the strip’s adhesive backing.
Depending on your installation surface, you may also want to purchase optional mounting accessories. These include plastic mounting clips with small screws, heavy-duty double-sided mounting tape (such as acrylic foam tape) to reinforce high-stress areas, and adhesive cable management clips to keep the power cords neatly tucked away out of sight.
Plan Your Layout and Measure Accurately
A successful light decoration project begins with a clear visual plan. Decide on the specific decorative effect you want to achieve, as this determines where the strips should be mounted. For instance, cove lighting along the ceiling perimeter provides a soft, indirect glow, while mounting strips behind a wall-mounted TV creates a bias light that reduces eye strain. Under-cabinet mounting offers direct task lighting for kitchen countertops, whereas under-bed mounting creates a floating furniture illusion.

Once you have chosen the placement, use your measuring tape to determine the exact length of the run. Measure every segment carefully, taking into account any architectural corners, vertical drops, or physical obstacles that the strip must navigate. If you are planning a continuous run that spans multiple walls, remember that standard low-voltage strips (usually 12V or 24V) can experience voltage drop over long distances, resulting in dimmer light at the far end; check the manufacturer’s manual for maximum continuous run limits.
As you measure, locate the designated cut points on your LED strip. These are clearly marked with copper pads, often accompanied by a small scissor icon, spaced at regular intervals (typically every 5 to 10 centimeters depending on the LED density). You must plan your layout so that any necessary cuts occur precisely at these marks, as cutting anywhere else will permanently damage the circuitry of that segment.
Finally, plan the physical path to your power source. The power adapter needs to plug into a standard wall socket safely without stretching the cable tight, creating a tripping hazard, or requiring the permanent use of unsafe extension cords. Ensure the controller receiver is positioned where it can easily receive signals from your remote control or connect to your home Wi-Fi router without obstruction.
Prep the Surface to Prevent Peeling
The single most common cause of DIY LED strip failure is the adhesive peeling off the wall or furniture after just a few days. This frustration is almost always preventable with thorough surface preparation. Dust, microscopic grease films, and ambient moisture act as barriers, preventing the pressure-sensitive adhesive on the back of the strip from forming a permanent bond with the mounting surface.
Before applying any adhesive, always check the light strip’s product label and your furniture or wall manufacturer’s care instructions to ensure compatibility and prevent surface damage. To prepare the area, pour a small amount of rubbing alcohol onto a clean microfiber cloth and wipe down the entire installation path vigorously. Avoid using standard household glass cleaners or multi-purpose sprays, as many of these products leave behind a thin chemical residue or wax coating that prevents adhesion.
After wiping the surface, allow it to dry completely. In Singapore’s naturally humid tropical climate, this drying process may take a few minutes longer, so do not rush to apply the strips while the surface still feels cool or damp to the touch.
If you are mounting the strips onto textured, porous, or challenging surfaces—such as textured wallpaper, unpainted wood, rough concrete, or uneven plaster—the factory-applied adhesive backing is highly likely to fail over time. In these scenarios, you should apply a thin strip of heavy-duty double-sided acrylic foam tape along the path first, or plan to secure the light strip at regular intervals using physical mounting clips screwed directly into the substrate.
Mount the Strips and Connect the Power Safely
With a clean, dry surface and a clear layout plan, you are ready to mount the LED strips. Begin by peeling away a small section—about 30 to 50 centimeters—of the protective paper backing from the adhesive side of the strip. Align the start of the strip with your starting point, then press it firmly against the surface using your fingers, applying steady pressure for at least 10 seconds to activate the pressure-sensitive adhesive.
Continue working your way along the planned path, peeling the backing off in small, manageable sections as you go. Do not peel the entire backing off at once, as the exposed adhesive will easily catch dust from the air or accidentally stick to itself.
When navigating corners, proceed with extreme caution. Bending a flexible LED strip sharply at a 90-degree angle can crack the delicate copper traces embedded inside the strip, causing the entire section beyond the bend to fail. Instead, create a gentle, rounded loop at the corner, or cut the strip at a designated cut point and use a solderless corner connector clip to bridge the gap at a perfect right angle.
Once the physical strip is mounted, make the electrical connections. Connect the end of the LED strip to the controller receiver, ensuring that the small arrows printed on the connectors align perfectly with each other; aligning these incorrectly can reverse the polarity and prevent the lights from working or damage the controller. Connect the controller to the power adapter, but do not plug it into the wall socket just yet.
At this stage, it is crucial to understand your safety boundaries. If the manufacturer instructions for your light strip conflict with your wall surface guidelines, or if you are dealing with unidentified materials, stop the installation and consult the manufacturer or a qualified professional. Furthermore, if your light decoration project involves cutting into walls to route cables, hardwiring the power supply directly into your home’s mains electrical junction boxes, or installing lighting in damp areas like bathrooms or exposed outdoor balconies, you must stop. These activities alter fixed electrical wiring and carry significant shock and fire risks; they must be carried out by a licensed electrical worker (LEW) in accordance with local safety regulations. Standard plug-and-play setups utilizing an approved power adapter plugged into an existing wall socket are perfectly safe for DIY installation.
Test the Lights and Manage the Cables
Now that everything is connected, plug the power adapter into your wall socket and switch it on. Use your remote control or the manufacturer’s smart app to cycle through all the available color modes, adjust the brightness levels from lowest to highest, and test any dynamic lighting scenes.
During this test, inspect the entire length of the strip carefully. Look out for any dark spots, flickering segments, or sudden color mismatches between different sections of the strip. Flickering or dead zones usually point to a loose connection at a solderless connector, a damaged section of copper circuitry from over-bending, or an overloaded power adapter that cannot supply enough current for the length of the strip you have installed.
Once you have verified that the lights are functioning perfectly, turn them off to complete the cable management. Loose, dangling wires not only look untidy but also pose a physical hazard and can pull the LED strip down if snagged. Use adhesive cable management clips or zip ties to secure the excess power cable and the heavy power adapter brick neatly against the wall, underside of furniture, or baseboards, ensuring a clean, professional finish.
Troubleshoot Common Installation Issues
Even with careful installation, you may encounter minor issues that require quick troubleshooting. If your LED strips begin to peel or sag after installation, do not try to re-stick the degraded factory adhesive. Instead, gently lift the loose section, clean the area again, and apply small pieces of heavy-duty double-sided mounting tape or secure the sagging spots with plastic mounting clips.
If you experience partial lighting, where only the first half of your strip lights up, or if the lights flicker constantly, double-check your physical connections. Ensure that any solderless connectors are fully seated and that the metal pins inside the connector are making firm, direct contact with the copper pads on the strip. If the entire strip is dim or flickering when set to maximum brightness, verify that your power supply’s wattage and amperage output match the requirements specified by the manufacturer for your total installed length.
When dealing with smart app connection failures on Wi-Fi-enabled strips, ensure that your home router is broadcasting a compatible 2.4GHz signal, as many smart home controllers do not support 5GHz bands. Keep the controller within reasonable range of your router during the initial pairing process, and refer to the manufacturer’s manual to reset the controller if it fails to enter pairing mode automatically.
Frequently Asked Questions (FAQ)
Can I install LED light strips in an HDB flat or rented room?
Yes, plug-and-play LED light strips that use standard wall adapters are completely safe and permitted for DIY room decoration in both HDB flats and rental properties. Because they do not require drilling or structural modifications, they are highly rental-friendly. However, you must avoid drilling into structural concrete walls or making permanent alterations to the property’s fixed electrical wiring without explicit permission from your landlord or the relevant housing authorities. If you require a hardwired setup or a dedicated light switch, you must hire a licensed electrical worker to perform the installation safely.
How do I safely cut and reconnect LED strips?
To cut an LED strip safely, you must locate the designated cut lines, which are marked by copper solder pads and a small scissor icon. Use a pair of sharp scissors to make a clean, straight cut directly down the middle of these copper pads. To reconnect two cut sections, you can use solderless quick-connectors, which slide over the copper pads and clamp down to establish an electrical connection, or you can solder wires directly to the pads if you have the proper tools. Always ensure that you match the polarity markings (such as +, G, R, B) on both sections; reversing the polarity will prevent the strip from functioning and could damage the controller.
Community discussion
Share your experience or ask a question. Comments are reviewed before publication.