
Installing an LED square downlight is an excellent way to bring a clean, architectural aesthetic to your home. Unlike traditional round fixtures, square downlights offer sharp lines that complement modern interior designs, particularly in contemporary homes where false ceilings are utilized to create clean spatial layouts. However, achieving a flawless, flush finish with a square fixture requires a higher level of precision during both the measuring and cutting phases.
While the physical mounting process is highly manageable, working with electrical wiring demands strict adherence to safety protocols. This step-by-step guide provides a comprehensive walkthrough for preparing your ceiling, wiring the fixture safely, and securing it in place. By understanding the technical requirements and preparing the correct tools beforehand, you can achieve a professional-grade installation while maintaining a safe working environment.
Before You Start: Safety, Tools, and Compatibility Checks
Before embarking on any electrical project, your primary focus must be safety and compatibility. Fixed electrical wiring work is subject to strict local regulations. While replacing an existing light fixture on a like-for-like basis is generally permissible for homeowners who possess the necessary skills, installing entirely new circuits, running new cabling from the distribution board, or performing complex wiring modifications legally requires a licensed professional. Always verify your local regulations before beginning.
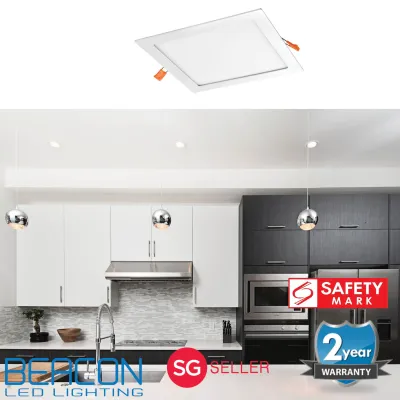
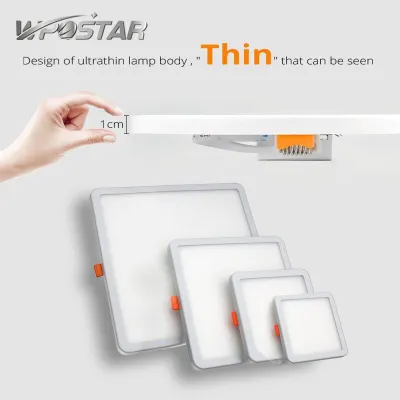
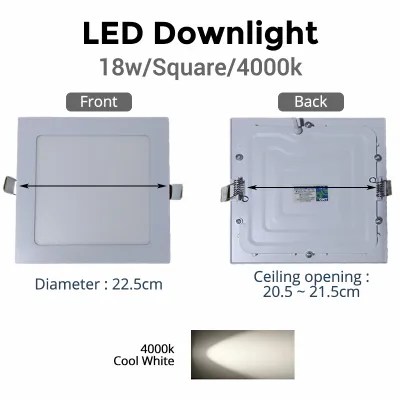
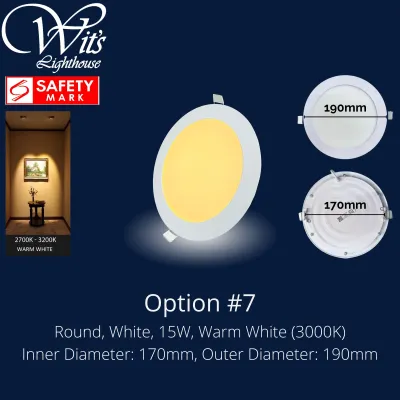
Products mentioned in this guide
![[BUY 2 FREE 1] DFS LED Recessed Downlight With Safety Mark Driver/Downlight Square/ Round 6W 9W 12W 18W](https://img.lazcdn.com/g/p/1bbba251513d2f446d42ef7aed2d1fe8.jpg_400x400q80.jpg_.webp)

Prices are valid at publication and may change. Please refer to the product page for the latest price.
Next, you must verify that your chosen LED square downlight is fully compatible with your home’s electrical system and ceiling structure. Check the product label for the appropriate electrical certification mark to ensure the fixture has been tested for safety. Confirm the operating voltage matches your household supply, which is typically 220V to 240V AC. Additionally, check the wattage limits of your existing circuit and ensure the dimming method of the downlight (such as triac or trailing-edge dimming) matches your wall dimmer switch if you plan to adjust the brightness.
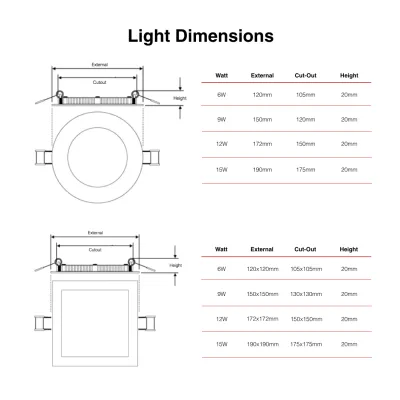
Physical dimensions are equally critical. Measure the cut-out size specified by the manufacturer, which is distinct from the outer dimensions of the downlight bezel. You must also measure the depth of your ceiling cavity to ensure there is sufficient clearance for the fixture and its driver, allowing for proper heat dissipation. Placing an LED fixture in a cavity that is too shallow or packed tightly with insulation can lead to premature driver failure or create a fire hazard.
To complete the installation efficiently, gather all necessary tools and personal protective equipment before you begin. You will need a measuring tape, a pencil, a spirit level, a drywall saw, wire strippers, and a non-contact voltage tester. For your personal safety, wear safety goggles to protect your eyes from falling plaster dust and a dust mask to avoid inhaling fine particles while cutting the ceiling.
The most critical safety step is isolating the power supply. Locate your home’s main distribution board and switch off the circuit breaker dedicated to the lighting circuit you will be working on. Do not rely solely on the wall switch, as it may only cut the live wire, leaving other parts of the circuit active. Once the breaker is off, use a reliable non-contact voltage tester at the existing light fixture or wiring point to verify absolutely that no electrical current is flowing through the wires before you touch them.
Step-by-Step Installation Process
The physical installation of an LED square downlight can be broken down into three distinct phases: preparing the ceiling and cutting the precise square opening, safely wiring the fixture to the electrical supply, and mounting the downlight securely into the ceiling. Each phase requires patience and attention to detail to ensure the final result is both safe and visually appealing.

Before you make any cuts or wire connections, unbox your downlight and locate the manufacturer’s instruction sheet. Keep this document nearby throughout the process, as it contains vital model-specific information, including the exact cut-out dimensions, wiring diagrams, and instructions for operating the spring clips or mounting brackets.
Step 1: Prepare the Ceiling and Cut the Hole
Achieving a clean, professional look with a square downlight depends entirely on the accuracy of your cut-out. Unlike round downlights, where minor rotational misalignments are invisible, a square downlight must be aligned perfectly parallel to the walls of the room. Start by using the manufacturer’s provided cut-out template to mark the ceiling. If no template is included, measure the rear housing of the downlight carefully, ensuring you do not include the outer flange that sits flush against the ceiling.
Hold the template or your measured markings against the ceiling at the desired installation point. Use a spirit level or measure equal distances from the nearest wall to ensure the square is perfectly straight. Mark the outline clearly with a pencil. Before proceeding to cut, you must verify that the area behind the plasterboard is clear. Use a stud finder to locate any wooden joists or metal framing channels, and ensure the cut-out maintains a safe clearance of at least 50mm from these structural elements.
In many modern homes, false ceilings also house air-conditioning copper pipes, electrical conduits, or water pipes. To avoid catastrophic damage, gently drill a small pilot hole in the center of your marked square and insert a stiff wire or probe to feel for any hidden obstructions. Once you are certain the cavity is clear, use a sharp drywall saw to cut along your pencil lines. Hold the saw at a 90-degree angle to the ceiling to ensure the edges are cut straight and clean, which prevents the plasterboard from crumbling and ensures a flush fit for the downlight bezel.
Step 2: Wire the Downlight Safely
With the ceiling hole prepared, you can now proceed to the electrical connections. Ensure the power remains isolated at the circuit breaker before handling the wires. Pull the existing ceiling cable gently through the cut-out hole. Use wire strippers to carefully remove about 50mm of the outer protective sheath from the cable, and then strip approximately 10mm of insulation from the individual wire ends to expose the clean copper conductors.
Examine the terminal block on the LED downlight or its external driver. Connect the wires exactly as indicated by the labels on the product. Typically, you will connect the live wire (brown or red) to the terminal marked ‘L’, the neutral wire (blue or black) to the terminal marked ‘N’, and the earth wire (green and yellow) to the terminal marked ‘E’ or the ground symbol. If your downlight is a Class II double-insulated fixture, it may not require an earth connection, but you must safely terminate any existing earth wire from your house wiring in an insulated connector block rather than leaving it loose.
Insert the stripped copper ends fully into the terminal block and tighten the screws firmly. Gently tug each wire to verify that it is held securely in place. Loose connections are a primary cause of electrical arcing, which can damage the fixture or pose a fire risk. Ensure that no bare copper wire is exposed outside the terminal housing. Once secured, close the terminal cover and tuck the wiring and the external driver neatly up into the ceiling cavity, positioning them away from the immediate edges of the cut-out so they do not interfere with the mounting clips.
Step 3: Mount and Secure the Square Downlight
The final physical step is mounting the square downlight into the prepared ceiling opening. Most modern LED square downlights utilize heavy-duty spring-loaded clips mounted on opposite sides of the fixture housing to hold it firmly against the plasterboard. Because these springs are under significant tension, handle them with care to avoid pinching your fingers during installation.
Carefully pull the spring clips upward and compress them against the sides of the downlight body. While holding the clips in this compressed position, guide the downlight and its connected driver up into the cut-out hole. Once the spring arms have cleared the thickness of the plasterboard ceiling, slowly release your grip on the clips. The springs will snap outward and pull the fixture upward, clamping the outer bezel tightly against the underside of the ceiling.
Before pushing the fixture completely flush, check its alignment. Gently rotate or slide the downlight slightly within the play of the cut-out to ensure its square edges run perfectly parallel to your walls. Once aligned, push the fixture firmly upward until the bezel sits completely flush against the ceiling surface without any visible gaps. Use a clean, dry microfiber cloth to wipe away any plaster dust, smudges, or fingerprints from the bezel and the ceiling area surrounding the light.
Post-Installation Testing and Troubleshooting
Once the downlight is physically secured, you can safely restore power to test your work. Return to your main distribution board and switch the lighting circuit breaker back to the ‘on’ position. Walk back to the room and turn on the wall switch. The LED square downlight should illuminate instantly with a steady, clear light.
Observe the operating downlight closely for several minutes. Pay attention to any signs of improper operation, such as flickering, buzzing, or excessive heat buildup. Flickering or buzzing is often a sign of electrical incompatibility, particularly if you are using a dimmer switch that is not rated for LED loads. If you notice any of these symptoms, turn off the light immediately and investigate the compatibility of your dimmer switch or check for loose wire connections.
If the downlight fails to turn on at all, do not attempt to adjust the fixture while the circuit is live. Immediately turn off the power at the main circuit breaker and verify the absence of voltage using your non-contact tester. Carefully pull the downlight down from the ceiling—taking care as the spring clips release—and inspect the terminal block to ensure the wires have not slipped out of their connections or that the insulation was not accidentally clamped instead of the bare copper.
When to Stop and Call a Licensed Electrician
While DIY installation is highly rewarding, it is vital to recognize your limits and prioritize safety. There are several scenarios where you must stop work immediately and contact a licensed professional. If you turn off the power and discover that your existing ceiling wiring is degraded, has crumbling insulation, or lacks an earth wire in a situation where your new fixture requires one, do not proceed with the installation.
Furthermore, complex installations require professional expertise. If you need to run new electrical circuits from your main distribution board, install downlights in high-ceiling areas that require specialized scaffolding, or cut through concrete ceilings rather than standard plasterboard false ceilings, you must hire a professional. Concrete ceilings require specialized rotary hammer drills and structural considerations that are beyond standard DIY scope.
Additionally, if you encounter unexpected wiring configurations behind your ceiling—such as a complex loop-in system with multiple cables that you cannot clearly identify—do not guess the connections. Incorrectly wiring a loop-in system can disable lights in other rooms or create a dangerous short circuit. Relying on a qualified professional ensures your home’s electrical system remains safe, compliant with local standards, and fully covered by your home insurance.
Frequently Asked Questions (FAQ)
Can I install square downlights in a bathroom?
Yes, but you must select fixtures with an appropriate Ingress Protection (IP) rating suitable for moisture-prone environments. Bathrooms are divided into electrical zones based on proximity to water sources; fixtures installed directly over a shower or bathtub typically require an IP44 or IP65 rating to protect against water splashes and steam. Additionally, because water increases the risk of electrical shock, always check local building regulations, as electrical work in bathrooms often legally requires installation by a licensed professional to ensure compliance with safety standards.
Do I need a transformer for LED square downlights?
Whether you need a transformer depends entirely on the design of your specific LED square downlight. Mains-voltage downlights operate directly on your home’s standard AC voltage (220V-240V) and feature either an integrated driver inside the housing or an external driver included in the box that connects directly to your ceiling wires. Low-voltage downlights (typically 12V or 24V) require a compatible external transformer or driver to step down the voltage. If your system uses an external driver or transformer, ensure it is placed in a well-ventilated area within the ceiling cavity and remains accessible through the downlight’s cut-out hole for future maintenance or replacement.
Community discussion
Share your experience or ask a question. Comments are reviewed before publication.