
Installing Philips recessed spot lights in a false ceiling is an excellent way to elevate the lighting design of your Singapore home, whether you live in a Housing & Development Board (HDB) flat or a private condominium. Achieving a clean, flush finish requires careful planning, precise measurements, and strict adherence to electrical safety standards. While the physical mounting of these fixtures is straightforward, handling the electrical wiring and cutting into your ceiling demands a systematic approach to ensure both structural integrity and personal safety. By understanding the technical requirements of your fixtures and the structural limits of your ceiling, you can achieve a professional-grade installation that enhances your living space.
Pre-Installation Checks and Electrical Safety Boundaries
Before making any physical alterations to your home, you must verify the structural and electrical compatibility of your chosen setup. In Singapore, false ceilings are typically constructed from gypsum boards suspended by a lightweight metal frame. You must ensure that the ceiling structure is stable and capable of supporting the weight of the spotlights without sagging over time. Use a stud finder to map out the locations of the metal support runners behind the gypsum board. Planning your layout around these structural elements prevents you from accidentally cutting into a metal joist, which would compromise the ceiling’s integrity and block your fixture.
Next, consult the product specifications for your specific Philips spot lights. Every model has a designated cut-out diameter and a minimum clearance depth requirement, printed on the packaging or manual. The clearance depth is critical; even energy-efficient LED fixtures generate heat that must dissipate safely. If the cavity is too shallow or packed with insulation, heat can build up, reducing the lifespan of the LED driver. Ensure there is sufficient free air space above the fixture as specified by the manufacturer.
Products mentioned in this guide
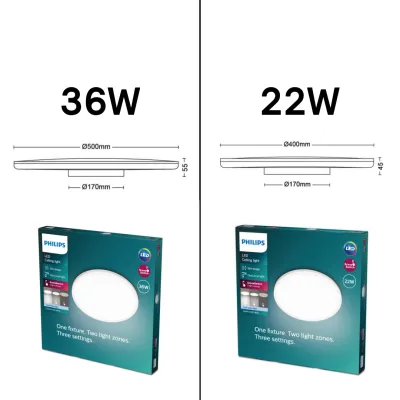
Prices are valid at publication and may change. Please refer to the product page for the latest price.
Electrical compatibility is another vital check. Singapore’s domestic electrical supply operates at 230V AC at 50Hz. Verify whether your Philips spotlights are mains-voltage models that connect directly to the home’s wiring, or low-voltage models that require a dedicated transformer or LED driver. If you plan to dim your lights, confirm that both the spotlight and the driver are explicitly labeled as dimmable, and that they are compatible with your wall dimmer switch type.
Finally, establish strict safety boundaries before beginning any electrical work. Always isolate the circuit you are working on by switching off the corresponding miniature circuit breaker (MCB) at your home’s main distribution board. Do not rely solely on the wall switch to cut the power. Use a reliable non-contact voltage tester at the ceiling wires to verify that the line is completely dead before touching any copper conductors. If your project involves running entirely new electrical lines, adding new switches, or modifying the fixed wiring of your home, Singapore law requires you to stop and hire a Licensed Electrical Worker (LEW) to perform the work.
Essential Tools and Materials for the Job
Having the correct tools on hand prevents mid-project delays and ensures a clean, safe installation. For the physical preparation of the ceiling, you will need a pencil, a measuring tape, and a compass or the cardboard template provided in the Philips packaging to mark the cut-out circles. A drywall keyhole saw or a specialized hole saw attachment for a power drill is essential for making clean, circular cuts in the gypsum board. Always wear safety goggles and a dust mask during this stage to protect your eyes and lungs from falling gypsum dust and debris.

For the electrical connections, prepare a pair of wire strippers to remove insulation without damaging the copper strands, along with insulated screwdrivers matching the terminal screws on your fixtures. You will also need approved wire connectors, such as spring-loaded terminal blocks, to join the ceiling wires to the light fixture securely. If your spotlights require grounding, ensure you have access to the green-and-yellow earth wire in your ceiling cavity. Keep a sturdy stepladder on hand to work comfortably at height, ensuring it is placed on a flat, stable surface.
Step-by-Step Installation Process
Begin the physical installation by marking the exact center point of each spotlight on the false ceiling according to your lighting plan. Double-check your measurements from the adjacent walls to ensure the fixtures are perfectly aligned. Use your template or compass to draw the cut-out circle around each center point. Before cutting, gently tap the ceiling or use a stud finder to confirm that no metal support frames or hidden utility pipes run directly through your marked circle.
To cut the hole, insert the tip of your drywall saw carefully into the gypsum board along the marked line. Cut slowly and smoothly, keeping the saw blade perpendicular to the ceiling surface to avoid creating an angled edge that could prevent the spotlight bezel from sitting flush. Once the circular piece of drywall is removed, clear away any loose dust from the edges of the hole.
Next, carefully retrieve the electrical cable from the ceiling cavity through the cut-out hole. Ensure there is enough slack in the cable to allow you to work comfortably on the ladder. Use your wire strippers to remove approximately 50mm of the outer protective sheath from the cable, and then strip about 10mm of insulation from the individual live (brown), neutral (blue), and earth (green/yellow) wires.
Insert the stripped wires into the terminal block of the Philips spotlight or its accompanying LED driver. Connect the brown live wire to the terminal marked ‘L’, the blue neutral wire to ‘N’, and the green-and-yellow earth wire to the ground terminal marked with the earth symbol. If you are installing a Class II double-insulated fixture that does not require an earth connection, safely terminate the house earth wire in an isolated connector block rather than leaving it loose in the ceiling. Tighten all terminal screws firmly and gently tug each wire to confirm a secure connection.
Once the wiring is complete, tuck the LED driver and the excess cable neatly into the ceiling cavity, positioning them away from the immediate top of the spotlight housing where heat accumulates. Locate the spring-loaded mounting clips on the sides of the spotlight. Pull both clips upward toward the top of the fixture and hold them tightly against the housing. Carefully insert the spotlight into the cut-out hole. Once the clips pass through the ceiling opening, release them slowly. The springs will snap outward, pulling the spotlight upward and clamping it securely against the visible side of the false ceiling.
Testing, Troubleshooting, and Final Adjustments
With all the spotlights securely mounted in the false ceiling, you can proceed to test the installation. Return to your main distribution board and switch the circuit breaker back on. Flip the wall switch to power up your new Philips spot lights. The fixtures should turn on immediately, providing a steady, consistent light without any flickering, humming, or delay.
If a spotlight fails to illuminate, turn off the power at the distribution board immediately before troubleshooting. Remove the affected fixture from the ceiling by gently pulling it downward until you can compress the spring clips. Check the terminal block connections to ensure that the copper wires are fully inserted and that the terminal screws are clamping down on bare wire rather than the plastic insulation. If the circuit breaker trips as soon as you turn the switch on, there is a short circuit or a ground fault in the wiring. Disconnect the fixture immediately and inspect the cables for any pinched insulation or exposed copper touching the metal ceiling frame. If the issue persists, do not attempt further DIY troubleshooting; contact a professional electrician.
For adjustable Philips spotlight models, you can now make final aesthetic adjustments. Wait for the fixtures to cool down completely if they have been on. Gently tilt or rotate the inner gimbal ring of the spotlight to direct the light beam toward your desired focal points, such as artwork, feature walls, or kitchen countertops. This step allows you to eliminate unwanted glare and customize the atmosphere of your room.
Routine Maintenance and Safe Cleaning
Keeping your spotlights clean ensures they continue to perform efficiently and look their best. Over time, dust and airborne particles can accumulate on the lens and bezel of the fixtures. Before performing any maintenance, always turn off the light switch and allow the spotlights to cool down completely to avoid thermal shock or burns. Use a dry, soft microfiber cloth or an electrostatic duster to gently wipe the visible surfaces of the light. Never use wet cloths, liquid spray cleaners, or abrasive chemical solvents, as moisture can seep into the ceiling cavity or the fixture housing, damaging the sensitive electronic driver.
Regularly inspect the ceiling area surrounding your spotlights for any signs of wear or electrical issues. Look for discoloration on the gypsum board, which can indicate excessive heat buildup due to poor ventilation in the ceiling cavity. Listen for any unusual buzzing or humming sounds when the lights are operating, and watch for intermittent flickering. If you observe any of these warning signs, isolate the power at the distribution board immediately and inspect the wiring or driver.
If your Philips spotlight model features a replaceable bulb, such as a GU10 LED, ensure you replace it only with a bulb of the correct wattage and base type. To replace the bulb, turn off the power, let the fixture cool, and gently press the bulb upward while twisting it counterclockwise to release it from the socket. Insert the new bulb, twist it clockwise until it locks into place, and restore power to test.
Frequently Asked Questions (FAQ)
Do I need a licensed electrician to install spot lights in Singapore?
In Singapore, the Energy Market Authority (EMA) regulates all electrical works to maintain high safety standards. Homeowners are permitted to carry out minor electrical tasks, such as replacing an existing light fixture or changing a light bulb, provided the existing wiring remains unchanged. However, if your project involves installing new electrical wiring, extending circuits from your distribution board, or adding new switches to support your false ceiling spotlights, you must engage a Licensed Electrical Worker (LEW). Attempting to modify fixed electrical wiring without a license is illegal in Singapore and can lead to severe safety hazards, including electrical fires and voided home insurance policies.
Can I install Philips spot lights in a bathroom false ceiling?
You can install spotlights in a bathroom false ceiling, but you must select fixtures with the correct Ingress Protection (IP) rating for wet environments. Bathrooms are subject to high humidity, steam, and potential water splashes. For areas directly above a shower or bathtub (Zone 1), you must use fixtures rated IP65 or higher, which are sealed against water jets. For areas outside the immediate splash zones (Zone 2), an IP44 rating is generally sufficient to protect against moisture and light splashes. Always check the product packaging or label on your Philips spot lights to verify their IP rating before installing them in any bathroom zone.
What if the false ceiling cavity is too shallow for the spotlight?
If your false ceiling cavity does not have enough depth to accommodate your chosen Philips spotlight, do not attempt to force the fixture into the space. Compressing the wiring or placing the hot fixture directly against insulation or concrete slabs creates a serious fire hazard and will cause the LED driver to overheat and fail. Instead, measure the exact depth of your ceiling cavity and compare it with the clearance requirements on the product packaging. If the space is too shallow, you should switch to ultra-slim LED downlights or flat panel lights, which require minimal clearance. Alternatively, you can install surface-mounted spotlights or track lighting systems that do not require recessed ceiling space.
Community discussion
Share your experience or ask a question. Comments are reviewed before publication.