
Installing track lighting on a false ceiling is an excellent way to achieve flexible, directional illumination in modern residential and commercial spaces. False ceilings, typically constructed from gypsum board, plasterboard, or calcium silicate panels, require specific mounting techniques to ensure the weight of the track and fixtures is safely supported. Because these ceilings are hollow and lack the structural density of solid concrete, standard mounting screws alone are insufficient. Proper planning, structural verification, and adherence to electrical safety protocols are essential to prevent ceiling damage or electrical hazards.
When working with Philips track light systems, understanding the mechanical and electrical specifications of your specific model is the first step toward a successful installation. This guide provides a comprehensive, step-by-step walkthrough for mounting, wiring, and adjusting your track lights on a false ceiling. By following these instructions, you can ensure a secure physical installation and a safe electrical connection that complies with standard household practices.
Pre-Installation Checks and Safety Preparations
Before purchasing or installing any hardware, you must assess the structural integrity of your false ceiling. False ceilings are suspended from the main concrete slab by a grid of metal runners or wooden joists. The gypsum or plasterboard panels themselves have limited load-bearing capacity. You must verify the total weight of the Philips track rail and the number of light heads you plan to install. Compare this total weight against the load limits specified by your ceiling panel manufacturer. If the track system is heavy, mounting it directly to the fragile gypsum board without structural support can lead to sagging, cracking, or complete ceiling failure over time.
Products mentioned in this guide
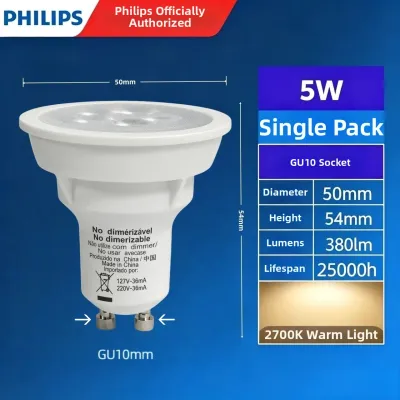
Prices are valid at publication and may change. Please refer to the product page for the latest price.
To ensure a secure installation, locate the underlying metal grid framework or wooden joists behind the false ceiling panels. You can use a stud finder designed for deep scanning or refer to the architectural layout of your ceiling. Planning your track alignment to cross or run directly beneath these structural supports allows you to anchor the track screws into solid material rather than relying solely on hollow-wall anchors. This step is crucial for long-term stability, especially when adjusting or sliding the light fixtures along the track in the future.
Electrical safety is the most critical aspect of any lighting installation. Before touching any wires or removing existing fixtures, isolate the electrical power. Go to your home’s main distribution board and switch off the circuit breaker dedicated to the ceiling lighting circuit. Do not rely solely on the wall switch to cut the power, as some wiring configurations may still leave live currents at the ceiling point. Use a reliable, non-contact voltage tester at the ceiling wire outlet to confirm that the circuit is completely dead before proceeding with any physical contact.
Tools and Materials Required
Having the correct tools and hardware on hand prevents delays and ensures the installation is completed to a professional standard. For the physical mounting, you will need a power drill with drill bits matching the size of your ceiling anchors, a manual Phillips-head screwdriver, a spirit level to guarantee straight alignment, a measuring tape, and a pencil for marking. Avoid using high-torque impact drivers when securing screws into false ceilings, as excessive force can easily strip the plasterboard or damage the plastic anchors.

The choice of fasteners is critical when mounting to a hollow false ceiling. If you are anchoring directly into the gypsum board where no joist is present, you must use specialized hollow-wall fasteners. Toggle bolts (also known as “butterfly anchors”) or heavy-duty metal self-drilling plasterboard anchors are suitable options because they expand behind the panel to distribute the weight over a larger surface area. If you are mounting directly into wooden joists or metal runners, high-quality wood screws or self-tapping metal screws of appropriate length are required.
For the electrical connections, prepare wire strippers, insulated pliers, and approved wire connectors or terminal blocks. Ensure you have the specific Philips track light kit, which includes the track rail, the live-end power connector, the dead-end cap, and the compatible light heads. Verify that all components, including the voltage rating and electrical certifications, match your local household supply (typically 220V–240V in Singapore) before beginning the assembly.
Mounting the Track to the False Ceiling
Begin by planning the exact position of the track on the ceiling. Use a measuring tape to mark the center line of the track, ensuring it is parallel to adjacent walls or architectural features. Hold the track rail up to the ceiling along your marked line and use a spirit level to verify its alignment. With a pencil, mark the locations of the pre-drilled mounting holes on the track onto the ceiling surface. If the pre-drilled holes do not align with your identified ceiling joists, you may need to drill new mounting holes in the track rail itself or plan to use hollow-wall anchors for those specific points.
Carefully drill pilot holes at the marked positions on the false ceiling. When drilling into gypsum board or calcium silicate panels, use a low drill speed and apply gentle pressure to prevent the backside of the panel from blowout or cracking. The diameter of the pilot hole must match the specifications of your chosen hollow-wall anchors exactly. If the hole is too large, the anchor will spin or slip; if it is too small, forcing the anchor in can fracture the surrounding plasterboard.
Insert the hollow-wall anchors or toggle bolts into the pilot holes. If using toggle bolts, feed the bolt through the track’s mounting hole first, thread the spring-loaded toggle wing onto the bolt, squeeze the wings closed, and push them through the ceiling hole until you hear them spring open behind the panel. Gently pull down on the track to create tension, then tighten the bolt with a manual screwdriver until the track is snug against the ceiling. Avoid over-tightening, as this can crush the gypsum core of the false ceiling panel and compromise its structural strength.
Wiring the Track System
Once the track is physically secured to the ceiling, you can proceed to the electrical wiring. The track system is powered through a specific live-end connector, which is typically installed at one end of the rail. Remove the plastic cover of the live-end connector to expose the terminal block. Carefully pull the household electrical wires from the ceiling cavity through the entry hole of the connector. Ensure that the wires are long enough to make a comfortable connection without being under tension, but not so long that they cannot be tucked away neatly.
Strip approximately 10mm of insulation from the ends of the household wires using wire strippers. Identify the wires according to your local wiring standards: typically, brown or red represents the live wire, blue or black represents the neutral wire, and green-and-yellow represents the earth wire. Insert the stripped copper ends into the corresponding terminals on the Philips live-end connector. Tighten the terminal screws firmly, ensuring that the clamp grips the bare copper wire securely and that no stray wire strands are exposed outside the terminal block.
The earth connection is a vital safety requirement for metal track systems to prevent electrical shock in the event of an insulation failure. Ensure the earth wire is securely connected to the grounding terminal on the track. Once all connections are verified, tuck the excess wire length neatly back into the ceiling cavity or the connector housing. Replace the plastic cover of the live-end connector and secure it with its retaining screw, ensuring that no wires are pinched between the cover and the track frame.
Attaching and Adjusting the Light Fixtures
With the track rail mounted and wired, you can now install the individual Philips light heads. Each fixture is equipped with a connector base designed to slide or snap into the track channel. Before inserting the fixture, ensure the locking lever or dial on the fixture base is in the “off” or “unlocked” position. Align the contact tabs of the fixture with the internal copper busbars inside the track rail, then insert the base straight into the track.
Once inserted, rotate the locking lever or dial by 90 degrees to lock the fixture mechanically and electrically onto the track. You should feel a distinct click or resistance, indicating that the fixture is securely seated and that the electrical contacts have made proper connection with the internal track wires. Repeat this process for all the light heads, spacing them evenly along the track according to your lighting design.
After securing the fixtures, adjust the tilt and rotation of each light head to direct the light where it is needed. Most Philips track heads offer multi-directional adjustment, allowing you to highlight artwork, walls, or specific work surfaces. When adjusting the angles, hold the base of the fixture with one hand to prevent putting unnecessary leverage or stress on the track and the false ceiling mounting points. Verify that all fixtures remain firmly locked in place and do not wobble after adjustment.
Post-Installation Testing and Troubleshooting
Before declaring the project complete, you must perform a thorough physical and electrical test. Walk along the length of the track and gently check for any signs of movement, sagging, or gaps between the track rail and the false ceiling. The track should sit perfectly flush against the ceiling surface. If you notice any flexing in the plasterboard, turn off the power immediately and reinforce the mounting points with additional anchors or support brackets.
Once the physical installation is verified as stable, return to the main distribution board and switch the lighting circuit breaker back on. Flip the wall switch to power the track system. All installed light heads should illuminate instantly and consistently. If any fixtures fail to light up, turn off the wall switch and check if the individual fixture is locked correctly into the track. A loose locking lever is the most common cause of poor electrical contact.
If you experience flickering or if entire sections of the track remain unlit, isolate the power at the main distribution board before troubleshooting. Remove the live-end connector cover and verify that the live, neutral, and earth wires are securely clamped in their respective terminals. Check that the internal copper busbars inside the track have not been bent or damaged during installation. Never attempt to adjust the internal wiring or slide fixtures along the track while the power is switched on.
When to Call a Qualified Electrician
While mounting the physical track can be a straightforward DIY task, certain scenarios present safety risks that require professional expertise. If your ceiling does not have an existing electrical point at the desired installation location, running new wiring through the false ceiling cavity must be handled by a licensed electrician. Pulling new cables requires knowledge of local building codes, conduit requirements, and circuit load calculations to prevent fire hazards.
You should also seek professional assistance if you encounter structural issues with your false ceiling. If the plasterboard is damp, crumbling, or shows signs of existing water damage, it cannot safely support the weight of a track lighting system. A professional contractor or electrician can assess whether the ceiling needs reinforcement or if additional suspension wires must be anchored directly to the concrete slab above the false ceiling to carry the load.
Finally, if you are unfamiliar with electrical testing tools, unsure about wire identification, or uncomfortable working at heights, do not take unnecessary risks. Working with mains electricity carries severe risks of shock, injury, or electrical fire. Hiring a qualified electrician ensures that your Philips track lights are installed in full compliance with local safety standards, giving you peace of mind and a reliable lighting setup.
Frequently Asked Questions (FAQ)
Can I install a dimmer switch with my Philips track lights?
Yes, you can install a dimmer switch, but compatibility depends on both the specific Philips light bulbs or integrated fixtures you use and the type of dimmer switch installed. Not all LED track lights are dimmable. You must check the product packaging or specifications of your Philips track light heads to confirm they are labeled as dimmable. Additionally, ensure that your wall dimmer switch is compatible with LED loads (such as a trailing-edge or leading-edge dimmer) to prevent flickering, buzzing, or premature bulb failure.
How do I clean the track and fixtures without damaging the ceiling?
To clean your track lights safely, always turn off the power at the wall switch and allow the fixtures to cool down completely. Use a dry, clean microfiber cloth to gently wipe away dust from the track rail and the exterior of the light heads. Avoid using liquid cleaners, wet cloths, or chemical sprays, as moisture can seep into the track channel and cause electrical short circuits or rust. When wiping the fixtures, avoid applying upward pressure or pulling down on the track, as this can stress the false ceiling panels and cause cracking around the mounting anchors.
Community discussion
Share your experience or ask a question. Comments are reviewed before publication.