
Installing smart LED strips is an excellent way to transform your balcony into a functional, inviting outdoor sanctuary. Whether you want to create a warm, dimmed space for evening relaxation or a vibrant, colorful setting for hosting guests, smart balcony lights offer unmatched versatility. Achieving a safe, durable, and visually appealing installation requires careful attention to weatherproofing, surface preparation, secure mounting, and smart configuration.
Because balconies are exposed to changing weather conditions, a successful installation depends on selecting the right hardware and executing each step with safety in mind. By understanding the specific demands of your outdoor environment and following a systematic setup process, you can enjoy reliable, automated outdoor lighting that integrates seamlessly with your smart home ecosystem.
Assess Your Balcony Environment and Product Specifications
Before purchasing or installing any smart LED strips, you must evaluate your balcony’s physical layout and exposure to the elements. Singapore’s tropical climate presents unique challenges, including high relative humidity, intense afternoon sunlight, and sudden, heavy downpours. Standard indoor lighting components will degrade rapidly under these conditions, leading to short circuits, yellowed materials, and premature product failure.
Products mentioned in this guide
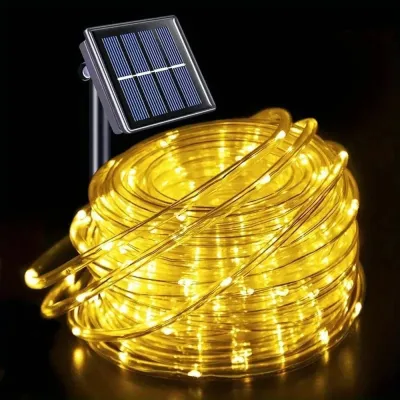
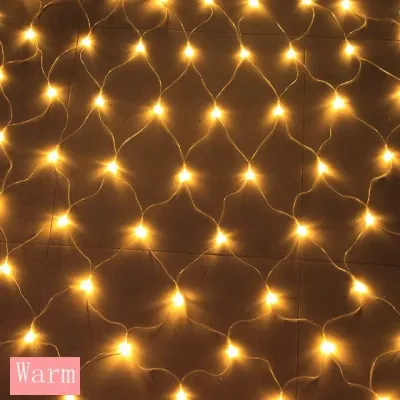
Prices are valid at publication and may change. Please refer to the product page for the latest price.
Your first step is to verify the Ingress Protection (IP) rating on the product packaging or label. For outdoor balcony lights, an IP65 rating is the minimum requirement. This rating indicates that the LED strip is dust-tight and protected against water jets from any direction. If your balcony is completely open and lacks an overhanging roof, or if you plan to mount the lights where they will experience direct rain, opt for an IP67 or IP68 rating, which provides protection against temporary immersion and severe weather.
Next, verify the electrical specifications of your smart lighting kit. Singapore’s domestic power supply operates at 230V AC at 50Hz. Ensure that the power adapter supplied with your LED strip is compatible with this voltage and carries the local SAFETY Mark certification, which proves it has been tested and approved for safe use. Additionally, calculate the total wattage of your LED strip run. The total wattage draw must not exceed the rated output limit of the power adapter; as a safe practice, keep the total load below 80% of the adapter’s maximum capacity to prevent overheating during continuous use.
Establish a strict safety boundary before beginning any physical work. If your balcony lacks an existing, weatherproof outdoor power outlet with an IP-rated protective cover, do not attempt to run temporary indoor extension cords through windows or sliding doors. This practice creates a severe risk of electrocution and electrical fires in wet weather. Instead, hire a licensed, qualified electrician to install a dedicated, outdoor-rated socket. Never attempt to modify your home’s fixed building wiring or tap directly into electrical distribution boards yourself.
Gather Tools and Prepare the Mounting Surface
Proper preparation of your mounting surface is the single most important factor in preventing your LED strips from sagging or peeling over time. The high humidity and ambient heat on a balcony can quickly degrade standard adhesives if the surface is not meticulously cleaned and prepared beforehand.

Gather the essential tools and materials before you begin the installation process:
- Measuring tape: For planning the exact path and calculating cable lengths.
- Sharp scissors or utility shears: For cutting the LED strip at designated points.
- Lint-free microfiber cloths: For cleaning the mounting surface.
- Isopropyl alcohol: For removing grease, dirt, and oils without leaving a residue.
- Mounting accessories: Outdoor-rated mounting clips, screws, or high-tack, weather-resistant double-sided acrylic foam tape.
- Personal protective equipment: Safety glasses and a sturdy stepladder if you are working at height.
Assess the material of your balcony’s mounting surface, as different materials require specific preparation. Powder-coated aluminum railings, glass balustrades, and sealed timber beams are excellent surfaces for adhesive mounting. Concrete walls, brickwork, or highly textured surfaces are porous and dusty, meaning standard adhesive backing will not hold securely over time. For these textured surfaces, you must plan to use mechanical mounting clips or rigid aluminum LED channels secured with screws.
To prepare the surface, wipe the entire installation path thoroughly with a lint-free cloth dampened with isopropyl alcohol or a mild soapy water solution. If using soapy water, rinse the area with clean water afterward to remove any soap film. Allow the surface to dry completely. Refer to the cleaning agent’s safety instructions regarding ventilation and skin contact. Do not rush this step; even a microscopic layer of dust or moisture will prevent the adhesive from bonding correctly with the substrate.
Finally, measure your planned installation path carefully. Route the path from the nearest weatherproof power outlet to the starting point of the LED strip. Ensure that the power cable can reach the outlet comfortably without being stretched tight or bent at sharp angles. Stretching cables puts physical stress on the internal solder joints and can cause the wiring to fail prematurely.
Mount, Secure, and Connect the LED Strips Safely
Once your surface is clean and dry, you can begin the physical installation of the smart LED strips. Always isolate the power supply at the main circuit breaker before handling any electrical connections or cutting any wires.
Measuring and Cutting
If your balcony layout requires you to shorten the LED strip, you must only cut it at the designated cut marks. These marks are typically spaced at regular intervals along the strip and are clearly identified by copper solder pads or a scissor icon. Cutting outside these specified zones will permanently damage the internal circuitry of that section, rendering it inoperable. Use a sharp pair of scissors to make a clean, straight cut directly through the center of the copper pads.
Adhesion and Reinforcement
Peel back the protective adhesive liner gradually, exposing about 15 to 30 centimeters of adhesive at a time. Press the strip firmly onto the prepared surface, applying steady pressure with your thumb for at least 30 seconds per section to activate the pressure-sensitive adhesive. To ensure long-term durability against Singapore’s heat and humidity, do not rely solely on the factory adhesive backing. Install supplementary outdoor-rated mounting clips or silicone mounting brackets every 30 to 50 centimeters, especially at corners, curves, and the ends of the strip. If you are using aluminum channels, secure the channels to the wall first, lay the strip inside, and snap the protective diffuser cover into place.
Electrical Connections
Connect the output end of the smart controller to the input connector of the LED strip. Most modern smart strips use keyed multi-pin connectors to ensure correct polarity; align the arrows on both connectors before pushing them together. Once connected, secure the joint. If your smart lighting kit does not feature pre-sealed, threaded outdoor connectors, you must weatherproof this connection point manually. Slide a piece of marine-grade, adhesive-lined heat-shrink tubing over the joint and apply gentle heat with a heat gun to shrink it, creating a watertight seal. Alternatively, wrap the connection tightly with self-amalgamating waterproof electrical tape, or apply a bead of outdoor-rated silicone sealant around the joint according to the manufacturer’s instructions.
Power Adapter and Controller Placement
While the LED strip itself is waterproof, the smart controller and power adapter are often more vulnerable to moisture and direct sunlight. Mount these components in a dry, sheltered area of your balcony, such as high up under an overhanging eave. If they must be placed in an exposed area, you must house them inside an IP-rated weatherproof electrical enclosure. When routing the power cable into the enclosure or the outdoor outlet, always create a “drip loop.” A drip loop is a simple downward curve in the cable just before it enters the device or plug. This ensures that any rainwater tracking along the cable will pool and drip off at the bottom of the loop rather than running directly into the electrical connection.
Power Up and Configure Your Smart Home App
With the physical installation complete and all connections weatherproofed, you are ready to configure the smart features of your balcony lights. Dimming methods, color transitions, and scheduling are managed through software, allowing you to customize the atmosphere of your space.
First, plug the power adapter into your weatherproof outdoor outlet and switch on the power. The LED strip should illuminate, and the smart controller’s indicator light should begin flashing rapidly. This flashing indicates that the device is in pairing mode and ready to connect to your network. If the lights do not turn on or fail to flash, double-check all physical connections. If the controller does not enter pairing mode automatically, locate the physical button on the controller housing; typically, pressing and holding this button for 5 to 10 seconds will reset the device and trigger pairing mode manually.
Next, open your smartphone and ensure you are connected to your home Wi-Fi network. Download the manufacturer’s official smart home application from your device’s app store. A common technical requirement for smart home devices is that they must connect to a 2.4GHz Wi-Fi network, as this frequency band offers a longer range and better penetration through thick concrete balcony walls than the faster 5GHz band. If your home router broadcasts a single, unified network name for both bands, you may need to temporarily disable the 5GHz band in your router’s settings or move further away from the router to force your phone onto the 2.4GHz band during the initial setup. Follow the step-by-step pairing prompts within the app to discover and add your balcony lights.
Once the pairing process is complete, test the functionality of your lights through the app. Verify that you can adjust the brightness smoothly and transition between different colors or color temperatures. Take advantage of the app’s automation features to maximize convenience and energy efficiency. You can set up a schedule to turn the balcony lights on automatically at sunset and turn them off at a designated bedtime. If you have integrated smart outdoor motion sensors, you can create a routine where the lights brighten to a cool white color when motion is detected late at night to enhance home security, while keeping them at a warm, dimmed level for general evening use.
Long-Term Maintenance and Safety Verification
Outdoor lighting installations require regular maintenance to ensure they remain safe and functional throughout their lifespan. Establishing a simple inspection routine will help you identify potential issues before they lead to system failures.
Perform a visual and physical inspection of your balcony lights every few months. Use this maintenance checklist to keep your system in top condition:
- Check the physical mounting: Ensure that the adhesive backing is not peeling and that all mounting clips or aluminum channels remain securely fastened to the balcony structure.
- Inspect for moisture ingress: Look closely at the connection points, the controller housing, and the inside of any weatherproof enclosures for signs of water, condensation, or corrosion. Corrosion often appears as a greenish or white powdery deposit on metal contacts.
- Clean the silicone sleeve: Gently wipe the outer protective silicone coating of the LED strip with a damp, lint-free cloth to remove accumulated dust, pollen, and airborne soot. This keeps the light output bright and prevents heat buildup.
To maintain safety, you must monitor the system for specific warning signs. Immediately unplug the power adapter from the outlet and cease using the lights if you observe any of the following stop-use conditions:
- The power adapter or smart controller feels unusually hot to the touch during operation.
- The lights begin to flicker erratically, drop colors, or fail to respond to app commands.
- There is visible cracking, yellowing, or hardening of the protective silicone sleeve, which indicates UV damage from sun exposure.
- Any part of the electrical cabling shows signs of fraying, cracking, or damage from pests.
Always respect professional boundaries when addressing electrical issues. While mounting the strips and configuring the app are suitable DIY tasks, any repairs involving fixed household wiring, the installation of new outdoor outlets, or troubleshooting faults within your home’s main electrical panel must be handled by a licensed electrical professional. Attempting to repair mains-voltage components yourself carries severe risks of electric shock, personal injury, and property damage.
Frequently Asked Questions (FAQ)
Can I use indoor smart LED strips on a covered balcony?
No, you should avoid using indoor-rated smart LED strips on any balcony, even if the space is fully covered or enclosed by outdoor blinds. Singapore’s tropical climate features consistently high ambient humidity, which easily penetrates the unprotected components of indoor electronics. During heavy monsoonal storms, wind-blown rain can easily reach a covered balcony. Indoor LED strips lack the necessary protective silicone or polyurethane coating required to shield their delicate circuitry from moisture. Using them in a semi-outdoor environment will lead to rapid corrosion, electrical short circuits, and will void the manufacturer’s warranty.
What should I do if the Wi-Fi signal is weak on my balcony?
Balconies in Singapore are typically separated from the main living areas by thick, reinforced concrete walls and heavy double-glazed glass sliding doors with metal frames. These materials are highly effective at blocking and absorbing wireless signals, which can cause your smart balcony lights to disconnect frequently. To improve your connection, try the following troubleshooting steps:
- Reposition your router: If possible, move your home router closer to the balcony door or window to minimize the physical obstructions between the router and the smart controller.
- Install a range extender: Place a Wi-Fi range extender or a mesh Wi-Fi node near the interior wall closest to your balcony to boost the 2.4GHz signal strength outdoors.
- Adjust controller placement: Mount the smart controller in a position where it is not directly shielded by large metal railings or concrete pillars.
- Consider alternative protocols: If Wi-Fi limitations persist, look for smart LED strip systems that utilize dedicated smart home hubs (such as Zigbee or Thread protocols), which often provide more reliable connectivity over longer distances through mesh networking.
Community discussion
Share your experience or ask a question. Comments are reviewed before publication.