
Installing T20 track lights is an excellent way to bring flexible, directional illumination into your home. Whether you want to highlight artwork, brighten a dark corridor, or add functional task lighting to a kitchen island, a track system offers versatility that standard fixed ceiling fixtures cannot match. The physical installation process involves planning your layout, securing the track rail to your ceiling structure, making safe electrical connections, and locking the light heads into place.
While the physical mounting of the track is a straightforward task for many homeowners, handling electrical wiring requires strict adherence to safety protocols. This guide walks you through the entire process step by step, highlighting critical safety checks, necessary tools, and the exact sequence of actions required to achieve a professional and secure setup.
Pre-Installation Planning and Safety Checks
Before purchasing materials or drilling holes, you must assess your ceiling structure to ensure it can support the weight of the track and the fixtures. In Singapore, residential ceilings typically fall into two categories: solid concrete (common in standard HDB flats) and plasterboard false ceilings. Concrete ceilings require robust masonry wall plugs, while false ceilings require specialized toggle bolts or direct anchoring into the underlying timber or metal support joists to prevent the track from sagging or falling over time.
Products mentioned in this guide
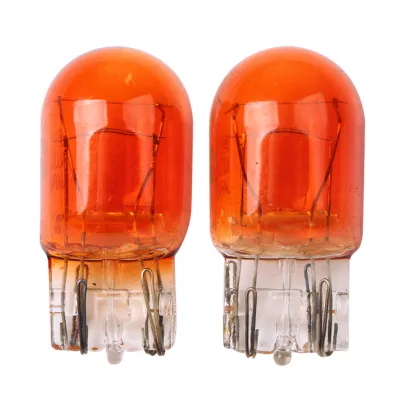
Prices are valid at publication and may change. Please refer to the product page for the latest price.
Next, examine the specifications on your T20 track system’s manufacturer label. Verify the voltage rating matches your household supply (typically 230V) and check the maximum wattage capacity of the track run. Overloading a track with too many high-wattage fixtures can lead to overheating and pose a fire hazard. You must also determine whether your track will be single-phase (where all lights on the track turn on and off together) or multi-phase, which allows you to control different groups of lights on the same track using separate switches.
Another key decision is choosing between a plug-in installation and a hardwired connection. A plug-in system is simpler to install but leaves a visible cord running down your wall to the nearest power outlet. A hardwired installation connects directly to an existing ceiling electrical point for a clean, seamless look.
If your project requires running new electrical cables behind walls, cutting into concrete slabs, or modifying your home’s main distribution board, you must stop and hire a licensed electrical worker. Working with live electricity carries severe risks, and local regulations often mandate that permanent structural wiring be performed only by certified professionals.
Tools and Materials You Will Need
Having the correct tools on hand before you begin ensures a smooth installation and prevents damage to your ceiling or the lighting components. Gather the following basic hand tools:

- A rotary hammer drill (for concrete ceilings) or a standard drill-driver (for plasterboard)
- Masonry or wood drill bits matching your wall plugs
- Insulated screwdrivers (flathead and Phillips)
- Wire strippers and utility cutters
- A reliable non-contact voltage tester
- A spirit level, measuring tape, and pencil
- Safety goggles and a sturdy stepladder
For materials, ensure you have the complete T20 track lighting kit, which should include the track rails, a live-end power connector, a dead-end cap, and compatible T20 light fixtures. You will also need appropriate mounting hardware. Do not rely on generic screws; use heavy-duty plastic wall plugs for concrete ceilings or spring-loaded toggle anchors for hollow plasterboard ceilings.
Step-by-Step Installation Process
To ensure a successful setup, you must execute the physical mounting and electrical connections in a logical, safe sequence. Always prioritize electrical isolation and structural stability, and keep the manufacturer’s instruction manual nearby for reference.
Step 1: Power Off and Track Mounting
Before touching any electrical components, you must isolate the power supply. Go to your home’s main consumer unit (distribution board) and switch off the circuit breaker that controls the lighting circuit in your work area. As an extra precaution, place a piece of tape over the breaker switch to prevent anyone else from turning it back on while you work. Use your non-contact voltage tester at the ceiling point to verify that there is absolutely zero voltage present before proceeding.
Once safety is confirmed, hold the T20 track rail against the ceiling in your desired position. Use a pencil to mark the mounting screw locations through the pre-drilled holes in the track. If you are installing a long track run using multiple sections, use a chalk line or a laser level to ensure the entire path is perfectly straight.
Drill holes at your marked spots using the correct drill bit size for your anchors. Insert your wall plugs or toggle bolts into the holes. Align the track rail with the anchors and drive in the mounting screws. Before tightening the screws completely, place a spirit level along the track to ensure it is perfectly flat. Tighten the screws securely, but avoid over-tightening, which can warp the track profile and make it difficult to slide the light fixtures into place.
Step 2: Electrical Wiring and Connection
With the track securely mounted, you can now proceed to the electrical connections. Remove the cover of the track’s live-end power connector and feed the ceiling wires through the designated knockout hole.
Carefully strip approximately 10mm of insulation from the ends of the ceiling wires. Connect them to the terminal block inside the live-end connector by matching the wire colors according to standard electrical codes:
- Live Wire: Connect the Brown (or Red) wire to the terminal marked "L".
- Neutral Wire: Connect the Blue (or Black) wire to the terminal marked "N".
- Earth Wire: Connect the Green and Yellow striped (or bare copper) wire to the terminal marked with the earth symbol.
Tighten the terminal screws firmly using an insulated screwdriver. Gently tug each wire to ensure it is securely clamped. Verify that no bare copper strands are exposed outside the terminal block, as this can cause short circuits. Replace the cover of the live-end connector and secure it.
If you encounter damaged wire insulation, unmarked wires, or if your ceiling point lacks a dedicated earth wire, stop immediately. Metal track systems must be properly earthed to prevent the risk of electric shock in the event of an electrical fault. Do not attempt to bypass this safety feature; consult a licensed electrician to resolve any wiring anomalies.
Step 3: Attaching the Light Fixtures
Once the track is mounted and wired, you can install the individual T20 light heads. Examine the adapter base of your light fixture. You will notice contact tabs designed to slide into the track and make contact with the internal copper conductor strips.
Insert the fixture adapter into the track channel. Most T20 systems feature a twist-and-lock mechanism. Rotate the locking lever or dial on the fixture base 90 degrees until it clicks into place. This action mechanically secures the fixture to the track and establishes the electrical connection. If the adapter does not rotate easily, do not force it; remove the fixture, check the orientation of the contact tabs, and try again.
If your T20 fixtures use replaceable bulbs, check the rating label inside the fixture cup to identify the maximum allowable wattage and compatible bulb type (such as GU10 LED bulbs). Insert the bulb into the socket and twist it clockwise to lock it. If your fixtures feature integrated LEDs, they are ready to use as soon as they are locked onto the track.
Post-Installation Testing and Adjustment
With all fixtures mounted, it is time to test your new lighting system. Remove your tools from the work area, step down from the ladder, and restore power at the main consumer unit. Turn on the wall switch to illuminate the track.
Verify that every light head turns on. If a specific fixture fails to light up, turn off the wall switch, isolate the power at the breaker, and check that the fixture is fully locked into the track and making proper contact with the internal conductors.
Once all lights are functioning correctly, you can adjust the beam directions. Most T20 light heads feature a swivel joint and a tilt mechanism. Carefully aim the fixtures to highlight your desired areas. If the lights have been running for several minutes, use protective gloves or wait for them to cool down before adjusting, as some fixtures can become warm during operation.
Finally, monitor the system for a few minutes. Listen closely for any unusual buzzing or humming sounds, and watch for flickering. These symptoms often point to a loose wiring connection in the live-end connector or an incompatible dimmer switch. If you notice any of these issues, turn off the power immediately and re-inspect your connections.
Frequently Asked Questions (FAQ)
Can I install T20 track lights on a sloped or vaulted ceiling?
Yes, you can install T20 track lights on sloped ceilings, but you must verify if your specific track system supports this configuration. Some manufacturers offer specialized slope-ceiling mounting clips or suspension kits that allow the track to hang level. Additionally, ensure that the T20 light fixtures you select have a wide range of motion so they can be tilted downward to project light vertically despite the angle of the ceiling.
Are T20 track lights compatible with smart home dimmers?
Compatibility depends entirely on the bulbs and the dimmer switch you use. If you plan to use a smart dimmer, you must verify that both the T20 light fixtures (or the replaceable LED bulbs you install in them) are explicitly labeled as dimmable. You should also check your smart dimmer manufacturer’s compatibility list to ensure it supports the specific LED driver or bulb model, which helps prevent issues like flickering, buzzing, or a limited dimming range.
Community discussion
Share your experience or ask a question. Comments are reviewed before publication.