
Installing the Philips CL200 spot light requires a systematic approach that balances precise mechanical mounting with strict electrical safety protocols. This surface-mounted ceiling luminaire is designed to provide focused, directional illumination, making it a popular choice for modern residential and commercial spaces. However, achieving a secure and reliable setup depends entirely on proper preparation, correct wiring alignment, and adherence to local electrical standards. Whether you are updating your living room, kitchen, or home office, following a structured installation sequence ensures the fixture functions safely and remains firmly anchored over its operational lifespan.
Pre-Installation Checks and Safety Boundaries
Electrical safety must always be your primary concern when installing any light fixture. Before touching any electrical components, locate your home’s main distribution board and switch off the circuit breaker dedicated to the lighting circuit you will be working on. Do not rely solely on the wall switch to isolate the power, as some wiring configurations may still leave live currents active at the ceiling junction box. Use a reliable, non-contact voltage tester directly on the wires at the installation site to confirm that no electrical current is present before proceeding with any physical contact.
Structural readiness is another critical factor that dictates the success of your installation. Examine the ceiling or wall material where you plan to mount the Philips CL200. Concrete ceilings require robust masonry anchors and a hammer drill to create secure mounting points. Conversely, false ceilings or plasterboard installations require specialized toggle bolts or hollow-wall anchors that distribute the fixture’s weight evenly across the delicate material. Mounting a fixture to an unsuitable surface without the correct anchors can lead to structural failure, causing the light to sag or fall over time.
Products mentioned in this guide
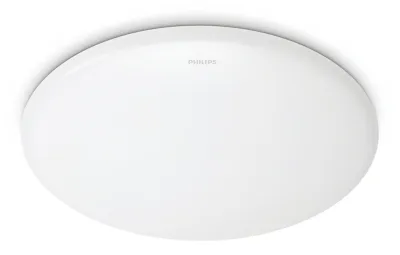
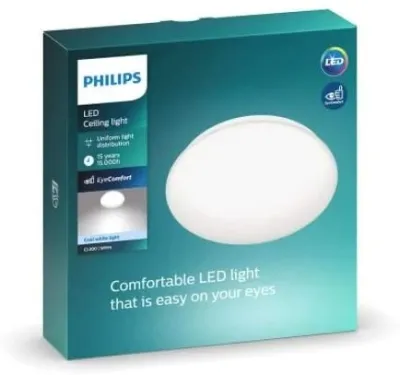
![[Climate Voucher] PHILIPS 10W / 20W / 24W CL200 Round LED Ceiling Light 6500K Cool Daylight EyeComfort](https://img.lazcdn.com/g/p/01b40521215d73f83b4f1429b443164d.jpg_400x400q80.jpg_.webp)
![[3 Year Warranty] Philips LED Ceiling light 17W 20W CL200](https://img.lazcdn.com/g/p/a7513e4a2b3c8a590df1beecd4b3709e.png_400x400q80.png_.webp)
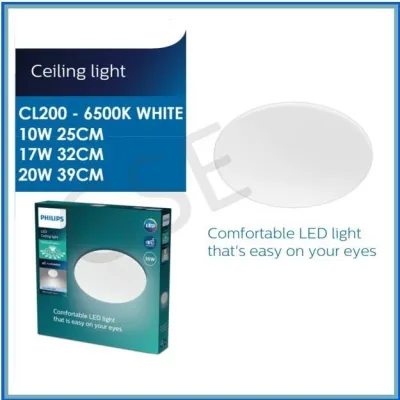
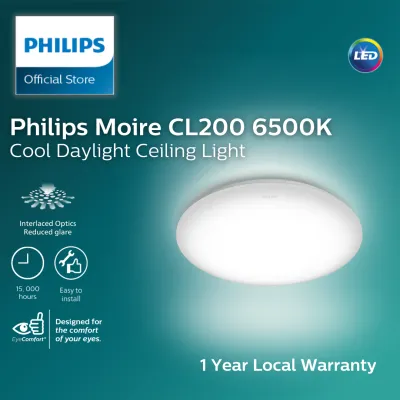
Prices are valid at publication and may change. Please refer to the product page for the latest price.
Additionally, you must review the product manual for specific technical parameters. Pay close attention to the rated voltage, IP (Ingress Protection) rating, and the required clearance distances from insulation or other combustible materials. Finally, establish clear personal skill boundaries. If your existing ceiling junction box lacks a dedicated ground (earth) connection, if the insulation on the old wires is cracked or brittle, or if you feel uncertain about local electrical codes, stop the installation immediately and consult a licensed electrician.
Tools and Materials Required
Having the correct tools on hand before you begin prevents unnecessary interruptions and ensures the installation is completed to a high standard of safety and precision. For the physical mounting process, you will need a power drill equipped with drill bits that match your ceiling material—such as masonry bits for concrete or wood bits for timber joists. A spirit level is indispensable for aligning the mounting bracket, ensuring the spot light sits perfectly straight. You will also need both flathead and Phillips screwdrivers to secure the bracket and the fixture housing.

For the electrical portion of the task, gather a non-contact voltage tester, wire strippers, and insulated pliers. While the Philips CL200 packaging typically includes standard mounting screws and basic wall plugs, these may not be suitable for every ceiling type. If you are mounting to drywall or plasterboard, purchase high-quality hollow-wall anchors separately. Additionally, have approved wire connectors or terminal blocks ready to secure the electrical connections. Using high-quality, flame-retardant connectors ensures a stable electrical path and minimizes the risk of loose connections.
Step-by-Step Installation Process
The physical installation of the Philips CL200 spot light can be broken down into three distinct, logical phases. First, you will prepare the ceiling surface and secure the mounting bracket to establish a rigid foundation. Second, you will perform the electrical wiring, connecting the fixture to your home’s power supply safely. Finally, you will mount the main fixture body to the bracket, install the light source, and adjust the beam angle to suit your space.
Preparing the Mounting Surface and Bracket
Begin by positioning the mounting bracket against the ceiling at your desired installation point. Use a pencil to mark the exact locations of the screw holes through the bracket’s mounting slots. If you are installing a series of spot lights along a corridor or kitchen counter, use a spirit level and a chalk line to ensure all marked points align perfectly. Double-check that there are no hidden water pipes or electrical conduits running directly behind the marked spots before you begin drilling.
Once the marks are verified, select the appropriate drill bit size as specified by your wall anchors. Drill the holes to the recommended depth, keeping the drill perfectly perpendicular to the ceiling surface to prevent the holes from becoming enlarged or skewed. After drilling, clear out any residual dust or debris from inside the holes using a vacuum or a hand pump. This step is crucial, as leftover dust can prevent wall anchors from gripping the material securely.
Insert the wall anchors into the drilled holes, tapping them gently with a hammer until they sit flush with the ceiling surface. Align the mounting bracket over the anchors and drive the screws in using a manual screwdriver or a drill set to a low torque limit. Tighten the screws firmly, but avoid over-tightening, which can strip the anchors or warp the bracket. Once secured, give the bracket a gentle tug to confirm there is absolutely no wobble or movement before moving on to the wiring phase.
Wiring the Spot Light
With the power verified as completely off, prepare the supply wires coming from the ceiling. Use wire strippers to carefully remove the outer insulation jacket, exposing approximately 8mm to 10mm of the copper conductor. Be careful not to nick or cut the individual copper strands, as damaged strands reduce the wire’s current-carrying capacity and can lead to localized heating. Inspect the exposed copper for any signs of corrosion or oxidation; if present, trim the wire back to clean copper before proceeding.
When connecting the wires, do not rely on color codes alone to identify the live, neutral, and ground lines. While modern installations typically use brown for live, blue for neutral, and green/yellow for ground, older properties may feature legacy color schemes. Always refer to the manufacturer’s wiring diagram provided in the manual to match the fixture’s terminals correctly. Insert the live supply wire into the terminal marked ‘L’, the neutral wire into the terminal marked ‘N’, and the ground wire into the terminal marked with the earth symbol.
Secure the connections tightly within the terminal block. If using screw terminals, tighten the screws firmly and give each wire a gentle pull test to ensure it is locked in place. Ensure that no bare copper is exposed outside the terminal housing, as this poses a significant short-circuit hazard. If the Philips CL200 is a Class I appliance, it must be grounded to prevent the metal housing from becoming live in the event of an internal fault. If your home’s wiring system does not include an earth wire, do not attempt to bypass this requirement; instead, consult a qualified professional to assess your home’s electrical safety.
Mounting the Light Fixture and Final Assembly
Once the wiring is secure, carefully fold and tuck the connected wires into the ceiling junction box or the dedicated wiring cavity within the fixture’s base. Ensure that no wires are pinched, compressed, or trapped between the mounting bracket and the fixture body, as damaged insulation can lead to electrical faults over time. Align the main body of the spot light with the secured mounting bracket, matching the screw holes or locking slots.
Fasten the fixture body to the bracket using the provided locking screws or collar mechanism. Tighten these fasteners securely to ensure the light is held flush against the ceiling without any gaps. If your specific model features a replaceable bulb rather than an integrated LED module, verify the correct bulb type and wattage limit printed on the fixture’s internal label. Insert the bulb carefully, ensuring it is seated correctly in the socket.
Finally, adjust the tilt and rotation of the spot light head to direct the beam toward your desired focal point, such as an artwork, a countertop, or a reading area. Tighten the adjustment joints just enough to hold the position securely. Avoid over-tightening these joints, as doing so can damage the internal swivel mechanism or strip the adjustment screws, making future repositioning difficult.
Post-Installation Testing and Troubleshooting
Before restoring power to the circuit, conduct a final visual inspection of the entire installation. Ensure that the fixture is flush against the ceiling, all screws are tight, and no tools or materials are left near the light. Once you are satisfied with the physical setup, return to the main distribution board and switch the circuit breaker back to the ‘on’ position. Walk back to the room and flip the wall switch to test the light.
The spot light should illuminate immediately with a steady, clear beam. Observe the fixture closely for the first few minutes of operation. If you notice any flickering, buzzing sounds, or a distinct burning smell, turn off the wall switch and isolate the power at the circuit breaker immediately. These issues are typically caused by a loose wire connection in the terminal block, an incompatible bulb, or a mismatch between the light source and the wall switch.
If you are using a dimmable setup, test the dimming range from the lowest to the highest setting. Flickering or buzzing during dimming usually indicates that the dimmer switch is incompatible with the LED driver. To resolve this, verify that your wall dimmer is rated for LED loads and matches the specific dimming protocol (such as trailing-edge dimming) required by the fixture. If troubleshooting does not resolve the issue, do not attempt to modify the internal electronics yourself; contact a professional electrician to diagnose the system.
Maintenance and Cleaning Guidelines
To preserve the appearance and operational safety of your Philips CL200 spot light, establish a regular maintenance routine. Always switch off the power at the wall switch and allow the fixture to cool down completely before performing any cleaning or adjustments. Spot lights can become warm during operation, and touching a hot bulb or housing can cause minor burns or accidental drops.
Use a soft, dry microfiber cloth to gently wipe away dust and fingerprints from the outer housing and the lens. If the fixture has accumulated stubborn grime, you may use a slightly damp cloth, but ensure no moisture enters the internal wiring compartment or the bulb socket. Never use abrasive pads, steel wool, or harsh chemical solvents like alcohol or acetone, as these substances can permanently strip or discolor the powder-coated finish of the fixture.
In addition to cleaning, perform a physical safety check once or twice a year. Subtle structural vibrations from nearby traffic or daily household activity, along with minor thermal expansion and contraction, can gradually loosen screws over time. Gently check that the mounting screws and adjustment joints remain tight, and ensure the fixture remains flush against the ceiling. Keeping the physical components secure prevents mechanical failure and maintains the clean, modern look of your lighting design.
Frequently Asked Questions (FAQ)
Can I install the Philips CL200 on a sloped or vaulted ceiling?
Yes, you can install the Philips CL200 on a sloped or vaulted ceiling, provided you take specific mechanical precautions. Before mounting, check the product specifications to verify the maximum tilt and rotation angles of the spot light head. On an angled surface, the fixture’s center of gravity shifts, which can put extra stress on the swivel joints. Ensure that the mounting bracket is anchored exceptionally tight to prevent any sliding. Additionally, verify that the adjustment joints are tightened sufficiently so that the weight of the light head does not cause it to droop or slip out of your desired position over time.
What should I do if the wiring colors do not match my home's setup?
If the wiring colors in your ceiling do not match the standard colors shown in the Philips CL200 manual, do not attempt to guess the wire functions. Connecting wires based on assumptions can cause severe electrical hazards, short circuits, or damage to the fixture. Instead, use a digital multimeter or a reliable voltage tester to safely identify which wire is live, neutral, and ground. If you do not own these tools or do not feel comfortable testing live circuits, immediately halt the installation. Contact a licensed electrician to identify the wiring configuration and complete the connection safely.
Community discussion
Share your experience or ask a question. Comments are reviewed before publication.