
Matching an LED driver to your light fixture is the most critical step in ensuring your lighting system operates safely, efficiently, and reliably over its lifespan. An LED driver acts as the heart of your lighting setup, regulating the electrical power flowing from your home’s mains supply to the sensitive light-emitting diodes. If these specifications are mismatched, you risk immediate component failure, persistent flickering, or even severe safety hazards like electrical fires.
To successfully match a driver, you must determine whether your fixture requires a constant voltage or constant current supply, identify the exact voltage or current requirements, and select a driver with a wattage capacity that includes a safe operating buffer. Taking the time to verify these details prevents premature equipment failure and ensures your home lighting remains bright and stable.
Understand Your Light Fixture's Electrical Specifications
Before purchasing a replacement or new LED driver, locate the electrical specifications on your light fixture’s product label, existing driver, or manufacturer datasheet. For integrated downlights or LED strips, look closely at the back of the housing or along the copper solder pads. This label displays critical electrical values, including the required input voltage, current, and total power consumption.
Products mentioned in this guide
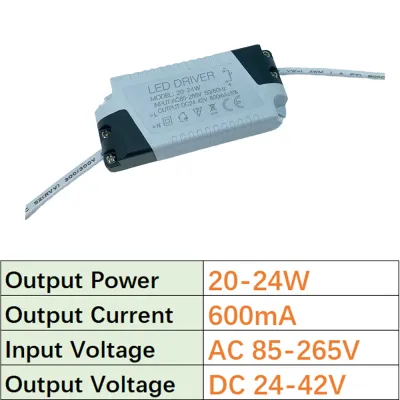
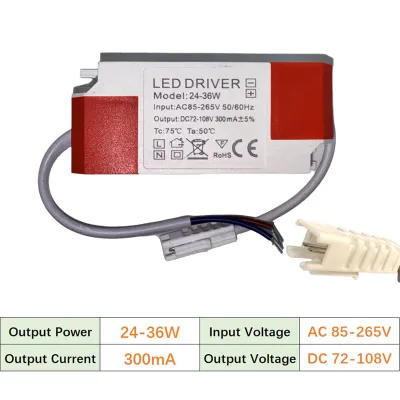
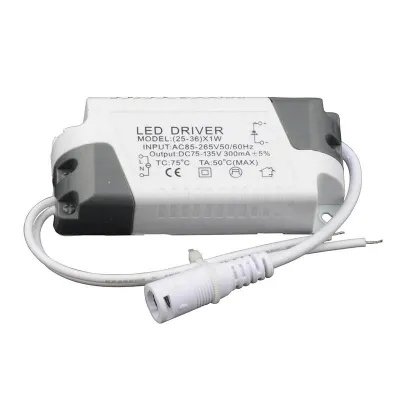
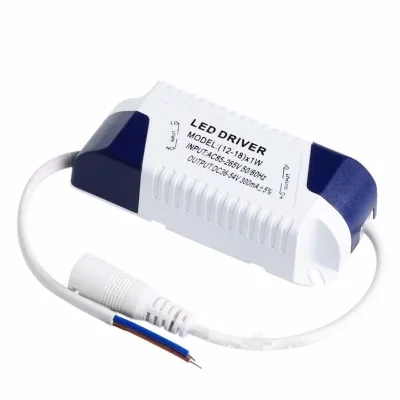
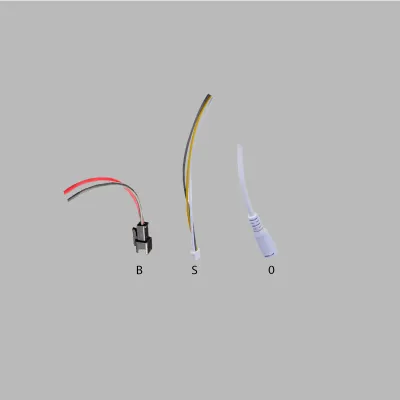
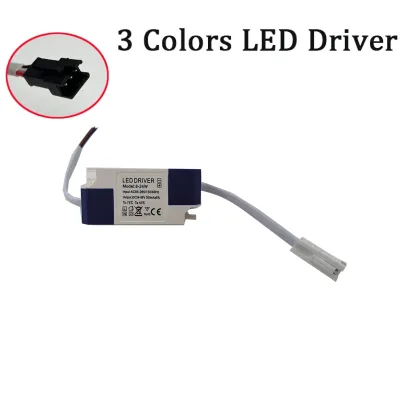
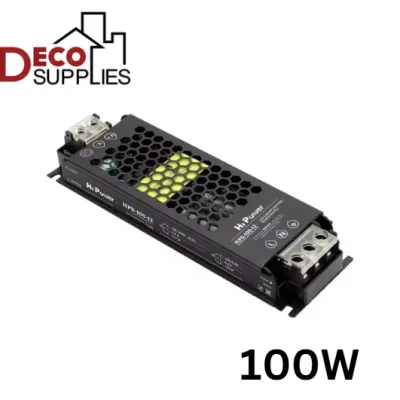
Prices are valid at publication and may change. Please refer to the product page for the latest price.
For constant voltage systems, you will see a specific direct current (DC) voltage rating, commonly 12VDC or 24VDC. For constant current systems, the label specifies a current rating in milliamperes (mA) or amperes (A), such as 350mA, 700mA, or 1050mA, alongside a variable voltage range. Understanding these numbers is essential because the driver’s output must align precisely with what the fixture is engineered to receive.
It is important to distinguish between the fixture’s actual power draw and the driver’s maximum capacity. The wattage listed on your light fixture represents the electrical power it consumes under normal operating conditions. The driver you select must be rated to supply at least this amount of power, but it should not run at its absolute limit.
Additionally, consider the environmental conditions of the installation site. In Singapore’s warm and humid climate, heat dissipation is a significant factor, especially when drivers are tucked away inside tight false ceiling cavities or concrete recesses. The fixture and driver labels will often indicate an Ingress Protection (IP) rating and a maximum operating temperature. If you are installing lighting in a damp zone like a bathroom, kitchen, or open balcony, the driver must possess an appropriate IP rating to resist moisture and dust intrusion.
Calculate the Required LED Driver Wattage and Output
Once you have identified the fixture’s base electrical requirements, calculate the necessary wattage capacity for your new LED driver. A fundamental rule of thumb in electrical design is to apply a safety margin, often referred to as the 80% rule. This means you should choose a driver with a maximum wattage rating that is at least 20% higher than the total wattage of the connected light fixtures.

Operating a driver at its maximum capacity causes it to run hotter, accelerating component degradation. For example, if an LED strip draws 80 watts, do not pair it with an 80-watt driver. Applying the 20% safety buffer (80 divided by 0.8) indicates a minimum driver capacity of 100 watts, ensuring cooler operation and system stability.
When dealing with multiple fixtures or extended runs of LED strips connected to a single driver, the calculation must account for the cumulative load. For parallel wiring configurations, simply add the wattages of all individual fixtures together before applying the 20% safety buffer. For long LED strip installations, you must also factor in voltage drop, which is the gradual loss of voltage as electrical current travels along the thin copper conductors of the strip. If the run is too long, the LEDs at the far end will appear dimmer, and the driver may experience an unbalanced load.
For constant current setups, verifying the output current is the absolute priority. If your downlight requires a constant current of 700mA, the driver must output exactly 700mA. The wattage of the driver in a constant current system is determined by multiplying this fixed current by the voltage range of the driver. Ensure that the fixture’s required operating voltage falls comfortably within the driver’s specified output voltage range.
Choose Between Constant Voltage and Constant Current Drivers
LED drivers are broadly categorized into two distinct architectures: constant voltage (CV) and constant current (CC). Selecting the wrong type of driver for your fixture will result in immediate operational failure and can permanently destroy your lighting components. You must match the driver’s operating mode to the internal electrical design of your specific light fixture.
Constant voltage drivers are designed for fixtures with built-in current-limiting devices, such as resistors. Common examples include flexible LED tape lights and under-cabinet light bars. These systems require a stable, fixed DC voltage—typically 12V or 24V—while the current fluctuates based on the number of active LED segments. The driver maintains this exact voltage level regardless of the load.
Constant current drivers, on the other hand, are engineered for fixtures that do not have built-in current regulators. High-power LED downlights, spotlights, and commercial panel lights typically rely on constant current drivers. LEDs are naturally semi-conductive devices whose resistance drops as they heat up, which causes them to draw more current. A constant current driver dynamically adjusts its output voltage to maintain a steady, regulated flow of current, preventing a phenomenon known as thermal runaway, where the LEDs overheat and burn themselves out.
Mismatching these two driver types carries severe risks. If you connect a constant voltage driver to a fixture that requires constant current, the LEDs will rapidly draw too much current, overheat, and fail within seconds. Conversely, if you connect a constant current driver to a constant voltage fixture, the light may flicker violently, fail to illuminate, or suffer driver component damage due to voltage mismatch. Always verify the driver architecture before making a purchase.
Verify Dimming Compatibility and Physical Constraints
Beyond basic electrical matching, you must ensure that your selected LED driver is fully compatible with your intended control systems and physical installation environment. Dimming is one of the most common sources of frustration in modern LED setups, as incompatible components frequently lead to buzzing, flickering, or a limited dimming range.
Cross-reference the driver’s dimming protocol with your wall dimmer, smart home hub, or remote control. Common methods include phase-cut dimming (leading-edge or trailing-edge TRIAC), analog 0-10V, and digital protocols like DALI. Smart home setups may require drivers integrating directly with wireless protocols like Zigbee or Wi-Fi. Both the dimmer and driver must support the same technology to prevent flickering.
Physical dimensions and thermal management are equally critical, particularly in Singapore’s residential properties where space is often at a premium. Before purchasing, measure the available space in your ceiling cavity, junction box, or the fixture’s internal housing. The driver must fit comfortably within this space without being forced or bent. Furthermore, drivers generate heat during operation and require adequate air circulation to dissipate this thermal energy. Placing a driver in a completely sealed, unventilated ceiling space will cause it to overheat and trigger its thermal shutdown protection.
Finally, review the driver’s IP rating to ensure it matches the environmental demands of the installation zone. For indoor living rooms and bedrooms, a standard IP20-rated driver is sufficient. However, for bathrooms, kitchens, or outdoor balconies exposed to wind and rain, you must select a driver with a higher rating, such as IP65 or IP67, which features sealed enclosures to prevent moisture from contacting the internal electronics.
Safety Boundaries and When to Call a Professional
Working with electrical components always carries inherent risks of shock, fire, and equipment damage. Before inspecting or replacing an LED driver, isolate the electrical circuit at your home’s main distribution board (DB box) by switching off the dedicated circuit breaker. Always use a reliable, non-contact voltage tester at the fixture site to verify that the power is completely off before touching any wiring.
There is a clear boundary between simple plug-and-play driver replacements and complex electrical installations. Many modern LED downlights feature quick-connect plugs that allow you to swap out a failed driver safely without exposing bare copper wires. If your replacement involves simply unplugging the old driver and plugging in an identical, pre-certified model, this can generally be done safely by a homeowner.
However, if the installation requires connecting raw wires directly to the mains AC power supply (typically 220-240V in Singapore), this work must be handled with extreme caution. Under local regulations, fixed electrical wiring installations and modifications should be performed by a Licensed Electrical Worker (LEW) to ensure compliance with safety standards. Hardwiring a driver incorrectly can lead to short circuits, voided home insurance policies, or severe electrical hazards.
You should immediately stop and consult a qualified professional if you encounter non-standard wire colors, if the existing installation lacks proper grounding, or if the new driver’s physical size requires modifying your ceiling structure or the fixture itself. Investing in professional installation ensures your lighting system is safe, compliant, and built to last.
Frequently Asked Questions (FAQ)
Can I use an LED driver with a higher wattage rating than my fixture?
Yes, using an LED driver with a higher wattage rating than your fixture is safe, provided the output voltage (for constant voltage) or output current (for constant current) matches the fixture’s requirements exactly. The fixture only draws the wattage it needs; it is not forced to consume the driver’s maximum capacity. For example, powering a 15-watt constant voltage LED strip with a 60-watt driver of the same voltage is safe and allows the driver to run cooler.
However, there are a few practical drawbacks to significantly oversizing your driver. Drivers are typically most efficient when operating closer to their maximum load, so an oversized driver may suffer from reduced electrical efficiency, leading to minor energy waste. Additionally, higher-wattage drivers are generally more expensive to purchase and have larger physical dimensions, which can make them difficult to fit into tight ceiling cavities or compact junction boxes.
What happens if the LED driver voltage is slightly higher than the fixture requirement?
Using a driver with an output voltage even slightly higher than your constant voltage fixture’s rating risks damaging the system. LEDs are highly sensitive to voltage fluctuations. A slight overvoltage causes the LEDs to draw excessive current, leading to rapid heat buildup, accelerated degradation, and premature failure.
In a constant voltage system, the driver’s output voltage must match the fixture’s required DC voltage exactly. You should never attempt to use a 24V driver on a 12V LED strip, as this will instantly burn out the LEDs and potentially melt the plastic backing. Always verify that the output voltage matches the fixture’s specifications, and avoid using adjustable drivers unless they can be locked precisely to the required voltage.
Community discussion
Share your experience or ask a question. Comments are reviewed before publication.