
Choosing the right 6R photo frame requires balancing the physical dimensions of your print with the visual weight of its material and the color harmony of its surroundings. A successful pairing enhances the photo’s mood—such as using sleek metal for high-contrast architectural shots or warm wood for family portraits—without distracting from the subject. By understanding how different materials, colors, and display options interact with your image style, you can transform a simple print into a compelling piece of home decor.
Understand the 6R Format and Framing Basics
A standard 6R photo print measures 6 by 8 inches, which translates to approximately 15.2 by 20.3 centimetres. While this is a standard photographic size, physical prints can sometimes vary slightly depending on the printing lab’s trimming process or paper thickness. Always measure the actual physical print with a reliable ruler before purchasing a frame to avoid unexpected gaps or overlapping edges.
When evaluating a 6R photo frame, consider its three primary components: the moulding, the mat board, and the glazing. The moulding is the outer border that provides structural support and aesthetic character. Its width and depth dictate the frame’s visual weight. The mat board is an optional cardboard border that surrounds the image inside the frame, creating a visual buffer and preventing the print from touching the glazing. The glazing is the protective front cover, typically made of glass or acrylic.
Products mentioned in this guide
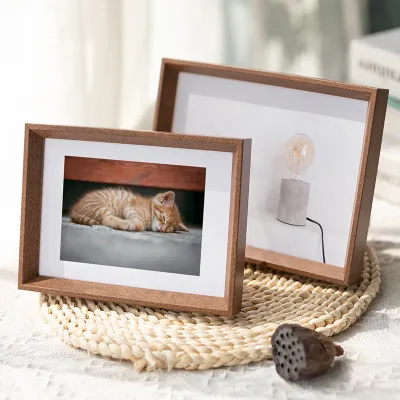
![SG Stock [Super Offer] Wooden Photo Frame Picture Frame 4R 5R 6R 8R A4 Frame Table Wall Display Photo Frame for Home Office Art Display Christmas Gift Teachers Day Gift](https://img.lazcdn.com/g/p/bb9e605bbbce2ca17e8b17e2edb1a478.jpg_400x400q80.jpg_.webp)
![SG Stock [offer] Simple Photo Frame Wooden Picture Frame A4 8R 6R 5R 4R Photo Frame Certificate Holder Table Wall Display Graduation Photos Gift](https://img.lazcdn.com/g/ff/kf/S671b7ecf83eb412aa50f0aa01093c1421.jpg_400x400q80.jpg_.webp)
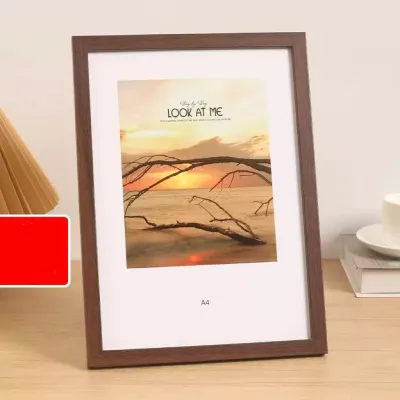
![[SG Ready Stock]Magnetic Clear Acrylic Photo Frame thickened 4R/6R/8R thickness 10+10MM Picture Holder Decorations](https://img.lazcdn.com/g/p/cdc6e8a0c839c9a561185267e6bf6bb5.png_400x400q80.png_.webp)
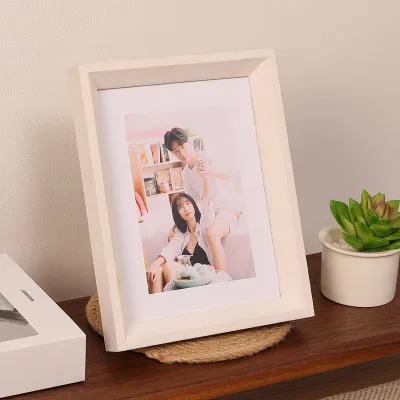
Prices are valid at publication and may change. Please refer to the product page for the latest price.
Before finalizing your purchase, measure the intended wall space or shelf depth to ensure the frame fits its physical environment. If placing the frame on a shallow shelf or a narrow console table, check the depth of the frame’s easel stand or base when fully extended. For wall mounting, verify the weight of the frame and the type of wall hook required. In humid environments, ensuring a secure wall mount is essential to prevent heavy frames from falling due to adhesive failure on damp plaster or drywall.
Match Frame Materials to Your Photo Style
The material of your frame sets the tone for how the photo is perceived. Wood, metal, and acrylic each offer distinct visual weights and textures that complement specific image styles.

Wood frames provide a classic, tactile quality that brings warmth to an image. The choice of grain and finish significantly impacts the photo’s presentation. Matte, open-grain woods like oak, pine, or walnut are excellent for family portraits, candid outdoor shots, and rustic landscapes because they mirror the natural elements within the photo. Conversely, polished or dark-stained wood finishes add a formal, traditional touch suitable for graduation photos, heritage portraits, or classic black-and-white prints. When selecting wood, check that the material is properly sealed to withstand local humidity levels, which helps prevent warping over time.
Metal frames, typically made of aluminum, offer a sleek, narrow profile that suits modern and minimalist aesthetics. The clean, sharp lines of a matte black or brushed silver metal frame act as a crisp boundary without competing with the image’s tonal range. This makes metal frames highly suitable for architectural photography, urban landscapes, and high-contrast black-and-white images. The thin profile of metal also allows the photo itself to remain the primary focus, making it a preferred choice for gallery-style displays.
Acrylic or frameless options provide a highly contemporary, clean aesthetic. Acrylic block frames or frameless clip frames allow the image to appear to float seamlessly on a tabletop or wall. This style is particularly suited for vibrant, colourful, or casual shots, such as travel snapshots or abstract art, where a heavy border might distract from the energy of the photo. Acrylic is also lightweight and shatter-resistant, making it a practical choice for high-traffic areas or children’s rooms, though it requires care during cleaning to avoid scratches.
Select Frame Colours to Complement Image Tones
Selecting the right frame colour is a balancing act. The goal is to enhance the photo’s palette without overpowering the main subject.
Black and white frames are the most versatile neutral options. A black frame creates a strong, dramatic border that anchors highly colourful images or emphasizes the deep shadows in black-and-white photography. A white frame, on the other hand, offers a clean, airy border that lets the photo’s colors pop. White frames are ideal for bright, high-key images, minimalist prints, or pastel-toned portraits, as they provide a seamless transition to light-coloured walls.
Natural wood tones should be selected based on the undertones of the image. Light wood tones, such as maple or birch, complement airy, Scandinavian-style interiors and warm, sunlit landscapes. Dark wood tones, like mahogany or espresso, enhance vintage-style photos, sepia prints, or formal portraits by matching the deep, rich undertones of the image.
Metallic finishes add elegance and a touch of luxury. Gold, bronze, and brass finishes add warmth, making them suitable for wedding photos, formal portraits, or classic art prints. Silver, chrome, and pewter finishes offer a cooler, more modern look that pairs well with urban landscapes or cool-toned portraits. When choosing metallic finishes, check the room’s lighting setup; highly polished metallic frames can catch bright overhead lights, creating distracting glare that obscures the photo.
When deciding between matching and contrasting, look at the dominant colours in your photo. To create a cohesive, harmonious look, pull a subtle, secondary colour from the photo—such as the green of a forest background or the blue of the ocean—and use a frame in a similar hue. Avoid matching the dominant colour exactly, as this can wash out the subject. Alternatively, use a neutral frame to let a highly vibrant, multi-coloured photo speak for itself without visual competition.
Finalise with Matting, Glazing, and Room Context
The final step in choosing a 6R photo frame involves selecting the right matting, glazing, and ensuring the frame fits the room’s overall context.
Using a mat board is an effective way to elevate the presentation of a 6R photo. Placing a 6R print inside a larger frame, such as an 8×10 inch frame, with a custom-cut mat board provides “breathing room.” This prevents the image from feeling cramped and draws the viewer’s eye directly to the center. When purchasing a mat board, check the product specifications to ensure it is acid-free, which prevents the edges of your photo from yellowing or deteriorating over time.
The choice of glazing affects both the protection and the visibility of your photo. Traditional glass is scratch-resistant and offers excellent clarity, but it is heavy and fragile. Acrylic glazing is lightweight, shatter-resistant, and safer for homes with pets or children. Regardless of the material, check product labels for UV protection features or anti-reflective coatings. This is particularly important if your photo will be displayed near windows or under direct spotlighting, as UV rays can cause the print to fade over time.
Finally, evaluate the room’s existing lighting and decor. A frame should not only match the photo but also harmonize with the wall colour and furniture. For example, a rustic wood frame might clash in an ultra-modern, industrial-style room, while a sleek metal frame might feel out of place in a traditional, cozy setting. Additionally, observe how light enters the room throughout the day to position the frame where reflections will not obscure the image.
Frequently Asked Questions (FAQ)
Can I use a standard A4 frame for a 6R photo?
Yes, you can use a standard A4 frame for a 6R photo, but you will need to use a mat board. Because an A4 frame (approximately 21 x 29.7 cm) is significantly larger than a 6R print (15.2 x 20.3 cm), placing the photo directly inside without a mat will leave uneven, empty spaces and look unfinished. Using a pre-cut or custom-cut mat board with an outer dimension of A4 and an inner window cut to slightly less than 6 x 8 inches (about 5.75 x 7.75 inches to secure the edges) will hold the photo in place and create a professional, gallery-style look.
Should the frame colour match the wall or the photo?
As a general rule, prioritize matching the frame to the photo first, and then ensure it harmonizes with the wall. If you want a dramatic gallery effect, choose a frame colour that contrasts sharply with your wall paint, such as a black frame on a white wall. If you prefer a seamless, minimalist look where the artwork appears to blend into the environment, match the frame colour closely to the wall paint. Always avoid choosing a frame colour that directly competes with the dominant tones of the photo itself.
How do I prevent my 6R photo from fading in the frame?
To protect your 6R print from fading, check the product specifications of your frame’s glazing to ensure it features UV-filtering glass or acrylic. Standard glass does not block all ultraviolet rays, which are the primary cause of colour degradation. Additionally, avoid hanging or placing your framed photo in areas that receive direct sunlight or are subject to high humidity, such as bathrooms or directly opposite large windows. Maintaining a stable indoor environment helps preserve the ink and paper quality over the long term.

Community discussion
Share your experience or ask a question. Comments are reviewed before publication.