
Mounting a surface mounted light successfully requires matching your installation technique to the specific structural material of your ceiling. While concrete ceilings demand heavy-duty masonry anchors and impact drilling, false ceilings or gypsum boards rely on distributing weight across structural studs or using specialized hollow-wall anchors. A surface mounted light sits flush against the ceiling surface, making the physical connection and the electrical housing highly visible. Ensuring a secure, flush fit guarantees aesthetic appeal and prevents structural hazards. Before starting, you must verify your ceiling type, assess the weight of the fixture, and strictly isolate the electrical supply.
Pre-Installation Checks and Safety Preparation
Safety is the absolute priority when dealing with fixed electrical wiring. Begin by switching off the main power supply at your home’s distribution board. Never rely solely on the wall switch to isolate the circuit; always use a reliable, non-contact voltage tester at the ceiling wires to verify that no electrical current is present before touching any components.
Next, inspect the installation environment and the fixture specifications. You must verify that the fixture’s voltage requirements match your household supply and that its wattage limit is compatible with your existing circuit breaker. Check the physical dimensions of the light base to ensure it covers any existing ceiling cutouts or junction boxes, and confirm that the dimming method of the fixture matches your wall switch if you plan to use dimmable bulbs.
Products mentioned in this guide
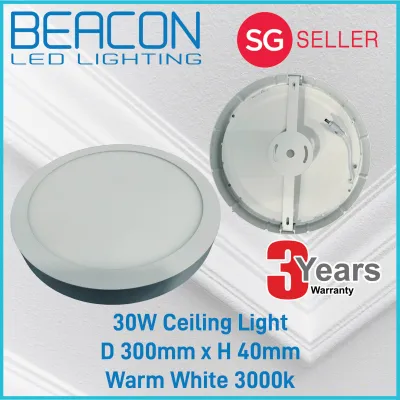
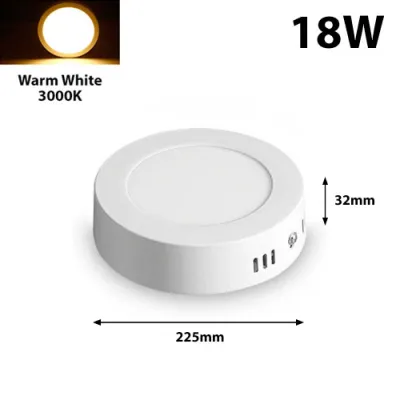
![[Local Seller] LED Ceiling Surface Mounted Downlight LED Panel Light Square Round](https://img.lazcdn.com/g/ff/kf/Sdd11b528478549189cb70a967ccae3d2t.jpg_400x400q80.jpg_.webp)
![[SG Seller]LED Panel Light Ultra-Thin Round Surface Mount Downlight Ceiling for Home Office Living Room Hallway Stairs](https://img.lazcdn.com/g/p/0067b3608711761daa2228d87525ee9d.jpg_400x400q80.jpg_.webp)
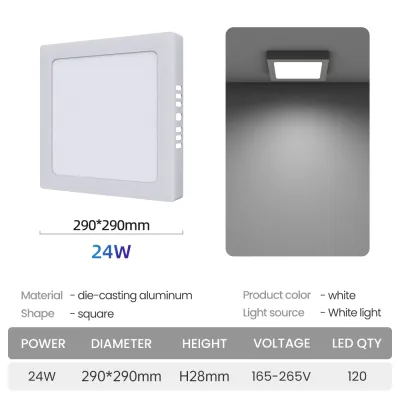
Prices are valid at publication and may change. Please refer to the product page for the latest price.
Examine the ceiling structure to determine what lies behind the surface. In many modern apartments and condominiums, you will encounter either solid concrete slabs or suspended false ceilings made of gypsum board. Knock gently on the surface; a hollow, echoing sound indicates a false ceiling, while a solid, dull thud points to concrete.
Gather your tools and compare the manufacturer-provided mounting hardware against your ceiling type. Standard screws and plastic wall plugs included in the box are often only suitable for solid masonry and may fail completely in hollow gypsum. Prepare an impact drill for concrete or a standard driver for drywall, safety goggles, wire strippers, insulated screwdrivers, and the correct anchors for your specific ceiling material.
Mounting on Solid Concrete Ceilings
Solid concrete ceilings offer excellent load-bearing capacity but require precise drilling and heavy-duty fasteners. Start by holding the fixture’s mounting bracket or base plate against the ceiling at your desired installation point. Use a pencil to mark the exact locations of the screw holes directly onto the concrete surface, ensuring the bracket is aligned correctly with your room’s layout.

Select a masonry drill bit that matches the exact diameter of your concrete anchors or expansion plugs. When drilling into concrete, use an impact drill set to hammer mode, holding the tool perfectly perpendicular to the ceiling to prevent the hole from widening unevenly. Drill to a depth slightly longer than the length of the anchor, using the drill’s depth gauge or a piece of tape wrapped around the bit as a guide.
Once the holes are drilled, clear out any concrete dust from inside the cavities using a hand blower or vacuum cleaner, as residual dust can prevent the anchors from gripping properly. Insert your masonry wall plugs or metal expansion sleeves into the holes, tapping them gently with a hammer until they sit completely flush with the concrete surface.
Position the mounting bracket over the installed anchors and align the screw holes. Thread the mounting screws through the bracket and tighten them firmly into the anchors using an insulated screwdriver. Check the stability of the bracket by giving it a firm tug; it must sit perfectly flat against the concrete without any gaps, wobbling, or movement, as any instability will cause the light fixture to sag or vibrate over time.
Mounting on False Ceilings and Gypsum Boards
False ceilings and gypsum boards require a completely different approach because these lightweight materials cannot support heavy, concentrated loads on their own. The most secure method is to mount the fixture directly into the underlying structural framework. Use a high-quality stud finder to locate the metal channels or wooden joists running behind the gypsum board, and mark their positions clearly.
If a structural stud aligns with your desired light placement, you can secure the mounting bracket directly into the stud using standard wood or self-tapping metal screws. This provides maximum stability and eliminates the risk of the ceiling board sagging under the weight of the fixture.
When mounting directly into the gypsum board is unavoidable because no studs are nearby, you must use specialized hollow-wall anchors. Toggle bolts, spring toggles, or butterfly anchors are highly recommended because they pass through a small drilled hole and expand behind the gypsum board, distributing the fixture’s weight over a much larger surface area. Avoid using standard plastic expansion plugs, as they will easily pull out of soft gypsum under the constant downward pull of a light fixture.
Before proceeding, always verify the weight rating of both your chosen anchors and the gypsum board itself against the total weight of the surface mounted light. Heavy decorative fixtures or multi-light track systems can easily overload standard gypsum boards, leading to structural cracks or complete ceiling failure. If the fixture is exceptionally heavy, you must plan for alternative support mechanisms rather than relying solely on the drywall.
Electrical Wiring and Final Assembly
With the mounting bracket securely in place, you can proceed to the electrical connections. Ensure the power remains isolated at the distribution board before handling the wires. Carefully strip the outer insulation of the ceiling wires to expose about ten millimeters of bare copper, taking care not to nick or damage the internal metal strands.
Match the wires from your ceiling to the terminals on the light fixture, adhering strictly to local electrical color codes. Typically, you will connect the live wire (usually brown or red) to the live terminal (marked ‘L’), the neutral wire (usually blue or black) to the neutral terminal (marked ‘N’), and the earth wire (usually green and yellow) to the grounding terminal or screw. Secure these connections using high-quality wire connectors or terminal blocks, tightening the screws firmly to prevent loose connections that could cause electrical arcing.
Gently tuck the excess wiring and connectors back into the ceiling cavity or into the hollow compartment of the fixture’s base. Ensure that no wires are pinched, bent at extreme angles, or trapped between the mounting bracket and the light body, as compressed insulation can degrade over time and lead to short circuits or overheating.
Align the main body of the surface mounted light with the secured mounting bracket. Depending on the fixture design, slide the housing over the bracket and secure it using the provided side screws, collar rings, or magnetic locking mechanisms. Once fully assembled, restore power at the distribution board and test the light switch to ensure proper operation and smooth dimming, if applicable.
Warning Signs and When to Call a Professional
While installing a surface mounted light is a manageable DIY project, certain situations present serious safety risks that require professional intervention. Stop the installation immediately if you notice the ceiling material crumbling, cracking, or showing signs of water damage around the drilling site. Soft, powdery, or damp gypsum board cannot safely support any fixture and indicates an underlying structural or moisture issue that must be resolved first.
Electrical anomalies also demand expert attention. If you discover that your existing ceiling wiring is brittle, has degraded insulation, lacks a dedicated earth wire, or does not match the electrical requirements of your new fixture, do not attempt to complete the wiring yourself. A licensed electrician should be called to inspect, repair, or run new wiring to ensure compliance with local electrical safety standards.
Finally, do not attempt to mount heavy fixtures on a false ceiling without proper structural reinforcement. If your surface mounted light exceeds the safe load limit of your ceiling board, or if the installation requires cutting into structural concrete beams or metal framing, seek professional assistance. A qualified contractor can install a dedicated wooden backing board or anchor the fixture directly to the concrete slab above using threaded rods, ensuring a safe and permanent installation.
Frequently Asked Questions (FAQ)
Can I install a surface mounted light if my ceiling has no earth wire?
If your ceiling lacks an earth (ground) wire, which is common in older properties, you must exercise extreme caution. Metal-bodied light fixtures require an earth connection to prevent the outer casing from becoming live in the event of an electrical fault. If no earth wire is present, you should consult a licensed electrician to assess your wiring or select a double-insulated (Class II) light fixture, which is specifically designed with non-conductive housing and does not require grounding for safe operation.
Do I need to reinforce a false ceiling before mounting a heavy surface light?
Yes, heavy surface mounted lights require structural reinforcement when installed on a false ceiling. Standard gypsum boards are designed to support minimal weight, and heavy fixtures can cause the ceiling to sag, crack, or collapse over time. To prevent this, you should install a wooden backing board (such as plywood) behind the gypsum board to distribute the weight, or use long threaded rods to anchor the fixture directly to the solid concrete slab above the false ceiling.
How do I hide the wiring if my surface mounted light does not have a built-in cable gland?
If your light fixture lacks an internal compartment or cable gland to conceal the wiring, you can manage the cables neatly along the ceiling surface using external PVC trunking or decorative conduit pipes. Alternatively, you can choose a fixture with a larger base canopy that provides ample space to house the wire connectors, or route the wiring through a small hole in the ceiling directly into the void behind a false ceiling, ensuring all connections remain hidden and protected.
Community discussion
Share your experience or ask a question. Comments are reviewed before publication.