
Pairing a tri-color LED driver with a wireless remote control is the key to unlocking seamless color temperature transitions in modern home lighting. This process establishes a dedicated wireless link between the handheld transmitter and the receiver built into the driver. By completing this setup, you can easily shift your room’s ambiance from a warm, relaxing glow to a crisp, productive daylight setting with the press of a button.
A tri-color LED driver functions as a specialized power supply that regulates current to multi-channel LED fixtures. Unlike standard single-color drivers, a tri-color variant manages two separate sets of light-emitting diodes—typically warm white and cool white. By adjusting the ratio of electrical current sent to each channel, the driver can blend these outputs to create intermediate color temperatures, such as neutral white.
While the fundamental pairing process involves broadcasting a sync signal from the remote to the driver, the exact button sequences and timing parameters vary by manufacturer. This comprehensive guide outlines the essential safety precautions, step-by-step pairing methods, testing procedures, and troubleshooting steps to help you successfully configure your tri-color lighting system.
Products mentioned in this guide
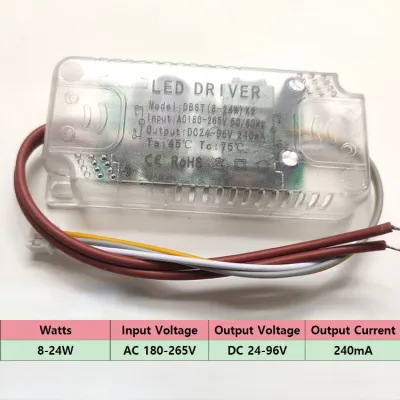
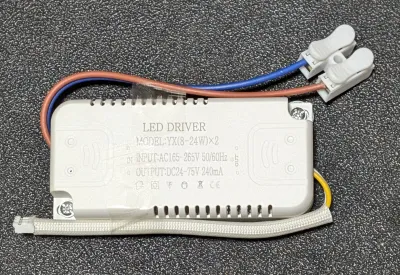
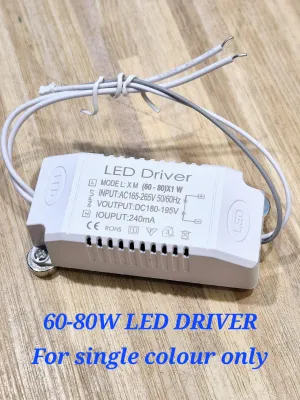
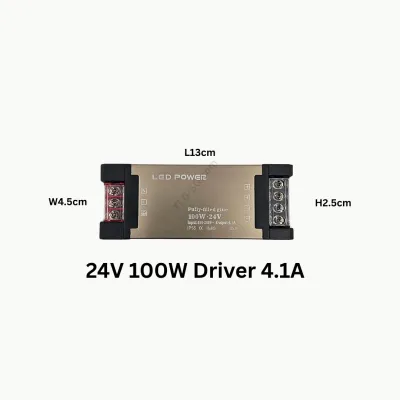
Prices are valid at publication and may change. Please refer to the product page for the latest price.
Preparation and Safety Checks Before Pairing
To ensure a smooth and hazard-free installation, you must perform several electrical and hardware checks before attempting to pair your devices. Working with residential lighting systems requires a cautious approach to prevent electrical shocks or equipment damage.
Electrical Safety First In Singapore, household lighting circuits typically operate on a 230V AC mains supply, which carries a significant risk of severe electrical shock. Before inspecting the driver, adjusting any physical wiring, or opening junction boxes, you must isolate the electrical power. Locate your home’s main distribution board (DB box) and switch off the miniature circuit breaker (MCB) dedicated to the lighting circuit you are working on. Use a reliable, calibrated non-contact voltage tester to confirm that the wires are completely dead before proceeding. Never rely solely on a standard wall switch for isolation, as some circuits may still carry live current through improperly wired neutral lines.
Compatibility Verification Wireless control systems rely on specific communication protocols, and a mismatch will prevent your remote from communicating with the driver. Check the product specifications on both devices to verify that they share the same protocol, such as Radio Frequency (RF, commonly 2.4GHz), Infrared (IR), or Bluetooth. You must also verify that the driver’s output voltage (typically 12V or 24V DC) and maximum wattage rating match the requirements of your LED fixture. Ensure the tri-color LED driver carries recognized safety certifications, such as the Enterprise Singapore Safety Mark, which proves the device has been tested and approved for safe domestic use.
Power and Battery Check Weak or depleted batteries are a primary cause of wireless pairing failures, as they prevent the remote from transmitting a strong, consistent signal. Install a fresh set of high-quality alkaline batteries into your remote control, ensuring that the positive (+) and negative (-) terminals align correctly with the markings inside the compartment. If your remote features an integrated LED indicator light, press any button to confirm that the light flashes brightly. If the indicator light is dim, flickers, or remains unlit, replace the batteries immediately before attempting the pairing process.
Documentation Readiness Because there is no universal industry standard for pairing wireless lighting accessories, manufacturers design their own proprietary sync sequences. Before starting, locate the user manuals for both your remote control and the tri-color LED driver. These documents contain critical information regarding specific button names, hold times, and indicator light behaviors unique to your hardware. Having these instructions on hand will save time and prevent the frustration of guessing complex button combinations.
Step-by-Step Guide to Pairing the Remote and Tri-Color LED Driver
Once you have completed the necessary safety checks and verified hardware compatibility, you can proceed with the pairing process. Follow this structured sequence to establish a reliable wireless connection between your remote and the driver.

Power Restoration With all physical wiring securely connected and the driver’s protective cover closed, you can safely restore power to the circuit. Switch on the dedicated miniature circuit breaker at your main distribution board, and then turn on the wall switch that controls the LED light fixture. The connected LED light should turn on, indicating that the driver is receiving mains power and is ready to enter its pairing window.
Entering Pairing Mode To link the remote, you must first prompt the tri-color LED driver’s receiver to listen for a new wireless signal. Depending on the model, this is achieved either by pressing a physical “Pair” or “Match” button on the driver’s housing, or by executing a specific power-cycling sequence using the wall switch. A common power-cycling method requires turning the wall switch off and on three to five times in rapid succession, leaving the switch in the “on” position on the final turn. Refer to your manufacturer’s manual to confirm the precise sequence, as incorrect timing will fail to activate the pairing mode.
Sending the Pairing Signal As soon as the driver enters pairing mode—which usually lasts for a brief window of five to ten seconds—you must immediately send the sync signal from your remote control. Press and hold the designated pairing button on the remote, which is often the main “ON” button, a dedicated “Setup” key, or a specific zone selection button if you are using a multi-channel remote. Hold the button down for three to five seconds until the remote’s indicator light begins to flash rapidly, signaling that it is broadcasting its unique pairing code.
Confirming Success Watch the connected LED fixture closely to verify that the driver has accepted the remote’s signal. Most tri-color systems provide a clear visual cue to confirm a successful pairing, such as flashing the light slowly two or three times, dimming the output momentarily, or cycling through the warm, neutral, and cool white color modes automatically. Once you observe this visual response, release the button on the remote and allow the system a few seconds to finalize the connection.
Safety and Professional Boundary If your LED driver is mounted in an inaccessible location, such as high up inside a false ceiling or behind structural panels, do not attempt to access it yourself. Working at heights on ladders or handling complex, hidden wiring poses serious safety hazards. If you cannot easily access the driver’s physical pairing button, or if you notice any signs of damaged, loose, or non-compliant wiring, stop the process immediately. Contact a licensed electrical worker (LEW) in Singapore to safely access, inspect, and configure the hardware for you.
Testing and Adjusting Color Temperature Modes
After successfully pairing your devices, you must thoroughly test the system to ensure that all color-mixing channels and control features function as intended.
Mode Cycling Begin by testing the remote’s primary function: switching between the three distinct color temperature modes. Press the dedicated color control buttons to cycle through Warm White (approximately 3000K, which provides a soft, yellow glow suitable for relaxing environments), Neutral White (approximately 4000K, offering a balanced, natural light ideal for general tasks), and Cool White (approximately 6000K to 6500K, delivering a bright, blue-toned light for focused work). Verify that the LED fixture transitions cleanly and instantly to each selected mode without any delay or color distortion.
Dimming Functionality If your tri-color LED driver and remote control support brightness adjustments, test the dimming range across all three color temperatures. Use the brightness keys to slowly lower the light output to its minimum level, and then increase it back to maximum brightness. Pay close attention to the light output during these transitions; there should be no visible flickering, strobing, or buzzing sounds. Continuous flickering during dimming often indicates an incompatibility between the driver’s dimming protocol (such as Pulse Width Modulation) and the connected LED chips.
Memory Function Check A reliable memory function ensures that your lights return to your preferred settings when turned on. To test this, use the remote to adjust the light to a specific color temperature and a dimmed brightness level. Turn the fixture off using the main wall switch, wait approximately fifteen seconds, and then turn the wall switch back on. A high-quality driver with an integrated memory chip will illuminate at the exact same color and brightness settings you selected, rather than defaulting back to its factory-preset mode.
Troubleshooting Common Pairing and Control Issues
If your remote control fails to connect to the tri-color LED driver, or if the light behaves erratically after pairing, use these troubleshooting steps to identify and resolve the issue.
Unresponsive Remote If the LED light does not respond to any commands, start by checking the remote’s power source. Remove the batteries and inspect the terminals for any signs of corrosion or misalignment, then reinsert them or replace them with a fresh set of alkaline batteries. For systems that utilize Infrared (IR) technology, ensure there is a completely clear line of sight between the remote’s transmitter and the driver’s external receiver sensor. If the receiver sensor is buried deep inside a ceiling void or covered by a thick light diffuser, the IR signal will be blocked, preventing any communication.
Signal Interference and Range Radio Frequency (RF) and Bluetooth controllers do not require a direct line of sight, but their signals can still be degraded by external factors. If you experience delayed responses or a limited operating range, check for nearby sources of electromagnetic interference, such as wireless routers, microwave ovens, or baby monitors. Additionally, thick concrete walls and metal structural supports can block radio waves. Try moving closer to the light fixture to see if the control improves, and ensure that the driver’s flexible receiver antenna is not pressed flat against metal surfaces, which can shield the signal.
Resetting and Re-pairing When a pairing sequence fails repeatedly, clearing the driver’s internal memory and starting fresh is often the most effective solution. To perform a factory reset, refer to your manual for the specific unpairing sequence. This typically involves holding down the driver’s physical pairing button for ten continuous seconds, or executing a rapid power-cycling sequence using the wall switch (such as switching it on and off six or more times). Once the connected LED light flashes rapidly to confirm the reset, repeat the pairing steps from the beginning.
Hardware Faults If the system remains unresponsive after multiple pairing and resetting attempts, there may be an internal hardware defect. Inspect the driver casing and wiring terminals for visible signs of damage, such as discoloration, swelling, or a burnt electrical odor. If you suspect a hardware failure, do not attempt to disassemble the driver or the remote control, as doing so will void the product warranty and introduce electrical safety risks. Instead, contact the manufacturer or your local retail outlet in Singapore to arrange for a professional inspection or a warranty replacement.
Frequently Asked Questions (FAQ)
Can I pair multiple tri-color LED drivers to a single remote control?
Many modern Radio Frequency (RF) and Bluetooth remote controls support multi-driver pairing, allowing you to control several light fixtures simultaneously or independently. This is typically achieved through zone control, where the remote features dedicated buttons for different zones (such as Zone 1, Zone 2, etc.). You can pair a separate tri-color LED driver to each zone by repeating the pairing process while selecting the corresponding zone button on the remote. However, this capability depends entirely on the design and specifications of your specific remote and driver system, so you must verify the supported zone limits in your product manuals.
What is the difference between RF and IR remotes for LED drivers?
The primary difference between Radio Frequency (RF) and Infrared (IR) remotes is the method of signal transmission, which directly affects how you install and use your lighting system. RF remotes use radio waves (often operating at 2.4GHz) to send commands, which means they can pass through solid obstacles like walls, furniture, and plasterboard ceilings. This allows you to hide the tri-color LED driver completely out of sight. In contrast, IR remotes use light signals and require a direct, unobstructed line of sight between the remote and the driver’s receiver sensor, limiting their range and installation flexibility.
Community discussion
Share your experience or ask a question. Comments are reviewed before publication.