
Pairing a WiZ remote control with your smart bulbs is a straightforward way to add physical, tactile control to your smart lighting system. While the WiZ mobile application offers comprehensive scheduling and automation features, a dedicated remote provides immediate access to power, dimming, and preset scenes without needing to unlock a smartphone. This setup is particularly beneficial in shared household spaces, guest rooms, or areas where quick adjustments are preferred by family members or visitors.
The pairing process can be completed using two primary methods: linking the remote through the official mobile application or establishing a direct hardware connection between the remote and the bulbs. Understanding the prerequisites and following the correct sequence ensures a stable connection that remains reliable over time.
What You Need Before Starting the Pairing Process
Before initiating the pairing sequence, verify that all hardware and software components are prepared. Your smart bulbs must be physically installed in their fixtures, switched on at the wall, and fully configured within the WiZ app. If you are installing new bulbs, verify that their voltage, base interface (such as E27 or GU10), and wattage limits match your home’s electrical fixtures. For installations involving work at height, damp environments like bathrooms, or fixed wiring modifications, always isolate the power at the main circuit breaker and consult a qualified professional to ensure safety and compliance with local electrical standards.
Products mentioned in this guide
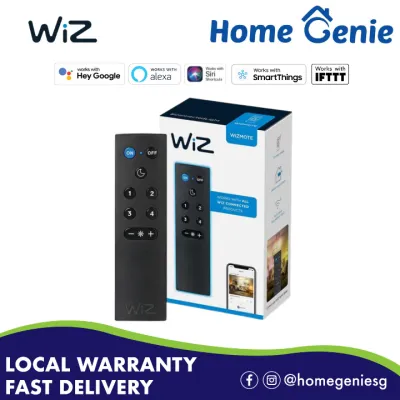
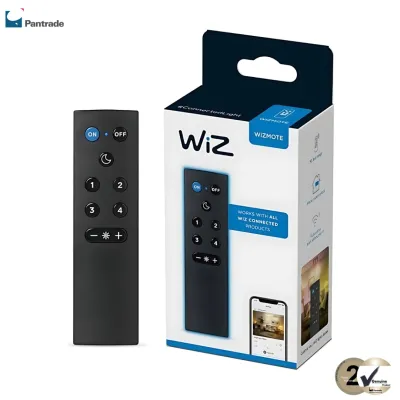
Prices are valid at publication and may change. Please refer to the product page for the latest price.
Your mobile device must be connected to the same local Wi-Fi network as your smart bulbs during the setup. Smart lighting accessories typically communicate over the 2.4GHz wireless band, so ensure your router is broadcasting this frequency and that your phone is not temporarily connected to a 5GHz band or a guest network.
Examine the physical remote control to ensure it is ready for operation. Remove any plastic battery insulation tabs from the battery compartment and install fresh, high-quality batteries. Low battery voltage is a common cause of pairing failures, so using new batteries is highly recommended even if the remote is newly unboxed. Keep the physical wall switch that controls the smart bulbs turned on throughout the entire process, as cutting power to the bulbs will interrupt the wireless handshake.
Additionally, consider the physical layout of your home. In high-density housing environments, concrete walls and structural pillars can sometimes degrade wireless signals. Ensure that the distance between your router, the smart bulbs, and the remote is within reasonable limits, and avoid placing the bulbs inside fully enclosed metal fixtures that could block wireless signals.
Step-by-Step Guide to Pairing Your WiZ Remote
The exact pairing sequence can vary depending on the specific model of your remote control. The standard WiZmote utilizes low-energy wireless protocols to communicate directly with compatible bulbs, whereas older or alternative models might rely on different radio frequency (RF) or infrared signals.

To ensure a smooth setup, locate the quick start guide or the manufacturer’s instructions for your specific remote model to identify the exact button layout. Most modern variations feature dedicated buttons for power, brightness adjustments, a night light mode, and four numbered preset slots.
During the pairing process, the smart bulbs and the remote will exchange security keys to establish a secure, localized link. Successful synchronization is typically confirmed by a visual signal, such as the smart bulb pulsing once or changing its color temperature briefly, followed by a confirmation message within the mobile application interface.
Method 1: Assigning the Remote via the WiZ App
Using the mobile application is the most reliable method for pairing, as it allows you to assign the remote to a specific room and customize its button functions. Open the WiZ app on your mobile device and ensure you are logged into the correct home profile. Note that menu paths may differ slightly depending on whether you are using the legacy WiZ app or the newer WiZ V2 app.
Navigate to the settings menu within the app, which is typically represented by a gear icon or an accessory management tab. Select the option to add a new device or accessory, and choose the remote control option from the list of available hardware types.
The app will prompt you to select the specific room you want the remote to control. Because the remote operates on a room-wide basis, any bulb assigned to that designated room in the app will respond to the remote’s commands.
Once the room is selected, follow the on-screen prompts to initiate the pairing signal from the physical remote. This usually involves pressing the “ON” button three times consecutively or holding down a specific button combination while standing within close range of the smart bulbs.
After the app detects the remote, save the configuration and assign a name to the accessory. Test the connection immediately by pressing the power button on the remote to verify that all bulbs in the designated room respond in unison.
Method 2: Using Direct Physical Pairing Mode
If you do not have access to a Wi-Fi network or prefer to bypass the mobile application entirely, you can establish a direct hardware link between the remote and the smart bulbs. This method is useful for basic setups or temporary installations where app-based management is not required.
Begin by turning off the physical wall switch that controls the target smart bulbs. Wait approximately ten seconds to allow the residual electrical charge in the fixtures to dissipate fully, then turn the wall switch back on. This action places the smart bulbs into a temporary pairing window for the first few seconds after receiving power.
Immediately point the remote control directly at the smart bulbs and press and hold the “ON” button (or the designated pairing button sequence specified in your hardware manual). Keep the remote within a distance of one to two meters from the bulbs to ensure a strong signal.
Watch the smart bulbs closely for a physical confirmation signal. The bulbs will typically flash or pulse once to indicate they have successfully registered the remote’s direct wireless signal.
If the bulbs do not flash within several seconds, release the button, turn the wall switch off, wait ten seconds, and repeat the process. Be careful with the timing of your physical switch toggles; flipping the switch too quickly or too slowly can sometimes trigger a factory reset sequence instead of the pairing window.
Verifying the Connection and Customizing Controls
After completing the pairing process, it is important to verify that all primary functions operate correctly. Test the power toggle buttons to ensure the lights turn on and off without delay. Gradually adjust the brightness levels using the dimming buttons to confirm smooth transitions, keeping in mind that perceived color temperature and spatial dimming effects are subjective preferences that can be adjusted to suit your comfort.
If your remote features numbered preset buttons, you can customize these slots to trigger your favorite lighting scenes. Open the WiZ app, navigate to the accessory settings for your paired remote, and map specific light recipes—such as warm white, daylight, or custom color blends—to buttons 1 through 4.
Verify that physical button presses are reflected accurately within the mobile application. When you turn the lights off using the remote, the app interface should update to show the bulbs as offline or off. If there is a persistent state mismatch or a significant delay, it may indicate local wireless interference or a weak signal between the devices.
One of the key benefits of the WiZ remote is its ability to operate locally. Even if your home internet connection goes down temporarily, the remote will still be able to control the bulbs directly, providing a reliable fallback control option.
Troubleshooting Common Pairing Failures
If your remote fails to pair or control the smart bulbs, the most common culprit is a network or frequency mismatch. Ensure that your mobile device, smart bulbs, and router are operating correctly on the 2.4GHz band. If your router uses a single SSID for both 2.4GHz and 5GHz bands, you may need to temporarily disable the 5GHz band in your router’s admin panel during the initial setup.
In high-density residential areas, wireless congestion from neighboring networks can interfere with the pairing handshake. If you suspect interference, try changing the Wi-Fi channel on your router to a less congested one (such as channel 1, 6, or 11) to improve connection stability.
Check the physical condition of the remote’s batteries. Even if the remote’s indicator LED flashes, the voltage may be too low to transmit a stable pairing signal to the bulbs. Replacing the batteries with fresh alkaline cells often resolves intermittent connectivity issues.
If the devices remain unresponsive, performing a factory reset on both the remote and the smart bulbs can clear conflicting configurations. To reset a smart bulb, toggle the physical wall switch off and on in a specific rhythmic sequence—typically five times consecutively with one-second intervals—until the bulb pulses to indicate it has reverted to setup mode. To reset the remote, consult the manufacturer’s manual for the specific button combination required to clear its internal memory.
Should these troubleshooting steps fail to resolve the issue, contact the manufacturer’s customer support team for further assistance. Do not attempt to disassemble the internal electronic components of the remote or the bulbs, as this can void your warranty and compromise electrical safety.
Frequently Asked Questions (FAQ)
Can one WiZ remote control multiple smart bulbs simultaneously?
Yes, a single remote can control multiple smart bulbs simultaneously, provided they are assigned to the same room or zone within the mobile application. The remote broadcasts commands to all compatible bulbs linked to that specific room, allowing you to adjust the entire space with a single button press.
However, standard remotes cannot control bulbs across different rooms independently. If you wish to control multiple rooms, you will need to purchase separate remotes for each zone or reassign the remote within the app settings when moving between spaces.
Do I need to re-pair the remote if I change my Wi-Fi router?
You do not need to re-pair the physical remote to the bulbs if you change your Wi-Fi router, as the remote communicates directly with the bulbs using local wireless protocols. The hardware link between the remote and the bulbs remains intact even without an active internet connection.
However, you will need to update your smart bulbs with the new Wi-Fi credentials in the mobile application so they can reconnect to the cloud. Once the bulbs are successfully updated and online on the new network, they will continue to respond to your previously paired remote without requiring any additional setup.
Community discussion
Share your experience or ask a question. Comments are reviewed before publication.