
Planning your lighting layout before making any physical changes is the most effective way to achieve a balanced, functional home environment. A well-designed plan prevents uneven illumination, avoids structural damage to your ceiling, and ensures your electrical system can safely handle the new load. In Singapore homes, where concrete slabs and false ceilings present distinct structural realities, careful preparation is essential before any installation begins.
Assess Your Space and Define Your Lighting Goals
To begin, determine the primary function of each room to guide your placement and brightness choices. A single room often requires a mix of ambient lighting for general visibility, task lighting for specific activities, and accent lighting to highlight architectural features or decor. These lighting styles are highly subjective and depend on your personal preferences for spatial effect and atmosphere.
Avoid placing down lights in positions that cause direct glare or visual discomfort. For example, positioning a light directly over a bedhead or a sofa can create an uncomfortable glare when you are lying down or relaxing.
Products mentioned in this guide
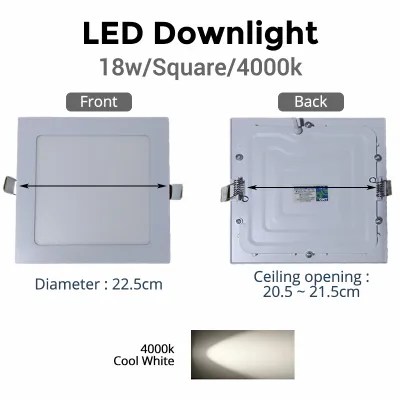
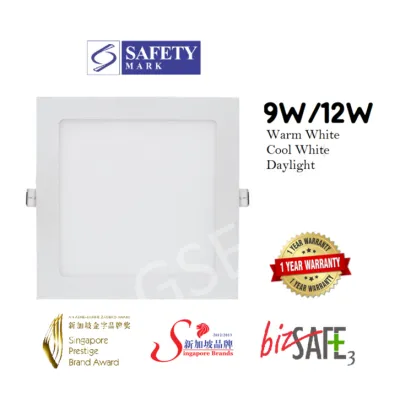
![[BUY 2 FREE 1] DFS LED Recessed Downlight With Safety Mark Driver/Downlight Square/ Round 6W 9W 12W 18W](https://img.lazcdn.com/g/p/1bbba251513d2f446d42ef7aed2d1fe8.jpg_400x400q80.jpg_.webp)
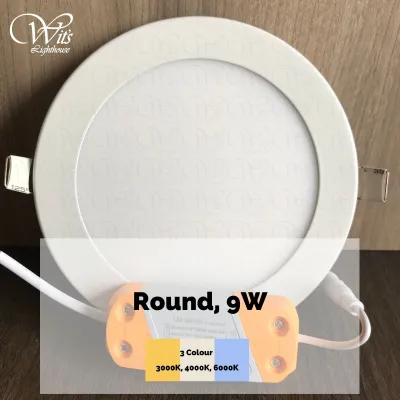
![[Buy 3 Free 1] LED PRO LED LIGHT Recessed Light/LED Downlight Light LED Downlight Square/ Round Downlight Tri-Tone/3000k/4000k/6000k 6W/8W/15W/20W](https://img.lazcdn.com/g/p/b3a12d1d401d4b6df3faabccd5153aff.jpg_400x400q80.jpg_.webp)
![[Buy 3 Free 1]BWL LED LIGHT Recessed Light/LED Downlight Square/ Round Downlight Tri-Tone/3000k/6000k/6W/8W/15W/20W](https://img.lazcdn.com/g/p/bdff589ffb0369083f1620824cfa18b4.jpg_400x400q80.jpg_.webp)
![[BUY 3 FREE 1] DFS Led SG Stock Recessed Downlight 6W 8W 15W 20W Adjustable/Tri-Tone/3000k/4000k/6000k](https://img.lazcdn.com/g/p/9b0b06054a118af0000d9ffc3b4f99e6.jpg_400x400q80.jpg_.webp)
Prices are valid at publication and may change. Please refer to the product page for the latest price.
Map out your furniture layout on a floor plan before finalizing your ceiling marks. If a down light is positioned directly above a tall wardrobe, a kitchen wall cabinet, or a refrigerator, the light will be blocked, creating dark shadows and rendering the fixture ineffective.
Calculate Spacing and Layout for Even Illumination
Achieving even illumination requires calculating the distance between fixtures based on your ceiling height and the beam angle of your chosen lights. For a standard Singapore residential ceiling height of 2.6 to 2.8 metres, a common starting point is to space the fixtures approximately 1.2 to 1.5 metres apart.

The specific beam angle of your LED down lights will dictate how close they need to be. Narrow beam angles concentrate light into a tight cone, which requires closer spacing to prevent dark gaps between pools of light. Wider beam angles spread light across a larger area, allowing for greater distance between fixtures but reducing the concentrated brightness.
To prevent harsh shadows along the perimeter of the room, place your down lights between 60 and 90 centimetres away from the walls. This spacing allows the light to wash down the wall surface gently, highlighting textures or artwork without creating intense, distracting hot spots.
Adjust your layout density to match the visual demands of each zone. High-activity areas like kitchen countertops, study desks, and vanity mirrors require a higher density of fixtures to ensure clear, shadow-free visibility. Conversely, living rooms and bedrooms benefit from a more relaxed, wider spacing that promotes a restful environment.
Evaluate Ceiling Structure and Clearance Requirements
Before cutting any holes in your ceiling, you must verify what lies behind the surface to avoid damaging critical home infrastructure. Structural metal joists, timber framing, plumbing pipes, and air conditioning ductwork can block your fixtures or pose severe safety hazards if punctured.
Use a reliable stud finder to locate and map the positions of ceiling joists on your ceiling surface. If you have access to your home’s architectural or renovation drawings, cross-reference them to identify the paths of hidden utility lines and structural supports.
Measure the vertical clearance space inside your ceiling void to ensure it can accommodate the physical depth of the fixtures. Recessed LED down lights require a specific minimum depth to sit flush, which varies significantly between ultra-thin models and deeper architectural fixtures. Always ensure the available clearance exceeds the manufacturer’s specified housing depth, leaving the required air gap for heat dissipation.
In Singapore, the type of ceiling structure dictates your installation options. Recessed down lights can only be installed in false ceilings, which are typically constructed from gypsum board suspended below the main slab. If your room has an exposed concrete ceiling, recessed installation is not possible without major, structurally risky hacking; in these areas, surface-mounted down lights or track lighting systems must be used instead.
Verify Electrical Readiness and Circuit Capacity
Adding new light fixtures increases the electrical load on your home’s existing circuits. You must verify that your distribution board and the specific lighting circuit have sufficient capacity to handle the total wattage of the new LED down lights without overloading.
Plan your switch zones to allow independent control over different lighting layers. Grouping all the down lights in a room onto a single switch limits your ability to adjust the atmosphere; instead, wire ambient, task, and accent lights to separate switches so you can customize the brightness as needed.
If you plan to install dimmable LED down lights, you must verify compatibility between your wall dimmer switches and the LED drivers. Standard dimmers designed for older incandescent or halogen bulbs often cause LEDs to flicker, buzz, or fail prematurely. Check the manufacturer’s technical specifications to ensure your dimmer switch and LED driver are fully compatible.
Select Compatible LED Down Light Specifications
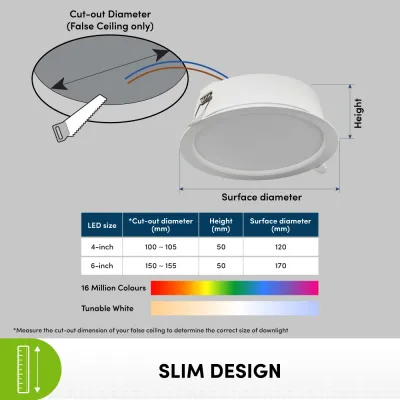
When purchasing your fixtures, double-check that the physical cut-out dimensions match your planned ceiling preparation. Standard cut-out sizes typically range from 70mm to 150mm, and cutting holes that do not match your fixtures can lead to sagging lights or require extensive ceiling repairs.
Verify the Ingress Protection (IP) ratings on the product packaging, especially for installations in high-moisture environments like bathrooms or kitchen cooking zones. For areas exposed to steam or water splashes, select fixtures with appropriate moisture-resistant ratings to ensure long-term safety and performance.
Check whether the down lights have an Insulation Contact (IC) rating if your ceiling contains thermal or acoustic insulation. IC-rated fixtures are designed to be safely covered by insulation, whereas non-IC rated fixtures require a specific clearance gap to prevent heat buildup and potential fire hazards.
Decide Between DIY Preparation and Hiring a Professional
Planning your layout, measuring distances, and marking the cut-out points on your ceiling are safe tasks that you can complete yourself. These preparation steps allow you to visualize the final look and ensure the placement aligns with your furniture.
However, all fixed electrical wiring, circuit modifications, and final connections to the mains power must be performed by a licensed electrical worker or a qualified professional. Attempting to wire the lights yourself is dangerous and violates local safety regulations in Singapore.
Before any physical preparation or inspection begins, ensure the mains power supply to the affected circuits is completely isolated at the distribution board. If you encounter unexpected wiring configurations, structural obstacles, or conflicting instructions, stop work immediately and consult a qualified professional to ensure a safe installation.
Frequently Asked Questions (FAQ)
Can I install LED down lights in a concrete ceiling?
Recessed LED down lights cannot be directly installed in a solid concrete ceiling without creating a false ceiling to house the fixtures and wiring. Hacking concrete slabs is structurally dangerous and often prohibited in Singapore residential buildings. For concrete ceilings, choose surface-mounted down lights or track lighting systems instead.
Do I need special down lights for bathrooms and kitchens?
Yes, areas with high humidity or potential water splashes require fixtures with appropriate moisture resistance. Check the product packaging for the manufacturer’s IP (Ingress Protection) rating and verify that the fixture is certified for use in damp or wet zones before installation.
How do I prevent LED down lights from overheating in the ceiling?
To prevent overheating, always maintain the minimum clearance distances specified in the manufacturer’s installation manual. Verify whether your fixtures require an IC (Insulation Contact) rating if they will be near insulation, and ensure that ceiling void ventilation is not blocked by debris or structural elements.

Community discussion
Share your experience or ask a question. Comments are reviewed before publication.