
To achieve maximum coverage and reliable motion detection from your solar flood light, you must plan its placement around three critical factors: direct sunlight exposure for the solar panel, an optimal mounting height of 2.5 to 4 meters, and a cross-traffic path for the motion sensor. Because solar-powered security lights rely entirely on the sun to charge their internal batteries, placing the panel where it receives unobstructed daylight is just as important as where the light actually shines. In Singapore’s dense urban environment, navigating local housing rules and architectural shadows is the first step toward a successful setup. Proper planning ensures your outdoor spaces remain bright and secure without causing unnecessary glare or false triggers.
Assess Your Space, Sunlight, and Local Housing Rules
Before installing a solar flood light, map out your outdoor space and define your primary goals. Whether you want to illuminate a dark driveway, secure a landed property porch, or light up a private patio, your goals dictate your layout. Security lighting requires a wide, bright beam that minimizes blind spots, while pathway lighting focuses on low-glare, downward illumination to guide your steps safely.
Define the target zones clearly. A landed property porch might require a focused beam over the main gate, while a private patio might benefit from a wider, softer wash of light. Driveways often require dual-headed flood lights to cover both the vehicle parking area and the pedestrian walkway. Understanding these spatial dynamics helps you choose the right lumens and beam angle for your solar flood light.
Products mentioned in this guide
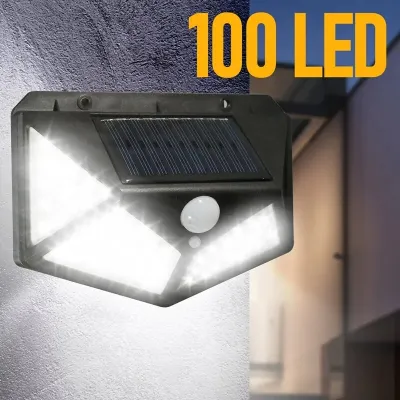
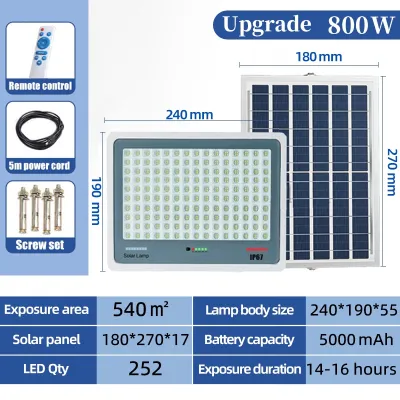
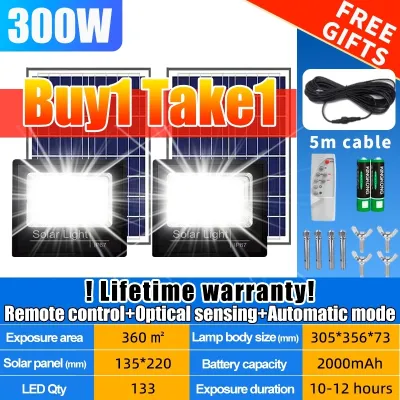
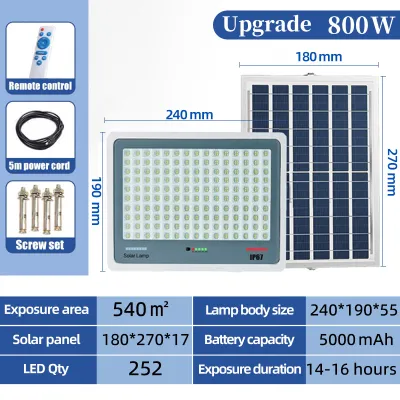
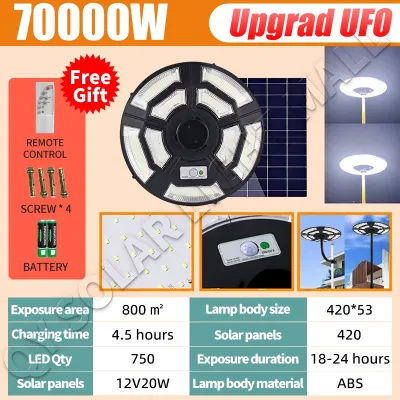
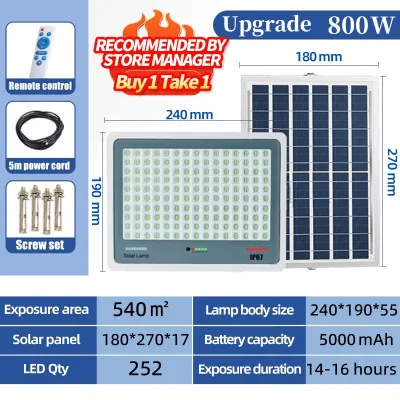
Prices are valid at publication and may change. Please refer to the product page for the latest price.
In Singapore, your housing type dictates what you can legally install on exterior walls. If you live in an HDB flat or a private condominium, check with your Town Council or Management Corporation Strata Title (MCST) before drilling. Exterior walls, common corridors, and building facades are common property; unauthorized modifications can lead to fines or removal orders. Landed property owners face fewer drilling restrictions but must still ensure the light does not spill over into neighboring windows or cause a public nuisance.
The solar panel requires direct, unobstructed sunlight for at least six to eight hours daily to charge the battery for overnight use. In Singapore’s tropical, high-rise environment, shadows cast by neighboring buildings, deep roof eaves, or dense tree canopies shift throughout the year. Observe your chosen mounting location during the day. If a nearby structure or a large rain tree blocks the sun for most of the afternoon, the light will suffer from reduced runtime or fail to turn on entirely.
Determine the Optimal Mounting Height and Angles
To maximize coverage, you must balance wide light distribution with effective sensor range by selecting the correct mounting height. Installing the fixture too low makes it susceptible to tampering and limits the illuminated area. Conversely, mounting it too high dilutes ground-level brightness and reduces the motion sensor’s sensitivity.

The recommended mounting height for a residential solar flood light is 2.5 to 4 meters. This elevation balances wide ground coverage with sufficient brightness while keeping the fixture out of arm’s reach, preventing easy tampering or damage.
When mounting between 2.5 and 4 meters, you also ensure that the PIR sensor’s detection cone spreads adequately across the ground. If you mount the light below 2.5 meters, the detection range is severely restricted, meaning a person might have to walk directly under the light before it triggers. Conversely, mounting above 4 meters might prevent the sensor from detecting smaller heat signatures altogether, rendering the motion activation unreliable.
Since Singapore is located near the equator, the solar panel does not require a steep tilt to track the sun. A slight tilt of about 10 to 15 degrees is ideal. This minimal angle is primarily to prevent water pooling and allow heavy tropical rain to naturally wash away dust, bird droppings, and debris, keeping the photovoltaic cells running at peak efficiency.
Adjust the flood light head to point slightly downward, about 30 to 45 degrees relative to the wall. This focuses the beam on your walkway or driveway without shining directly into neighboring windows, the street, or nearby security camera lenses.
Position the Motion Sensor for Reliable Detection
Most solar flood lights use Passive Infrared (PIR) sensors to detect motion by measuring changes in heat within their field of view. Understanding sensor alignment is crucial to ensuring the light triggers reliably when someone approaches.
PIR sensors detect motion best when a person walks across the sensor’s field of view (cross-traffic) rather than walking directly toward it. Position the light so the expected path of movement cuts across the detection cone. This ensures the sensor registers the thermal contrast instantly and activates the light.
PIR sensors operate by detecting rapid changes in infrared radiation. When a human body moves across the sensor’s field of view, it cuts across multiple passive zones, triggering the switch. If a person walks directly toward the sensor, the change in infrared signature is gradual and slow, which is why cross-traffic positioning is much more effective. Plan your layout so that visitors must walk across the light’s path rather than straight down its beam.
To prevent false triggers that drain the battery, keep the sensor away from heat sources like air conditioner compressors or exhaust vents. Ensure the detection zone is clear of moving objects like swaying tree branches, hanging plants, or busy public roads where passing vehicles might activate the light.
If the light, solar panel, and sensor are built into a single unit, you must often compromise between the best sun angle and the best sensor angle. If the ideal sun spot and the required detection spot do not overlap, consider a split-design model. These models feature a separate solar panel connected to the light head by a long, weatherproof extension cable, allowing you to mount the panel in direct sunlight while placing the light and sensor exactly where coverage is needed.
Prepare the Mounting Surface and Gather Tools
A secure physical installation ensures your solar flood light withstands Singapore’s intense tropical weather, including high humidity and heavy monsoon rains. Evaluating your wall surface and gathering the correct tools prevents the fixture from loosening over time.
Identify your wall material to select the correct anchors and screws. Concrete and brick walls require a hammer drill, masonry bits, and wall plugs, while wooden fences or metal cladding require wood or self-tapping screws. Ensure the mounting surface is structurally sound and not crumbling.
For concrete wall drilling in Singapore homes, a high-quality masonry drill bit is essential. Standard metal or wood bits will quickly dull and overheat when they come into contact with structural concrete. When inserting plastic rawl plugs, ensure they fit snugly into the drilled holes; if the hole is too wide, the plug will spin when you attempt to tighten the screw, compromising the entire physical mount.
To protect the wall and fixture during heavy monsoon rains, apply outdoor-grade silicone sealant around the mounting bracket and inside the drill holes. This weatherproofing step prevents water ingress, which can damage the wall plaster and short-circuit the light’s internal electronics.
Gather your tools before starting the installation:
- Power drill: Use a drill with the correct bits, such as masonry bits for concrete walls.
- Screwdriver: A manual screwdriver or power driver bits for securing screws.
- Measuring tape and pencil: Essential for marking precise drill hole locations.
- Spirit level: Ensures the mounting bracket is perfectly level.
- Sturdy ladder: A stable A-frame ladder for working safely at height.
Use a stable ladder and have a spotter for high installations. Before starting, read the manufacturer’s instructions for your specific model and check the treated wall’s structural integrity. While pure solar lights do not require electrical wiring or power shutoff, any hybrid models connected to mains electricity must be installed by a licensed electrician after proper power isolation.
Test and Calibrate Before Permanent Installation
Verify the light’s performance and sensor settings before fully securing the fixture to the wall. Calibrating the settings beforehand saves you from repeatedly climbing the ladder to make adjustments later.
To test the light during the day, cover the solar panel completely with a dark cloth or your hand to trick the sensor into thinking it is dark. This allows you to trigger the motion sensor and check its operation in daylight.
Walk through the intended detection zone at a normal pace to check the trigger range. If the light turns on too late, tilt the sensor head slightly upward or angle it toward the path of entry. If it picks up distant movement, tilt it downward.
Adjust the settings dials—typically located on the underside of the sensor—to calibrate performance:
- Sensitivity (Sens): Start with a medium setting to balance battery life and convenience, increasing it only if the sensor fails to pick up movement.
- Time (Delay): Set this to a shorter duration (such as 30 to 60 seconds) to conserve battery power.
- Lux (Ambient Light): Set this so the light only activates in true darkness rather than during twilight.
Once coverage and detection are confirmed, fully tighten all mounting screws, remove the cloth from the solar panel, and ensure the fixture is level. Wipe the solar panel clean to ensure maximum charging efficiency.
Frequently Asked Questions (FAQ)
Do I need permission to install a solar flood light outside my HDB flat?
HDB residents generally cannot drill into external common walls, install protruding fixtures in common corridors, or alter the building facade without prior approval. These surfaces are managed by the local Town Council, and unauthorized modifications can lead to fines or removal orders. Before installing any fixture, check with your Town Council or HDB branch. For private condominiums, similar restrictions apply under management (MCST) rules; installation is typically permitted only within private, enclosed spaces like a balcony or patio, subject to respective guidelines.
Why does my solar motion light keep turning on when no one is there?
False triggers are usually caused by small animals, swaying plants, passing cars, or heat fluctuations from nearby air conditioner compressors. To resolve this, try lowering the sensitivity dial on the sensor. You can also trim nearby foliage, adjust the sensor’s physical angle downward to ignore distant street traffic, or apply a small piece of tape to the side of the sensor lens to narrow its detection zone.
Community discussion
Share your experience or ask a question. Comments are reviewed before publication.