
To get the most out of your solar motion sensor lights, you must place them where the solar panel receives at least four to six hours of direct, unobstructed sunlight daily, while positioning the motion sensor to cover your high-traffic entry points at a height of 2 to 3 meters. Achieving this balance requires mapping out your property’s daily shade patterns, understanding the detection limits of your specific solar light, and choosing the right fixture design for each specific spot.
By carefully planning your layout before drilling any holes, you can ensure your outdoor spaces remain bright and secure throughout the night without wasting energy or causing annoying false alarms. A well-placed solar light provides reliable, eco-friendly illumination exactly when and where you need it, adapting seamlessly to your home’s unique architectural layout and local environmental conditions.
Assess Sun Exposure and Identify Key Solar Light Zones
Planning a successful outdoor lighting layout begins with a detailed assessment of your property’s daily sun exposure. Because a solar light relies entirely on solar energy to charge its internal battery, the placement of the solar panel is the single most critical factor determining its nightly performance. In tropical urban environments like Singapore, tracking sun patterns can be surprisingly complex due to frequent cloud cover, heavy afternoon rainstorms, and shifting shadows cast by neighboring high-rise buildings or mature trees.
Products mentioned in this guide
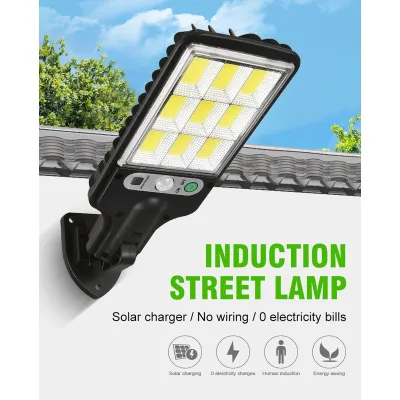
Prices are valid at publication and may change. Please refer to the product page for the latest price.
To find the best locations, spend a weekend observing how sunlight moves across your outdoor areas at different times of the day. A spot that seems bright at 9:00 AM might be completely shaded by a neighboring wall or balcony by 1:00 PM. For optimal charging, the solar panel needs direct, unobstructed sunlight rather than ambient daylight. If a panel is blocked by roof eaves, dense foliage, or adjacent structures, the battery will struggle to reach a full charge, leading to weak illumination or premature shut-offs during the night.
While maximizing sun exposure is vital, you must balance this requirement with your actual lighting needs. Identify the high-traffic, vulnerable, or dark zones around your home that genuinely require motion-activated lighting for safety, security, and convenience. Typical key zones include driveways, narrow side pathways, back alleys, outdoor stairwells, and main entryways.
When these target zones do not align with sunny spots, you must choose your fixture type carefully. This is where the distinction between integrated and split-design solar lights becomes crucial:
- Integrated Solar Lights: These units feature the solar panel and the light fixture in a single, combined housing. They are highly compact and easy to install, but they require the entire unit to be mounted in a spot that receives direct sunlight. They are ideal for open areas like fence lines, exposed exterior walls, and unshaded garden pathways.
- Split-Design Solar Lights: These systems separate the solar panel from the light fixture, connecting them via a weatherproof cable. This allows you to mount the solar panel high up on an unshaded roof or wall where it can harvest maximum sunlight, while positioning the actual light fixture in a shaded porch, under a deep carport, or inside a dark entryway.
Before finalizing your purchase, always check the manufacturer’s specified charging requirements and battery capacity. Ensure the chosen installation site can provide enough daily sunlight to satisfy the fixture’s charging cycle, allowing the battery to sustain the light’s expected nightly runtime even after an overcast or rainy afternoon.
Map Out Sensor Detection and Solar Light Coverage Angles
Once you have identified your sun-exposed areas and lighting zones, you must map out how the fixture’s sensor and light beam will interact with the physical environment. Most modern solar motion sensor lights utilize passive infrared (PIR) sensors, which detect changes in infrared radiation when warm objects—such as people, cars, or animals—move across their field of view.

The detection area of a PIR sensor is shaped like a three-dimensional cone extending outward from the lens. The effective range and angle of this cone vary significantly between models, so you must consult your specific product’s manual for exact detection distances and coverage angles. If you place a light too far from the path of travel, the sensor may fail to trigger when someone approaches. Conversely, placing it too close to a high-traffic boundary can cause the light to turn on constantly, rapidly draining the battery.
Minimizing false triggers is essential for maintaining both battery life and neighborly harmony. When planning your placement, aim to position the sensor away from busy public pavements or shared residential corridors where passersby will trigger the light unnecessarily. Additionally, avoid angling the sensor toward swaying tree branches, tall grass, or dense shrubbery that can mimic motion when wind blows.
Other common environmental triggers include air conditioning condenser exhausts or outdoor dryer vents, as sudden blasts of warm air can easily fool a PIR sensor. You should also consider areas with frequent small animal activity, such as stray cat pathways or bird nesting sites, and adjust the sensor’s field of view accordingly.
You must also match the light’s physical beam angle with the layout of the space you want to illuminate. A wide floodlight beam (typically 120 degrees or wider) is excellent for broad areas like driveways or backyards, as it distributes light evenly to eliminate dark corners. A narrow spotlight beam (around 45 to 60 degrees) is better suited for highlighting specific features, such as a lockset on a door or a set of garden steps, without casting excessive glare into neighboring windows.
If your ideal placement sits close to a property boundary, look for fixtures that include physical sensor hoods or adjustable shields. These accessories allow you to physically block a portion of the sensor’s lens, narrowing its horizontal detection angle so it only triggers when someone enters your private property rather than when a neighbor walks past their own gate.
Determine the Ideal Mounting Height and Panel Tilt
To maximize both sensor sensitivity and solar energy collection, you must mount the fixture at the correct height and adjust the solar panel to the optimal angle. For most residential outdoor applications, the recommended mounting height for a solar light is between 2 and 3 meters from the ground.
Mounting the fixture within this height range ensures that the PIR sensor can project its detection cone downward at an effective angle, covering a wide path while remaining high enough to prevent tampering, vandalism, or accidental damage. If you mount the light too high—for example, above 3.5 meters—the sensor’s sensitivity to lateral movement directly below the light decreases significantly, meaning a person might have to walk deep into the zone before the light activates. Furthermore, mounting too high disperses the light beam too widely, reducing the brightness on the ground.
On the other hand, mounting the light too low (under 1.8 meters) restricts the sensor’s detection range, creating blind spots. It also increases the risk of direct glare in the eyes of anyone approaching, which can be temporarily blinding and unsafe on stairs or uneven pathways.
For the solar panel itself, the tilt angle is critical for long-term efficiency. In equatorial regions like Singapore, which sit very close to the equator, solar panels do not require steep angles to track seasonal sun paths. Instead, the primary purpose of tilting the panel is to facilitate self-cleaning and water runoff.
A slight tilt angle of approximately 10 to 15 degrees is generally recommended for equatorial installations. This minor slope ensures that heavy tropical downpours will naturally wash away accumulated dust, bird droppings, and atmospheric soot from the glass surface, preventing a buildup that would otherwise block sunlight and degrade charging efficiency over time. If you are installing an integrated model, pay close attention to the manufacturer’s specific angle guidelines to balance the downward direction of the light with the upward exposure of the solar panel.
Prepare for Safe and Weatherproof Installation
Installing outdoor fixtures requires careful preparation to ensure structural stability and long-term weather resistance. Before beginning any drilling or mounting, check the applied product’s label and your home’s exterior wall manufacturer instructions. If instructions conflict, the material is unidentified, or the intended use is not covered by the product’s manual, stop and consult the manufacturer or a qualified professional to avoid damaging your property or voiding the product warranty.
Identify the material of the mounting surface—such as concrete, brick, plaster, timber, or metal cladding. Different materials require specific anchors, screws, and drilling techniques to support the weight of the fixture and withstand strong wind loads during storm seasons. Make sure to verify the fixture’s dimensions, weight limit, and electrical certifications (such as IP ratings) to confirm it is fully rated for an outdoor, wet environment.
Prior to drilling any holes, it is absolutely vital to check for hidden hazards. Always use a reliable stud finder or wall scanner to check for hidden electrical wiring, water pipes, or structural reinforcements behind the exterior wall. If you are mounting the light onto a shared wall, a boundary fence, or near utility meters, double-check your property lines and local regulations to avoid structural disputes or utility damage.
Because these lights will be exposed to intense tropical heat and heavy rainfall, proper weatherproofing is essential to prevent water damage and electrical failure. After drilling your mounting holes and inserting the wall plugs, apply a small bead of high-quality, outdoor-grade silicone sealant around the holes and the back of the mounting bracket. This creates a watertight barrier that prevents rain from seeping into the wall cavity or behind the fixture.
If you are using a split-design model, ensure the cable connecting the panel to the light has a waterproof screw-cap connector. Secure any excess cable with UV-resistant cable clips to prevent it from flapping in the wind or sagging over time. If your installation involves connecting to any existing fixed wiring or home automation systems, ensure you isolate the power supply at the main circuit breaker before touching any wires.
Always recognize the boundaries of a do-it-yourself (DIY) project. If your planned installation requires working at significant heights on tall ladders, complex facade drilling, or fixed electrical wiring, stop and hire a qualified professional. Additionally, if your property is part of a managed condominium or estate where exterior modifications are tightly regulated, check with your managing agent or MCST before mounting any fixtures to ensure compliance with estate guidelines.
Test the Setup and Plan for Routine Maintenance
After successfully mounting your solar light, you must test the system to fine-tune its performance. Wait until dusk to conduct a comprehensive nighttime walk-test. Walk toward the light from various directions and angles to verify the exact boundaries of the sensor’s trigger zone.
If your model features adjustable dials for sensitivity (SENS), light duration (TIME), or ambient light threshold (LUX), adjust these settings during your walk-test. Set the sensitivity high enough to detect human movement reliably, but low enough to ignore small wind-blown debris. Adjust the light duration to your preference—typically 30 to 60 seconds is sufficient for security lighting without excessively draining the battery. Ensure the light does not spill over into your neighbor’s bedroom windows or create distracting glare on public pathways.
To keep your solar light operating at peak efficiency, establish a simple, routine maintenance schedule:
- Clean the Solar Panel: Every few months, gently wipe the solar panel's glass cover with a soft, damp microfiber cloth. Remove any accumulated dust, pollen, bird droppings, or salt residue, as even a thin layer of grime can reduce solar conversion efficiency by 20% or more. Avoid using abrasive sponges or harsh chemical cleaners that could scratch the protective coating.
- Inspect the Housing: Check the light lens for any signs of internal moisture, condensation, or insect infestation. If water has penetrated the housing, turn off the unit, dry it thoroughly, and check if the seals need resealing or if the product is eligible for a warranty replacement.
- Monitor Battery Performance: Over several years of continuous outdoor exposure, rechargeable batteries naturally lose their capacity. If you notice the light turns off much earlier in the night than it used to, or if the light appears dim despite sunny daytime conditions, consult your product manual for battery replacement instructions. Always use the exact battery type and specification recommended by the manufacturer to maintain safety and prevent damage.
Frequently Asked Questions (FAQ)
Can solar motion sensor lights work effectively in heavily shaded areas?
Solar motion sensor lights cannot work effectively if the solar panel is placed in a heavily shaded area, as they require direct, unobstructed sunlight to charge their internal batteries. If a panel is constantly shaded by deep roof eaves, dense tree canopies, or high-rise shadows, the battery will not receive enough energy to power the light throughout the night. For shaded locations, it is highly recommended to use a split-design solar light, which allows you to mount the solar panel in a sunny spot on your roof or wall while running a cable to the light fixture in the shade. Alternatively, if no direct sunlight is available anywhere nearby, you should consider hardwired or battery-operated outdoor lighting solutions instead.
How do I stop my solar light from turning on every time a car passes on the street?
To prevent your solar light from constantly triggering when vehicles or pedestrians pass on a public street, you can adjust the physical positioning and settings of the sensor. If your light model includes a sensitivity (SENS) dial, turn it down slightly to reduce the detection range. You can also physically tilt or angle the sensor downward and away from the street, focusing its detection cone strictly on your private driveway or pathway. For models without adjustable dials, you can apply a physical barrier, such as a sensor hood or a small piece of dark adhesive tape, over a portion of the PIR sensor lens to narrow its horizontal field of view and block signals coming from the direction of the road.
Community discussion
Share your experience or ask a question. Comments are reviewed before publication.