
Replacing a worn-out or damaged gu10 holder is a highly practical way to restore your spotlight, track light, or recessed downlight fixture without buying a completely new light fitting. Over time, the high heat generated by halogen bulbs or even the continuous operation of LED bulbs can degrade the plastic or ceramic casing of a lamp holder, leading to loose connections, intermittent flickering, or total failure. While this task is highly manageable for a competent DIY enthusiast, working with mains electricity demands absolute precision, the right tools, and an unwavering commitment to safety.
By taking a systematic approach to replacing this minor but critical component, you can extend the lifespan of your existing light fixtures, maintain electrical safety, and avoid the unnecessary expense of replacing entire light fittings. This guide provides a detailed, step-by-step walkthrough of the replacement process, tailored to standard residential electrical systems.
Safety First: Power Isolation and When to Call a Professional
Working with residential electrical systems in Singapore involves dealing with 230V mains electricity, which carries severe risks of electrical shock, severe burns, and electrical fires if handled incorrectly. Before attempting any physical work on a light fixture, you must establish strict safety boundaries. Never rely solely on the wall switch to cut power to the fixture, as wall switches often only disconnect the Live wire, leaving the Neutral wire active, or the switch itself could be incorrectly wired.
Products mentioned in this guide
![[5 PCS Bundle] GU10 Bulb Holder GU 5.3 MR16 Lamp Holder Base](https://img.lazcdn.com/g/p/5f0d2811482003ad2aca792aa23b3857.jpg_400x400q80.jpg_.webp)
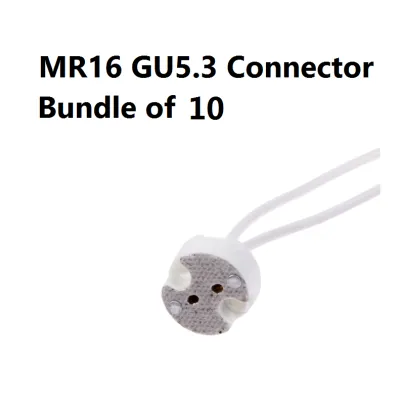
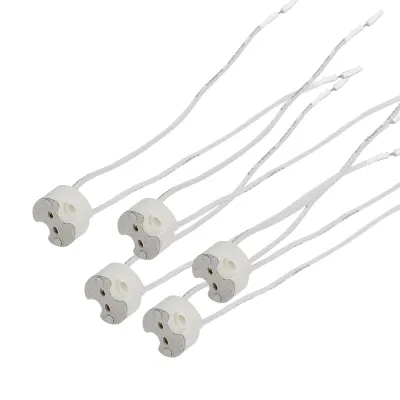
Prices are valid at publication and may change. Please refer to the product page for the latest price.
The mandatory first step for any electrical maintenance is to isolate the circuit at your home’s main distribution board, commonly referred to as the DB box. Locate the miniature circuit breaker (MCB) that controls the lighting circuit for the room you are working in and switch it to the “Off” position. If your DB box is not clearly labeled, or if you want to be absolutely certain, you can temporarily switch off the main incoming circuit breaker, though this will cut power to your entire home.
Once you have switched off the breaker, you must verify that the circuit is truly dead before touching any wires. Use a reliable, functioning non-contact voltage tester at the light fixture itself. Bring the tester close to the outer casing of the fixture, the bulb base, and any accessible wiring. A non-contact tester detects the electrical field around live wires; it should remain silent and show no active light signals if the power is successfully isolated. Always test the tester on a known live outlet first to ensure it is operating correctly before relying on it for your safety.
While a like-for-like replacement of a gu10 holder within an existing, accessible light fixture is generally a manageable task for a competent DIYer, you must recognize when a job exceeds your skill level. In Singapore, complex modifications to fixed electrical wiring must be performed by a Licensed Electrical Worker (LEW) to comply with local safety regulations. You should immediately stop and contact an LEW if you encounter brittle or crumbling wire insulation, signs of overheating such as melted plastic or discolored copper, or if you find that a metal (Class I) fixture lacks a proper earth connection. If you are ever uncertain about identifying the Live, Neutral, and Earth wires, do not guess; professional intervention is the safest course of action.
Tools and Materials Required for the Replacement
To complete the replacement smoothly and safely, gather all necessary tools and materials before you begin. Having everything on hand prevents mid-job interruptions and ensures you do not feel tempted to cut corners with makeshift tools.

The primary component you need is a high-quality replacement gu10 holder. It is highly recommended to choose a holder made of ceramic rather than plastic, as ceramic offers superior heat resistance, especially if you ever decide to use halogen bulbs instead of LEDs. Ensure the replacement holder matches the voltage of your home electrical system (230V) and fits the physical dimensions of your existing fixture housing. Look for components that carry recognized safety certifications or compliance marks to ensure they meet rigorous manufacturing standards.
For your tool kit, assemble the following essential items:
- Non-contact voltage tester: To verify power isolation.
- Insulated screwdrivers: Both Phillips and flathead types, rated for electrical work (typically marked with a 1000V safety rating).
- Wire strippers and wire cutters: To prepare clean, undamaged wire ends.
- A smartphone: Essential for taking reference photos of the wiring configuration before dismantling.
- Terminal connectors: Standard screw terminal blocks or lever-operated push-in connectors (such as Wago 221 connectors) if the new holder requires splicing into the existing mains wiring rather than direct screw-terminal connections.
Step 1: Accessing and Removing the Old GU10 Holder
With the power isolated and verified, you can now begin the physical removal of the old lamp holder. If your light fixture is installed at a height, such as on a high ceiling or track, ensure you use a stable, secure step ladder. Avoid overreaching; position the ladder directly beneath the fixture to maintain your balance.
Begin by removing the GU10 bulb from the socket. GU10 bulbs feature a two-pin twist-lock base; to remove the bulb, gently press it inward and rotate it counter-clockwise by about a quarter-turn until the pins align with the release slots, then pull the bulb straight out. If the fixture has a decorative trim ring, a glass cover, or a metal retaining spring clip holding the bulb or the inner assembly in place, carefully remove these components and set them aside in a safe spot so they do not fall or get lost.
Next, you must access the wiring compartment where the lamp holder connects to the home’s mains wiring. The location of this compartment depends on your specific fixture type. For recessed downlights, you will typically need to pull the entire spring-loaded metal canister slightly down from the ceiling cutout to access the junction box attached to the back. For track lights, the wiring is housed within the track adaptor head. For pendant lights, the connections are usually located inside the canopy flush against the ceiling.
Before disconnecting any wires, use your smartphone to take a clear, well-lit photograph of the existing wiring configuration. This photo will serve as an invaluable reference during the reassembly phase. Pay close attention to how the Live, Neutral, and Earth wires are routed and connected.
Once you have documented the setup, use your insulated screwdriver to loosen the terminal screws holding the wires in place. Gently slide the wires out of the terminals. If the wires are secured with push-in connectors, carefully release them according to the connector’s design. Gently extract the old holder from its mounting bracket or housing. Avoid pulling or tugging on the wires forcefully, as this can damage the copper conductors or tear the protective insulation inside the ceiling cavity or wall, creating a hidden fire hazard.
Step 2: Wiring and Securing the New GU10 Holder
Before connecting the new gu10 holder, inspect the exposed ends of the existing wires. If the copper strands are frayed, oxidized, or damaged, use your wire cutters to trim away the compromised section. Then, use your wire strips to carefully remove the outer insulation to expose fresh copper. Strip only the exact length recommended by the manufacturer of the new holder or terminal block—typically around 8mm to 10mm. Stripping too much insulation leaves bare copper exposed, increasing the risk of short circuits, while stripping too little can prevent the terminal clamp from securing the copper properly, leading to a loose, high-resistance connection that can overheat.
When connecting the wires to the new holder, strictly follow the manufacturer’s wiring diagram or the markings embossed on the holder casing. In Singapore, standard electrical wiring color codes are as follows:
- Live (L): Brown (or Red in older installations). Connect this to the terminal marked 'L'.
- Neutral (N): Blue (or Black in older installations). Connect this to the terminal marked 'N'.
- Earth (E): Green-and-Yellow (or solid Green in older installations). This must be connected to the earth terminal of the fixture if it is a Class I (metal) fixture.
Insert the stripped copper end of each wire fully into its corresponding terminal. Tighten the terminal screws firmly using your insulated screwdriver, but avoid overtightening, which can strip the threads or crush the copper strands. If you are using lever-operated connectors, ensure the lever snaps down completely.
Perform a critical safety check: gently tug each wire to ensure it is locked securely in place. Visually inspect the connections to confirm that no bare copper is visible outside the terminal housing and that no stray wire strands are bridging the gap between the Live, Neutral, or Earth terminals, which would cause an immediate short circuit when power is restored.
Once the electrical connections are secure, position the new holder back into the fixture housing. Align it with the original mounting brackets, screw holes, or retaining clips. Secure it firmly in place using the original hardware, ensuring that the holder sits flush, stable, and straight. Make sure that no wires are pinched or trapped between the metal parts of the fixture or the mounting bracket during this step, as pinched insulation can wear away over time and cause a ground fault.
Step 3: Reassembly and Safe Power Testing
With the new holder securely wired and mounted, you can proceed to reassemble the light fixture. Carefully tuck any excess wiring back into the junction box or ceiling cavity, ensuring the wires maintain a natural bend without sharp kinks. Reattach any decorative trim rings, glass covers, or retaining clips that you removed earlier.
Next, insert a compatible GU10 bulb into the new holder. Align the two pins on the bulb base with the larger openings in the socket, push the bulb in gently, and rotate it clockwise by a quarter-turn until you feel it lock firmly into place. Ensure the bulb sits straight and is fully seated within the fixture.
Now, you can restore power to the circuit. Head back to your main distribution board (DB box) and switch the corresponding miniature circuit breaker (MCB) back to the “On” position. If you switched off the main incoming breaker, turn that back on first.
Return to the room and turn on the wall switch to test your installation. The light should turn on instantly, providing steady, flicker-free illumination. Observe the fixture closely for a few minutes. If you notice any immediate warning signs—such as flickering, buzzing or humming sounds, a burning smell, or if the circuit breaker immediately trips and cuts power—turn the wall switch off instantly and isolate the power at the DB box before investigating further.
Troubleshooting Common Post-Installation Issues
If your newly installed GU10 light does not function perfectly right away, remain calm and systematic. Most post-installation issues stem from minor, easily correctable errors. Always remember to isolate the power at the DB box before touching any part of the fixture to troubleshoot.
If the bulb does not turn on at all, start with the simplest possibilities. Verify that the main circuit breaker at the DB box is switched on and has not tripped. Next, ensure the GU10 bulb is fully twisted and locked into the new holder; a loose bulb will not make proper electrical contact. If the bulb is secure, turn off the power, remove the bulb, and use a different, known-working bulb to rule out a blown or defective lamp. If the issue persists, isolate the power, open the connection compartment, and verify that the terminal screws are tight and clamping down on the bare copper rather than the wire insulation.
Flickering or buzzing sounds are often related to dimming systems. If your GU10 bulb is an LED and is connected to a wall dimmer switch, ensure that both the bulb and the dimmer switch are specifically rated as compatible with each other. Non-dimmable LED bulbs installed on a dimming circuit will flicker or buzz constantly and can sustain permanent damage. Additionally, a loose Neutral wire connection in the terminal block can cause intermittent electrical contact, leading to flickering; check and tighten all terminal connections to resolve this.
If restoring power or turning on the wall switch causes the circuit breaker to trip instantly, this indicates a short circuit or a ground fault. A short circuit occurs when the Live wire directly touches the Neutral wire or the metal housing of the fixture. Leave the power off at the DB box. Carefully dismantle the fixture and inspect the wiring. Look for exposed copper wires touching each other, a stray wire strand bridging the terminals, or insulation that has been pinched and cut by a metal bracket. Correct the wiring fault, ensure proper insulation, and reassemble before attempting to turn the power back on.
Frequently Asked Questions (FAQ)
Do I need to connect an earth wire to my new GU10 holder?
Whether you need to connect an earth wire depends entirely on the electrical safety class of your light fixture. Class I fixtures feature conductive metal housings and must be connected to the earth wire of your home’s electrical system to prevent the metal chassis from becoming live in the event of an insulation fault. Class II fixtures, often referred to as double-insulated, are constructed with non-conductive plastic housings or reinforced insulation that prevents any single fault from causing an electric shock; these do not require an earth wire. Check the symbols on your fixture: a symbol of three horizontal lines with a vertical line on top indicates an earth connection is required, while a square-within-a-square symbol indicates Class II double-insulation. If your fixture is Class I but your ceiling box lacks an earth wire, stop the installation immediately and consult a Licensed Electrical Worker (LEW).
Can I replace a GU10 holder with a different bulb base type?
Replacing a GU10 holder with a different bulb base type, such as an E27 screw base or an MR16 bi-pin base, is highly discouraged and generally unsafe. GU10 holders are designed to operate directly on 230V mains voltage, whereas MR16 bulbs typically operate on low-voltage (12V) alternating current and require a separate step-down transformer. Swapping to an MR16 base without installing a compatible transformer will destroy the bulb instantly and poses a major fire hazard. Furthermore, larger bases like E27 will not physically fit within the compact housing or reflector of a dedicated GU10 spotlight fixture. To maintain the fixture’s safety certifications, thermal ratings, and physical compatibility, always replace a damaged holder with an identical, high-quality GU10 holder.
Community discussion
Share your experience or ask a question. Comments are reviewed before publication.