
Replacing a salt lamp cable is a practical way to restore your decorative light source, but because these lamps operate on household mains voltage and are made of moisture-attracting salt, safety must be your top priority. Whether your existing cable has suffered from physical wear, pet damage, or corrosion from salt moisture, you can successfully restore your lamp’s function. The process involves either swapping out the entire pre-assembled cord set or carefully rewiring a raw cable into the existing lamp holder. By understanding the electrical safety boundaries and following a systematic approach, you can complete this repair without creating electrical hazards.
Assessing Your Cable Type and Electrical Safety Boundaries
Before beginning any electrical work, you must identify the specific design of your salt lamp’s wiring. Most commercial salt lamps use a pre-assembled cord set, which features a molded plug, an inline dimmer switch, and a lamp holder equipped with metal spring clips that slide directly into the hollow base of the salt crystal. Other models feature a custom wooden or plastic base where a raw cable is threaded through a central channel and wired directly into a screw-terminal lamp holder. Knowing which setup you have determines whether you will perform a simple component swap or a more detailed rewiring task.
Working with 230V mains electricity in Singapore requires strict caution and a clear understanding of your limits. If your lamp’s inline dimmer switch is a sealed, molded unit that has failed, or if the cable is frayed or cracked near the plug, attempting to patch the wire with electrical tape is highly dangerous. Splicing raw wires without proper terminal blocks or insulation can lead to short circuits, electrical shocks, or electrical fires. In these situations, replacing the entire pre-assembled cord set is the significantly safer and more reliable route for any DIYer.
Products mentioned in this guide
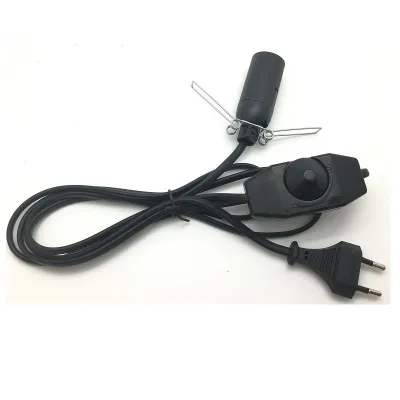
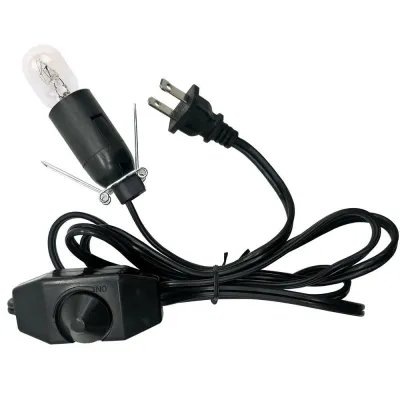
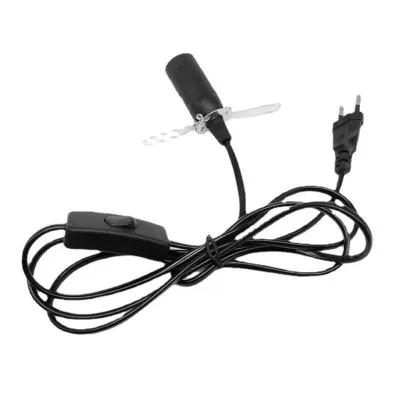
Prices are valid at publication and may change. Please refer to the product page for the latest price.
The physical properties of Himalayan salt lamps add unique environmental risks that you must account for during this repair. Salt is highly hygroscopic, meaning it actively absorbs water vapor from the surrounding air. In humid climates like Singapore, this moisture can accumulate on the surface of the salt crystal and run down to the base in a process known as “weeping.” Because water conducts electricity, any weeping that reaches active electrical connections will cause a short circuit or ground fault. Therefore, you must ensure that your replacement components are completely dry, properly sealed, and kept away from moisture accumulation.
Essential Tools and Materials for the Replacement
Having the correct tools and materials ready before you begin ensures that the replacement process is smooth, safe, and efficient. Working with the wrong tools can damage the delicate plastic terminals or strip the small screws holding the lamp base together.

Essential Tools:
- Screwdrivers: A small Phillips or flathead screwdriver is typically required to remove the mounting screws on the wooden or plastic base of the lamp.
- Wire Strippers: These allow you to remove the outer insulation of the cable cleanly without nicking or cutting the copper strands inside.
- Wire Cutters: Useful for trimming the cable to the desired length and cutting away damaged sections of the old cord.
- Non-Contact Voltage Tester: This tool is essential for verifying that there is absolutely no electrical current running through the lamp before you begin handling the wires.
Required Materials:
- Replacement Salt Lamp Cable: You must select a high-quality salt lamp cable that is compatible with Singapore's electrical standards. Ensure the cable features a Type G three-pin plug, which is the standard plug type used locally. The cable should also include an inline dimmer switch if you want to adjust the brightness of your lamp, and it must have a current rating appropriate for the bulb wattage, which typically ranges from 15W to 25W.
- Replacement Bulb (Optional): If your old bulb was damaged by a short circuit or is old, keep a spare E14 or E12 bulb handy.
Protective and Preparatory Gear:
- Safety Glasses: Protect your eyes from any small salt fragments or wire clippings that may fly off during the process.
- Soft Dry Towel: A thick towel provides a cushioned, non-slip surface to protect the heavy, brittle salt crystal from chipping or scratching.
- Dry, Non-Conductive Work Surface: Always work on a dry wooden or plastic table, and avoid working near sinks, damp floors, or metal surfaces.
Step-by-Step Guide to Replacing the Cable
Replacing the cable requires a methodical approach to ensure that every connection is secure and insulated. Follow these steps carefully to dismantle, wire, and reassemble your salt lamp safely.
Step 1: Preparation and Safe Disassembly
First, completely disconnect the salt lamp from the wall outlet. Never rely solely on the inline switch to turn off the power, as current still flows through the cord up to the switch. If the lamp has been turned on recently, allow the bulb and the socket to cool completely for at least 15 minutes to prevent painful burns.
Next, spread your soft, dry towel flat on your work surface. Carefully lift the heavy salt crystal, turn it upside down, and rest it securely on the towel. The towel cushions the brittle salt, prevents it from rolling, and protects both the crystal and your work surface from scratches.
Locate the screws securing the wooden or plastic base to the bottom of the salt crystal. Using the appropriate screwdriver, carefully remove these screws and place them in a small container so they do not get lost. If your lamp uses a spring-loaded metal clip instead of screws, gently squeeze the clips together and slide the base assembly out of the hollow cavity of the salt crystal. Note the orientation of the base and the path of the cable exit groove.
Step 2: Removing the Old Cable
The method for removing the old cable depends on whether you are replacing the entire pre-wired cord set or rewiring a raw cable into a reusable socket.
If you are replacing the entire pre-assembled cord set, the removal is very simple. Squeeze the spring clips or unscrew the old lamp holder from the base plate, and pull the entire old cord set out of the base. You can then set this old assembly aside for disposal.
If you are rewiring a raw cable into a reusable socket, you must access the internal terminals. Carefully pry open or unscrew the plastic casing of the lamp holder to expose the screw terminals inside. Use your screwdriver to loosen the terminal screws, then gently pull the old wires out of their slots. Take a quick photo of the wiring configuration with your phone before disconnecting so you have a clear reference for the new installation.
Once the old components are removed, perform a thorough inspection of the socket and the base. Look closely for signs of heat damage, such as melted plastic, discolored terminals, or brittle wire insulation. Also, check for salt corrosion, which appears as a white, crusty residue. If you find any signs of thermal damage or salt corrosion, do not reuse the socket; discard it immediately and replace the entire cord set to prevent a fire hazard.
Step 3: Wiring and Installing the New Cable
To wire the new cable, you must first prepare the wire ends. Use your wire strippers to remove about 2 centimeters of the outer protective sheath from the new cable, taking care not to nick the inner wire insulation. Then, strip away approximately 6 millimeters of the insulation from the individual wires to expose the bare copper strands. Twist the exposed copper strands of each wire tightly between your fingers to prevent them from fraying.
Insert the exposed copper ends into the corresponding terminals of the lamp holder. In Singapore, standard electrical wiring color codes must be followed: connect the Brown wire (Live) to the terminal marked ‘L’ and the Blue wire (Neutral) to the terminal marked ‘N’. If your lamp base is made of metal and requires grounding, you must connect the Green/Yellow wire (Earth) to the terminal marked with the earth symbol. If your lamp is a Class II double-insulated appliance with a plastic housing, it will only use the Live and Neutral wires.
Tighten the terminal screws firmly with your screwdriver. Inspect the connections closely to ensure that no stray copper strands are sticking out of the terminals. Even a single loose strand can touch an adjacent terminal or metal part, creating a direct short circuit or a shock hazard.
Locate the cable grip (or cord grip) inside the lamp holder or base. Secure the cable firmly within this grip and tighten the grip screws. The cord grip is a critical safety feature that prevents any external pulling or tugging on the cable from transferring tension to the delicate electrical terminals inside.
Step 4: Reassembly and Securing the Base
Carefully route the new cable through the designated cable exit groove in the wooden or plastic base. Ensure the wire is positioned neatly and is not pinched or compressed between the base and the salt crystal, as a pinched wire can wear down and expose live copper over time.
Align the base with the mounting holes on the bottom of the salt crystal. Reinsert the screws and tighten them slowly and evenly. Do not overtighten the screws; the salt crystal is brittle and can easily crack under excessive or uneven pressure.
Turn the lamp upright and place it on a flat, stable surface. Verify that the lamp sits completely level and does not wobble, and check that the cable exits freely from the bottom without lifting the base.
Testing and Post-Replacement Safety Verification
Before powering on the lamp, perform a final visual inspection. Ensure that the cable is secure, the base is stable, and no bare copper wiring is visible at any point.
Plug the Type G plug into the wall outlet and turn on the wall switch. Turn on the inline dimmer or switch on the cable. If you have a non-contact voltage tester, you can pass it near the outer plastic housing of the base to verify there is no stray voltage leaking onto the exterior surfaces of the lamp.
Leave the lamp on and observe it closely for the first 15 to 20 minutes. Watch for any flickering, which indicates a loose terminal connection. Feel the cable, the plug, and the inline dimmer switch; they should remain cool to the touch. If you notice any unusual heat, a burning smell, or flickering, turn off the power at the wall immediately, unplug the lamp, and recheck your connections.
Because Singapore experiences high relative humidity year-round, always place your salt lamp in a dry, well-ventilated, or air-conditioned room. Salt lamps are naturally hygroscopic; when turned off, they absorb ambient moisture and may begin to “weep.” If water drips down the crystal and enters the electrical base, it creates a severe shock and short-circuit hazard. Keeping the lamp turned on regularly helps keep the salt crystal warm and dry, evaporating any collected moisture safely.
When to Replace the Entire Cord Set Instead
For many users, purchasing a pre-assembled salt lamp cord set is a much safer, faster, and more cost-effective alternative to rewiring a raw cable. A pre-assembled set comes with the molded Type G plug, inline dimmer switch, cable, and bulb holder pre-wired and sealed in the factory, completely eliminating the risks associated with DIY mains wiring.
If you decide to buy a pre-assembled cord set, you must verify compatibility before purchasing. Measure the diameter of the opening in your wooden or plastic base, and check the hollow cavity depth of your salt crystal to ensure the bulb holder and bulb will fit inside comfortably. Additionally, confirm the bulb fitting size—most salt lamps use E14 (small Edison screw) or E12 fittings—and ensure the replacement set matches your existing bulb.
Always prioritize safety. If you feel unsure about handling 230V mains electricity, or if your salt lamp continues to trip your home’s circuit breaker (RCD/ELCB) even after a cable replacement, stop using the lamp immediately. Consult a licensed electrician in Singapore to inspect the appliance or professional electrical installations.
Community discussion
Share your experience or ask a question. Comments are reviewed before publication.