
A plug-in bulb holder offers a highly convenient, flexible way to add task or accent lighting to any room without the need for complex, permanent electrical rewiring. However, because these fixtures rely on exposed cords, temporary mountings, and standard wall outlets, safety must be your primary focus during setup and everyday operation. To safely use a plug-in bulb holder, you must securely anchor the physical weight of the fixture, route the cord away from physical hazards, and strictly match the bulb’s wattage to the holder’s rated limit.
By taking the time to plan your layout, inspect your equipment, and manage your cables properly, you can enjoy beautiful, functional lighting while keeping your home completely safe from electrical and physical hazards.
What to Check Before Installing a Plug-In Bulb Holder
Before you begin mounting your new lighting fixture, gathering the correct tools and conducting a thorough safety inspection will prevent damage to your walls and ensure a secure, long-lasting setup.
Products mentioned in this guide
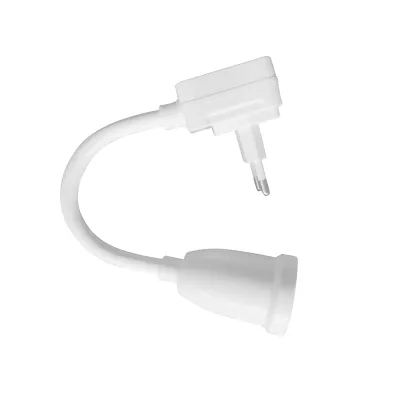
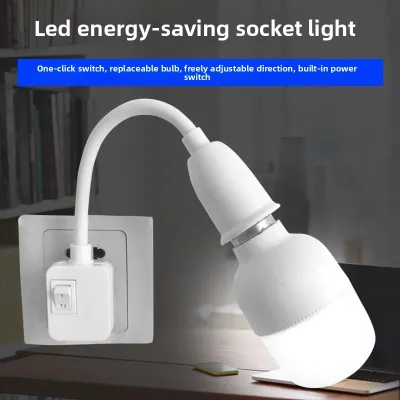
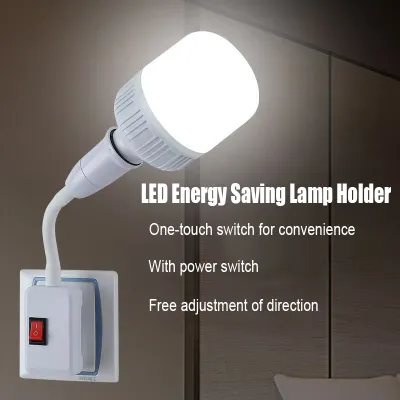
![[SG FREE ] 1Pc LED Light Bulb E27 Socket Lamp Base Holder Adapter Converter With Switch EU UK Plug Energy Saving Lamp F](https://img.lazcdn.com/g/p/65c09ebe9d4306801b9cfad1c99d86a0.jpg_400x400q80.jpg_.webp)
Prices are valid at publication and may change. Please refer to the product page for the latest price.
For physical installation, you will need a few basic tools depending on your wall and ceiling types. In Singapore, residential walls and ceilings are typically constructed from reinforced concrete or solid brick. To mount hooks securely in these materials, you will need a hammer drill, masonry drill bits, high-quality plastic wall plugs, and compatible swag hooks. If you are mounting to a plasterboard partition or a false ceiling, you must use spring-loaded toggle bolts or specialized hollow-wall anchors instead. Additionally, gather a measuring tape, a pencil, and a set of cable management clips to secure the cord later.
Once your tools are ready, perform a detailed visual and physical inspection of the plug-in bulb holder itself. Run your fingers along the entire length of the power cord to check for factory defects, deep kinks, cuts, or exposed copper wiring. Examine the plug housing carefully to ensure it is sturdy and free of cracks. In Singapore, standard household appliances must use a Type G three-pin plug that complies with local safety regulations. If you notice any signs of wear, fraying, or exposed wires, do not use the fixture. Do not attempt to splice the cord or wire a new plug yourself; instead, discard the damaged unit or consult a qualified professional.
Finally, verify that the electrical specifications of the plug-in bulb holder match your local household supply. Singapore’s standard domestic electrical supply operates at 230 volts AC with a frequency of 50 hertz. Check the label on the bulb holder or the product packaging to ensure it is rated for this voltage. Using an imported fixture designed solely for 110-volt systems on a 230-volt supply without a proper voltage transformer is an extreme hazard that can lead to immediate equipment failure, electrical shocks, or fire.
Step-by-Step Installation Guide for Plug-In Fixtures
Installing a plug-in light fixture requires a systematic approach to ensure that the physical weight of the lamp is fully supported and that the electrical components are never subjected to physical tension.

Step 1: Plan the layout Start by measuring the exact distance from your chosen wall outlet to the precise spot on the ceiling or wall where you want the light to hang. When calculating this path, always allow for a generous amount of slack in the cord. The cable must never be pulled taut or stretched tightly between the outlet and the hanging point, as this puts dangerous physical stress on the internal electrical connections. Ensure the hanging height of the bulb holder clears any pathways to prevent people from accidentally bumping into it.
Step 2: Install hooks Mark the mounting spot on your ceiling or wall with a pencil. For concrete surfaces, drill a hole using a masonry bit that matches the diameter of your plastic wall plug. Insert the wall plug fully into the hole so it sits flush with the surface, then screw the swag hook tightly into the plug. If you are working with a false ceiling, drill a hole wide enough to insert the folded wings of a toggle bolt, push the bolt through, and tighten the hook until the wings grip the backside of the plasterboard firmly.
Step 3: Hang and route Hang the fixture’s pendant loop, chain, or dedicated collar onto the installed hook. The physical weight of the bulb holder, the bulb, and any decorative shade must be borne entirely by this hook or support chain. Never allow the electrical cord itself to support the weight of the fixture, as this will eventually pull the wires out of their terminals and cause a short circuit. Once the weight is safely supported, route the remaining cord neatly along the ceiling and down the wall toward the outlet, securing it at regular intervals.
Step 4: Connect and test Before plugging the fixture into the wall, ensure that the power switch on the wall socket is turned completely off. Insert the Type G plug firmly into the socket, ensuring a snug fit. Once the plug is secure, turn on the wall switch and use the in-line cord switch or wall switch to test the light. Always isolate the power by turning off the wall socket switch before making any physical adjustments to the cord or hanging position.
How to Match Bulb Wattage and Base Types Safely
Selecting the correct light bulb for your plug-in holder is critical to preventing overheating, electrical faults, and premature failure of the fixture.
To begin, locate the maximum wattage rating printed directly on the collar of the bulb holder or listed in the manufacturer’s instruction manual. This rating is typically expressed as a maximum limit, such as “MAX 40W” or “MAX 60W”. This limit represents the maximum amount of thermal energy the holder’s materials can safely dissipate without melting or degrading. You must strictly adhere to this limit and never install a bulb that draws more power than the holder is rated to handle.
We highly recommend using LED bulbs rather than traditional incandescent bulbs for plug-in holders. LEDs are exceptionally energy-efficient and convert the vast majority of their energy into light rather than heat. This low heat emission is particularly crucial if you plan to pair your bulb holder with an enclosed paper or fabric shade, or if the fixture is positioned near heat-sensitive materials like wooden shelves or curtains. For example, a 9-watt LED bulb can produce the same light output as a 60-watt incandescent bulb while running cool to the touch, significantly reducing any fire risk.
Additionally, you must verify the physical compatibility of the bulb’s base with the socket of your holder. The two most common bulb base types found in Singapore are E27 (Edison screw, 27mm diameter) and B22 (Bayonet cap, 22mm diameter). Ensure you purchase a bulb that matches your holder’s socket precisely. Forcing an incorrect bulb base into a socket, or using cheap, uncertified base adapters, can result in poor electrical contact, localized electrical arcing, and severe overheating.
Exceeding the maximum wattage limit or using incompatible components poses a severe safety risk. Over time, the excessive heat generated by an oversized bulb will melt the plastic socket housing, degrade the rubber or plastic insulation on the electrical cord, and expose live wires. This degradation can lead to short circuits, electrical shocks, and is a leading cause of residential electrical fires.
Cord Management and Everyday Safety Practices
Proper cord management is essential not only for the visual neatness of your space but also for mitigating serious tripping hazards and preventing wear on the electrical cable.
To secure the cord safely against your walls and ceiling, use dedicated adhesive cable clips, paintable cord covers, or plastic surface raceways. These accessories keep the wire running flat and taut against the wall, preventing loops of loose cable that could catch on limbs, furniture, or passing pets. When installing clips, ensure they hold the wire snugly but do not pinch or compress the outer insulation sleeve of the cable.
There are several critical safety rules regarding cord routing that you must follow in your home. Never run electrical cords under rugs, carpets, or heavy furniture. Walking over a covered cord crushes the internal copper strands over time, while the rug traps heat around the cable, creating a hidden fire hazard. Additionally, keep all electrical cords away from high-traffic walkways, sliding doors where they can be pinched, and heat sources such as kitchen stoves, ovens, or portable heaters.
You must also consider the environmental conditions of the room where the plug-in holder is used. Singapore’s tropical climate brings high relative humidity, which can affect electrical connections. Standard plug-in bulb holders are typically rated IP20, meaning they are designed strictly for dry, indoor environments. Never use these standard fixtures in moisture-prone areas like bathrooms, kitchens near sinks, or open outdoor balconies. If you require lighting in these areas, you must use fixtures specifically rated for damp or wet locations with appropriate IP (Ingress Protection) ratings, such as IP44 or higher.
To make daily operation safer and more convenient, avoid repeatedly pulling the plug out of the wall socket to turn the light off. This physical pulling strains the plug pins and loosens the internal contacts of the wall outlet over time. Instead, plug your fixture into a wall socket that features an integrated physical switch, use a cord with a built-in in-line switch, or connect the fixture to a certified smart plug. This allows you to control the light easily via a switch, smartphone app, or voice commands without causing mechanical wear to the electrical outlet.
Final Safety Checks and Maintenance
Once your plug-in bulb holder is fully installed and the bulb is fitted, performing a final series of safety checks will ensure the setup is stable, secure, and completely safe for daily use.
Begin with a comprehensive visual check of the entire installation. Walk along the path of the cord to confirm that no copper wire is exposed and that the cable is not pinched, tightly bent, or compressed by any mounting hooks or wall clips. Ensure that the cord hangs naturally and does not put any angled tension on the plug or the bulb holder.
Next, conduct a physical check of the mounting stability. Give the ceiling or wall hooks a gentle tug to verify they are firmly anchored and can easily support the load of the fixture. Check the wall outlet to ensure the plug sits flush and firmly within the socket without sagging or pulling away under its own weight. If the plug feels loose in the socket, the outlet contacts may be worn, and you should use a different outlet or have a professional replace the socket.
Finally, perform an operational burn-in test. Turn the light on and let it run continuously for 15 to 20 minutes. During this time, observe the light for any flickering or buzzing sounds. After 20 minutes, carefully place your hand near the bulb holder and the plug to check for unusual warmth. While a slight warmth is normal, the holder, cord, and plug should never feel hot to the touch, and there must be absolutely no burning plastic smells.
If you notice any flickering, buzzing, excessive heat, or unusual odors during this operational test, you must take immediate action. Turn off the wall socket switch immediately, unplug the fixture from the wall, and do not use it again. Reassess your installation to check for loose bulbs or incorrect wattages, and if the issue persists, consult a licensed electrical professional to inspect the fixture or your home’s wiring.
Frequently Asked Questions (FAQ)
Can I convert a plug-in bulb holder to a hardwired fixture?
While it is physically possible to cut off the plug of a bulb holder and strip the wires to connect them directly to a ceiling junction box, doing so is highly discouraged for several safety and compliance reasons. Modifying the fixture in this manner immediately voids the product’s safety certifications, such as the Singapore Safety Mark, as well as any manufacturer warranties.
Furthermore, the flexible insulated cords used for plug-in fixtures are designed for open-air use and typically do not meet the strict insulation thickness, heat resistance, or wire gauge requirements specified by building codes for permanent wiring inside walls or ceilings. Running non-compliant cords inside ceiling voids poses a hidden fire hazard. For any permanent lighting installation, you should purchase a dedicated hardwired fixture and hire a licensed electrician to carry out the installation safely in accordance with local electrical safety standards and regulations.
Community discussion
Share your experience or ask a question. Comments are reviewed before publication.