
Setting up a UGREEN-based whole-house downlight control system in your Singapore home involves integrating UGREEN smart wall switches or in-wall relay modules with a central smart hub, allowing you to manage your traditional or smart-ready downlights via a single app. This setup transforms standard downlights into a cohesive, automated system across your living room, bedrooms, and kitchen. By choosing the right control components and ensuring proper installation, you can enjoy the convenience of smart lighting while maintaining the aesthetic appeal of your home’s interior design.
To achieve a seamless setup, you must evaluate your existing electrical infrastructure, adhere to local safety regulations, and systematically configure your smart devices. Whether you are moving into a new Housing & Development Board (HDB) Build-To-Order (BTO) flat or retrofitting an established condominium, this guide provides the practical steps needed to design, install, and automate a reliable smart lighting system.
Assessing Your Space and Choosing UGREEN Control Components
Before purchasing any smart hardware, you must evaluate your existing downlight fixtures. Standard LED downlights—which are highly common in Singaporean homes—are non-smart fixtures that rely on physical switches to cut or supply power. If you have these standard fixtures, you do not need to replace the bulbs themselves; instead, you will use UGREEN smart switches or in-wall relay modules to control the electrical circuit. If you have smart-ready fixtures that already feature built-in wireless protocols, your control strategy will focus on maintaining continuous power to the fixtures while using smart controllers to send digital commands.
Products mentioned in this guide
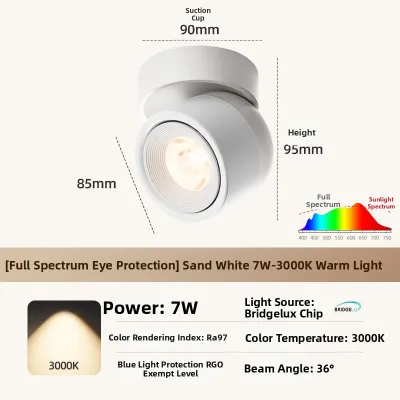
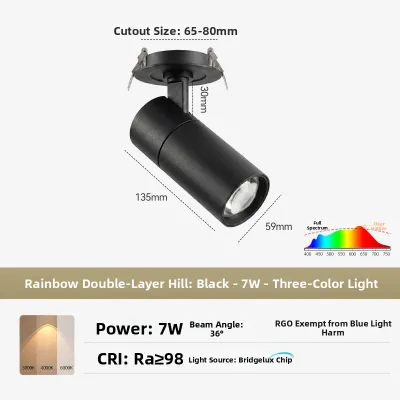
Prices are valid at publication and may change. Please refer to the product page for the latest price.
Next, select the UGREEN control devices that match your room layouts and lighting zones. UGREEN offers smart wall switches in one-gang, two-gang, and three-gang configurations, allowing you to replace traditional switch plates directly. If you prefer to keep your existing designer physical switches, UGREEN’s in-wall relay modules can be installed behind your current switch plates or inside the ceiling cavity. This choice allows you to preserve your home’s visual styling while upgrading the underlying technology.
Physical and electrical compatibility is a critical consideration for any smart home upgrade in Singapore. The local electrical grid operates at a standard voltage of 230V with a frequency of 50Hz, so you must verify that your chosen UGREEN devices are rated for these specifications. Additionally, Singaporean wall switches typically use the square British Standard format, measuring 86mm by 86mm. Ensure that the physical depth of your wall backboxes can accommodate the slightly bulkier chassis of smart switches, which often require more space than shallow mechanical switches.
Finally, plan for your system’s network architecture by incorporating a central UGREEN smart hub or compatible gateway. While individual smart devices can sometimes connect directly to Wi-Fi, a central hub using Zigbee or Bluetooth protocols is highly recommended for whole-house systems. The hub acts as a local coordinator, reducing the bandwidth load on your home router and ensuring that your automations continue to function even if your external internet connection experiences a temporary outage.
Electrical Safety and HDB Compliance in Singapore
Modifying fixed electrical wiring in Singapore is subject to strict regulatory oversight to prevent electrical hazards and ensure household safety. Under local regulations, any installation, alteration, or repair of fixed electrical wiring in HDB flats and private condominiums must be performed by a Licensed Electrical Worker (LEW) or a qualified electrician. This professional installation ensures that your smart home upgrade complies with Singapore Standard SS 638, which governs the safety of electrical installations.

Before your electrician begins any physical work, executing a strict power isolation protocol is mandatory. Locate your home’s main distribution board (DB) and switch off the miniature circuit breaker (MCB) that controls the lighting circuit for the target rooms. Never rely solely on turning off the wall switch. The electrician must use a calibrated digital multimeter or a non-contact voltage tester to verify that there is absolutely zero voltage at the switch terminals and light fixtures before handling any wires.
To facilitate a smooth installation process, prepare a checklist of essential tools and documentation. Your electrician will require insulated screwdrivers rated for electrical work, wire strippers, electrical tape, and a voltage tester. Keep the official UGREEN product manuals, wiring diagrams, and specification sheets easily accessible so the installer can verify the terminal layouts and wiring requirements unique to each smart device.
Always establish clear stop conditions during the installation process. If the electrician discovers that the existing wiring colors do not match standard Singapore electrical codes—where modern wiring uses Brown for Live, Blue for Neutral, and Green/Yellow for Earth—all work must stop until the wiring paths are professionally traced. Furthermore, if the wall backbox is structurally cracked, or if a critical neutral wire is missing and cannot be safely pulled, do not attempt to force the installation. Pause the project and consult a qualified professional to resolve these infrastructure issues.
Professional Installation of UGREEN Switches and Relays
Installing your UGREEN smart switches and ceiling relays requires systematic physical execution. While the following steps outline the technical process, all physical wiring must be completed by a qualified professional in strict accordance with the product’s official manual and local safety standards.
Replacing Mechanical Wall Switches
To begin the replacement process, the electrician will carefully unscrew the existing mechanical switch faceplate from the 86mm wall backbox. Once the switch is detached from the wall, the installer will identify and label each wire. It is crucial to distinguish the incoming permanent Live wire from the outgoing Load wires that feed power to the individual downlight groups.
Next, the electrician will connect the wires to the corresponding terminals on the UGREEN smart wall switch. Connect the incoming Live wire to the ‘L’ terminal and the Neutral wire to the ‘N’ terminal. Because smart switches contain internal wireless radios that must remain powered at all times, a stable neutral wire connection is essential. The load wires for the downlights are then secured into the output terminals.
Once the connections are secure, the electrician will gently fold the wires back into the 86mm wall box, ensuring that no wires are pinched or under tension. The UGREEN switch chassis is then screwed into the backbox. Avoid over-tightening the mounting screws, as warping the frame can interfere with the physical switch mechanism or touch sensitivity. Finally, restore power at the main distribution board and check that the switch’s physical indicator light turns on, confirming successful power-up.
Installing In-Wall Relay Modules in the Ceiling
If you prefer to keep your original mechanical wall switches for aesthetic reasons, installing UGREEN smart relay modules in the ceiling cavity is an excellent alternative. The electrician will begin by safely removing a downlight fixture from its ceiling cutout to gain physical access to the ceiling void and locate the active junction box or wiring feed.
The installer will wire the UGREEN smart relay module inline between the mains power supply and the downlight driver. The permanent Live and Neutral supply wires are connected to the input side of the relay, while the output terminals are connected directly to the downlight cluster’s power input. If you wish to maintain manual control, the physical wall switch wires are connected to the switch terminals on the relay module.
Proper heat dissipation is vital when installing smart hardware in enclosed spaces. The electrician must position the UGREEN relay module away from the direct heat sink of the downlight fixture and ensure it is not covered by thermal insulation material. Maintaining adequate clearance prevents heat buildup, protecting both the smart relay and the ceiling structure from thermal degradation over time.
Connecting Your UGREEN Hub and Pairing Devices
With the hardware securely installed, you can begin the software configuration. Place your UGREEN smart hub in a central location in your Singapore home to ensure optimal wireless coverage across all rooms. Plug the hub into a stable power outlet near your home router. Open the UGREEN smart home app on your smartphone and ensure your phone is connected to your home’s 2.4GHz Wi-Fi network, as most smart hubs do not support 5GHz bands for initial setup.
Follow the in-app prompts to add the smart hub to your account. Once the hub is online, you can begin pairing your individual downlight switches and ceiling relays. Put each UGREEN switch or relay into pairing mode, which is typically achieved by pressing and holding the physical button on the device for 5 to 10 seconds until its LED indicator flashes rapidly. In the app, select the option to add a sub-device under your hub, and wait for the system to auto-detect the flashing hardware.
After successfully pairing each device, assign clear and logical names to prevent confusion as your system grows. Instead of using default hardware codes, name your devices based on their specific location and function, such as “Living Room Center Spotlights” or “Master Bedroom Downlights.” Group these devices into virtual rooms within the app, allowing you to control entire zones with a single tap.
Finally, check for and install any pending firmware updates for your hub, switches, and relays. Manufacturers regularly release updates to improve network stability, patch security vulnerabilities, and introduce new software features. Keeping your devices updated ensures that your whole-house control system remains reliable and secure.
Designing Whole-House Lighting Scenes and Automations
Once your UGREEN devices are paired and organized, you can design customized lighting scenes and automations to match your daily routines. Start by creating basic device groups in the UGREEN app. An “All Downlights” group allows you to turn off every connected spotlight in your home with a single tap when leaving, saving energy and eliminating the need to check every room individually.
Next, design specialized scenes that adjust multiple lighting zones simultaneously. For example, you can program a “Movie Mode” scene that dims the main living room downlights to 10% while turning off the adjacent dining area lights. A “Goodnight” scene can be configured to turn off all common area spotlights while leaving a low-intensity pathway illuminated in the hallway for safety.
You can also implement time-based schedules and sensor-driven automations. Program your entryway downlights to turn on automatically at sunset and turn off at sunrise. Alternatively, link your UGREEN switches with compatible motion sensors in corridors or bathrooms to trigger the downlights at a low brightness level when motion is detected during late-night hours.
To maximize convenience, integrate your UGREEN smart ecosystem with compatible voice assistants, such as Google Assistant or Amazon Alexa, depending on regional app support in Singapore. Linking these services allows you to control your home’s spotlights using simple voice commands, providing hands-free convenience when your hands are full.
Troubleshooting Connectivity and Flickering Issues
If you experience connectivity issues where a UGREEN switch or relay frequently drops offline, begin by checking the wireless signal strength between the device and the central hub. Ensure the hub is not placed inside a closed metal cabinet or too close to large electronic appliances that cause signal interference. If necessary, reposition the hub to a more central, open location in your home, or verify that your home router’s 2.4GHz Wi-Fi band is operating stably.
Flickering downlights are a common issue when retrofitting LED lights with smart controls. First, verify that the total combined wattage of the connected LED downlights does not exceed the maximum load rating specified on your UGREEN switch or relay module. If the load is within limits, have an electrician inspect the wiring terminals for loose connections, or check if the LED downlights require a dedicated bypass capacitor to stabilize low-wattage loads.
If a physical switch becomes completely unresponsive, ensure that the power supply from the distribution board is active and that the neutral wire connection is secure. If the physical hardware appears frozen, consult the UGREEN product manual to perform a factory reset—typically by holding down the primary button for an extended period—before re-pairing it with the hub.
Frequently Asked Questions (FAQ)
Do I need a neutral wire for UGREEN smart wall switches?
Yes, most standard UGREEN smart wall switches require a dedicated neutral wire to keep the internal wireless radio powered continuously. Many older Singapore homes, especially older HDB flats, only have a single live wire at the switch box. If your home lacks neutral wiring at the switch, you can engage a Licensed Electrical Worker (LEW) to pull a neutral wire from the nearest junction box, or alternatively, install UGREEN smart relay modules in the ceiling cavity where neutral connections are readily available at the light fixtures.
Are there load limits when connecting multiple LED downlights to one smart switch?
Yes, every UGREEN smart switch and relay module has a maximum load limit, which is clearly specified on the product label and in the manufacturer’s instruction manual. When grouping multiple LED downlights onto a single switch channel, you must calculate the sum of their individual wattages. Ensure this total wattage remains well below the maximum rated load of the UGREEN device—paying close attention to the specific limit for LED or capacitive loads, which is often lower than the resistive load limit—to prevent overheating, electrical hazards, or premature hardware failure.
Community discussion
Share your experience or ask a question. Comments are reviewed before publication.