
Setting up and grouping Tapo smart bulbs allows you to manage your home’s lighting system from a single interface, offering convenient control over brightness, schedules, and color settings. Achieving a seamless whole-home setup requires installing the physical bulbs into compatible fixtures, connecting each device to a standard 2.4GHz Wi-Fi network via the official Tapo companion app, and organizing them into logical groups. By structuring your smart lighting system systematically, you can control multiple fixtures simultaneously across different rooms, establish synchronized lighting scenes, and simplify your daily routines. This approach not only enhances convenience but also optimizes energy usage by allowing you to monitor and manage every light source in your household remotely.
What You Need Before Setting Up Tapo Smart Bulbs
Before beginning the installation process, you must verify that your physical fixtures and home network environment meet the technical requirements for smart lighting. Smart bulbs contain integrated wireless receivers and dimming circuitry, which makes them highly sensitive to electrical and environmental conditions. Taking the time to prepare your space beforehand prevents common installation bottlenecks and ensures a stable, long-term connection.
First, inspect the physical light fixtures where you plan to install the bulbs. Check the base type of your existing sockets—common options include screw-type E27 bases or bayonet-type B22 bases—to ensure the new bulbs will fit securely. You must also verify that the voltage rating of the bulb matches your local electrical supply, which is typically 220V to 240V in Singapore. Additionally, ensure that the fixtures are controlled by standard on/off wall switches rather than traditional dial or slider dimmer switches, as physical dimmers can disrupt the power supply to the smart bulb’s internal computer. If you have enclosed fixtures, verify that the bulb dimensions allow for adequate airflow, as excessive heat buildup can shorten the lifespan of the sensitive electronic components inside the bulb.
Products mentioned in this guide
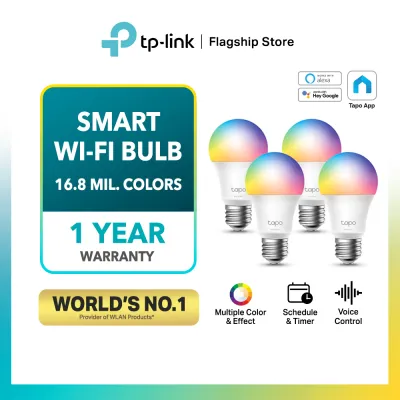
320 Lazada user ratings
Took 4 days to reach me. Easy to setup with the Tapo app. Just make sure your 2.4GHz wifi is not hidden. Otherwise it cannot connect. But on…Read full reviewShow less
Took 4 days to reach me. Easy to setup with the Tapo app. Just make sure your 2.4GHz wifi is not hidden. Otherwise it cannot connect. But once connected you can switch your wifi back to hidden mode.
A better option than Smatrul bulbs, better interface. This 8W bulb is comparable to Smatrul 13w version in terms of brightness when coloured…Read full reviewShow less
A better option than Smatrul bulbs, better interface. This 8W bulb is comparable to Smatrul 13w version in terms of brightness when coloured LED is chosen.
Energy-saving bulb with programmable features, Easy to customize brightness and color temperature, Long-lasting and reliable bulb from TP-Li…Read full reviewShow less
Energy-saving bulb with programmable features, Easy to customize brightness and color temperature, Long-lasting and reliable bulb from TP-Link,
Works well, app controlled and does not need any extra device for controlling the colour, temperature and brightness.
Works seamlessly with Google Assistant and Alexa, Easy to customize brightness and color temperature,
![[TAPO OFFICIAL] TP-Link Smart Wi-Fi LED Light Bulb 16 mil Colors Tapo L530E (E27/No Hub required/Google Assistant)](https://img.lazcdn.com/g/p/ca2cd9444e136fd67f17aa2a9224c711.jpg_400x400q80.jpg_.webp)
16 Lazada user ratings
easy to setup with tapo apps. easy to control dimming / brightness, warm vs cool white light, or other colours. It also can be used as manua…Read full reviewShow less
easy to setup with tapo apps. easy to control dimming / brightness, warm vs cool white light, or other colours. It also can be used as manual lamp via switches, it will remember the last settings.
No need for a hub, Easy to set up, Easy to control using Tapo app. Can use schedule, timer n away modes to control if use with Tapo smart pl…Read full reviewShow less
No need for a hub, Easy to set up, Easy to control using Tapo app. Can use schedule, timer n away modes to control if use with Tapo smart plug. Very versatile. Highly recommended.
Happy w purchase... Good price and can link to my existing tapo app. Fast delivery
Fast delivery. Pretty easy and smooth to set up.
works well and easy to pair
![TP-Link Tapo L530E Multicolor Smart Wi-Fi Light Bulb E27 - Tapo L530E - [SG Ready Stock]](https://img.lazcdn.com/g/p/ecfb7bcc9b0ba092b8e4356b6e5da3ae.jpg_400x400q80.jpg_.webp)
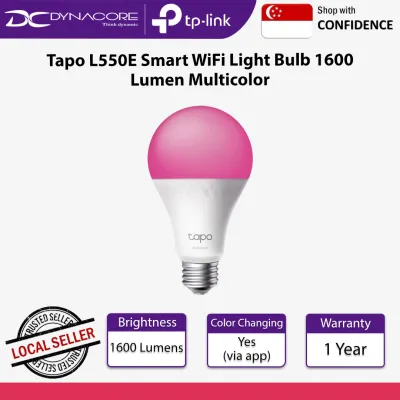
6 Lazada user ratings
Excellent product. Very easy to set up and has many functions to choose. Thanks Seller, will surly buy somemore if needed in future. Fast de…Read full reviewShow less
Excellent product. Very easy to set up and has many functions to choose. Thanks Seller, will surly buy somemore if needed in future. Fast delivery too👍😀
easy to use and setup, easy add on if already using tapo ecosystem, vibrant colours, reasonable price
wife loves this as it can be controlled by hp. delivered fast
💡Brightness:
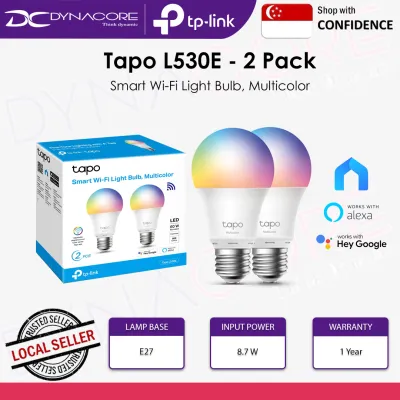
23 Lazada user ratings
Fast delivery! light is bright, I have to bring down the intensity to 70%. Super easy to connect to the app and update the firmware too! way…Read full reviewShow less
Fast delivery! light is bright, I have to bring down the intensity to 70%. Super easy to connect to the app and update the firmware too! way way easier than the previous smart Bulb that I used. hopefully this will not have the no connection issue like my previous one. like once or twice a week google home can't find the light bulb. 👍👍
Delivery was super fast. Neatly packed. I have several Tapo plugs and bulbs but this time the Tapo app was erratic during set up. Just have …Read full reviewShow less
Delivery was super fast. Neatly packed. I have several Tapo plugs and bulbs but this time the Tapo app was erratic during set up. Just have to be patient. Restart, reset, switch off all turn on one by one. Eventually worked. All good.
fast delivery and well received
fast delivery & well packed.
Create the perfect ambiance,
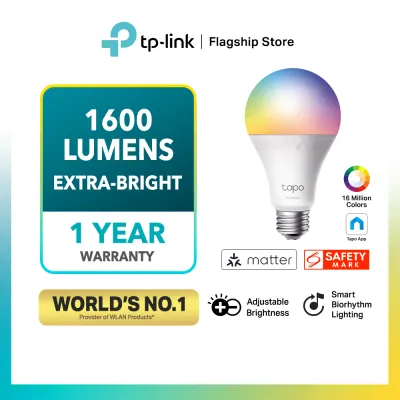
18 Lazada user ratings
Simple and direct fit. Easy to set up and i love the ability to adjust the brightness from my phone. Also great for home automation to work …Read full reviewShow less
Simple and direct fit. Easy to set up and i love the ability to adjust the brightness from my phone. Also great for home automation to work with Tapo Motion Sensors. Seller gives one of best prices and v prompt in shipment.
Nice product and very easy to install and do setting, Energy efficient and cost-saving, Works with voice assistants, Easy to control with th…Read full reviewShow less
Nice product and very easy to install and do setting, Energy efficient and cost-saving, Works with voice assistants, Easy to control with the app, Creates a cozy atmosphere,
Fast packing and delivery. Received in good condition. Have not tested it yet as it’s for my new house. I have other tapo light so I believe…Read full reviewShow less
Fast packing and delivery. Received in good condition. Have not tested it yet as it’s for my new house. I have other tapo light so I believe it will work just fine.
Energy efficient and cost-saving, Easy to control with the app,
Fast delivery. Although I ordered a wrong model 🥲
Prices are valid at publication and may change. Please refer to the product page for the latest price.
Next, evaluate your home wireless network. Tapo smart bulbs require a stable 2.4GHz Wi-Fi band to establish and maintain a connection with your router. Many modern home routers broadcast a single dual-band network name that combines both 2.4GHz and 5GHz frequencies. If your router uses this setup, you may need to access your router’s configuration page to temporarily separate the bands or enable a dedicated 2.4GHz guest network to ensure the bulb pairs successfully during the initial setup. It is also wise to check your router’s device limit, as standard service provider routers can sometimes struggle to maintain connections when dozens of smart home devices are added to the network simultaneously.
Finally, prepare your control device by downloading the official Tapo app from your smartphone’s app store. Ensure your phone’s Bluetooth and location services are enabled, as the app uses these features to detect nearby smart devices during the initial pairing phase. Create a secure user account or log into your existing profile within the app to save your device configurations and enable remote access. Having your account ready and your phone fully updated minimizes software-related delays during the connection process.
Step-by-Step Guide to Connecting Your First Tapo Light Bulb
Connecting your first smart bulb establishes the foundation for your entire home lighting network. Following a structured installation sequence ensures safety and prevents pairing failures.

Before handling any electrical fixture, prioritize physical safety by turning off the power switch at the wall. If the previous bulb was recently illuminated, allow it to cool completely to avoid burns before removing it from the socket. Carefully insert the Tapo bulb into the fixture, turning it clockwise for screw bases or pushing and twisting for bayonet bases until it is firmly seated. Do not overtighten the bulb, as this can damage the contact points inside the socket or crack the bulb’s plastic housing.
Once the bulb is physically secure, turn the wall switch back on. The bulb should illuminate immediately, indicating that it is receiving electrical power. Within a few seconds, the light will begin to blink or pulse gently, which serves as the visual indicator that the device has entered its default pairing mode. If the bulb does not blink, you may need to perform a manual reset to trigger the pairing state, which is a common requirement if the bulb was previously tested or paired to another network.
Open the Tapo app on your mobile device and tap the addition icon, usually represented by a plus sign, to start searching for new hardware. Select the appropriate smart bulb category and model from the on-screen list. The app will use your phone’s Bluetooth connection to locate the blinking bulb nearby. Once detected, select the bulb and input your home Wi-Fi network credentials when prompted. Ensure you enter the password for your 2.4GHz network accurately, as an incorrect password is a common cause of setup failures.
After the bulb successfully connects to your Wi-Fi network, the app will prompt you to assign a basic identifier. Choose a temporary name that describes the bulb’s physical location, such as “Living Room Corner,” and save the settings. The bulb’s indicator light will stop blinking and remain steady, confirming that the pairing process is complete and the device is ready for operation. You can now test the basic on/off and dimming functions within the app to verify that the connection is fully stable before moving on to additional installations.
How to Add and Name Multiple Bulbs Across Different Rooms
Expanding your smart lighting system involves repeating the pairing process for additional bulbs and organizing them systematically within the app interface. A logical naming convention and room assignment structure prevent confusion as your device count grows.
To add subsequent bulbs, follow the same physical installation and in-app pairing sequence for each unit. It is highly recommended to pair one bulb at a time rather than powering on multiple new bulbs simultaneously. Pairing devices individually prevents your smartphone from detecting multiple identical setup signals at once, which can lead to configuration errors or incorrect room assignments. This methodical approach ensures that each bulb is correctly registered and configured before you proceed to the next fixture.
As you add each bulb, implement a clear and consistent naming convention. Avoid generic names like “Light 1” or “Bulb 2,” which quickly become confusing when managing a whole-home system. Instead, use names that combine the specific room, the fixture type, and the relative position, such as “Master Bedroom Bedside Left” or “Dining Table Pendant East.” This level of detail is particularly helpful if you plan to integrate your lighting with voice assistants later, as it allows for precise verbal commands that the system can easily interpret without asking for clarification.
After naming a new bulb, assign it to a specific room or zone within the app’s interface. The app allows you to create virtual rooms that mirror the physical layout of your home, such as the kitchen, hallway, or balcony. Assigning each bulb to its respective room groups the devices visually on your app’s home screen, making it easier to locate individual lights and monitor their current power status at a glance. This spatial organization also simplifies the process of creating schedules, as you can easily identify which lights belong to specific living areas.
Grouping Tapo Bulbs for Simultaneous Whole-Home Control
Grouping your smart bulbs is the key to achieving synchronized, whole-home lighting control. This feature allows you to send commands to multiple fixtures simultaneously, eliminating the need to adjust each light individually.
To create a new group, navigate to the main menu or device management section of the Tapo app. Select the option to add a new group, and the app will display a list of all connected smart bulbs associated with your account. Check the boxes next to the specific bulbs you wish to combine. You can group lights based on physical proximity, such as “Living Room Downlights,” or based on functional use, such as “Reading Lights.” This flexibility allows you to customize your control schemes to match your daily habits and preferences.
Once you have selected the desired bulbs, assign a descriptive name to the group. Choose a name that clearly indicates the collective function, such as “All Downstairs Lights” or “Evening Ambient Group.” This group will now appear as a single control tile on your app’s dashboard, allowing you to turn all member bulbs on or off with a single tap. This centralized control is especially useful when leaving the house or going to bed, as you can turn off entire zones instantly.
Beyond basic power control, grouping enables you to synchronize advanced lighting settings across multiple fixtures. When you open the group’s control panel, any adjustments you make to brightness levels, color temperatures, or color selections will apply uniformly to all bulbs in that group. For example, you can set a “Movie Mode” group to dim to ten percent brightness and shift to a warm color temperature simultaneously, creating a cohesive atmosphere across your entire living space. This synchronization ensures that your lighting remains balanced and visually harmonious throughout the room.
Troubleshooting Common Connection and Grouping Issues
Even with careful preparation, you may occasionally encounter connection drops or synchronization issues. Understanding how to diagnose and resolve these common hurdles keeps your smart lighting system running reliably.
If a newly installed bulb fails to blink or enter pairing mode when powered on, first verify that the physical wall switch is in the “on” position and that the fixture is receiving electricity. If the power supply is active but the bulb remains unresponsive, perform a manual power cycle by turning the wall switch off and on several times with brief pauses in between. This action manually triggers the bulb’s internal reset sequence, forcing it back into pairing mode so the app can detect it. If the bulb still fails to respond, try installing it in a different fixture to rule out a faulty socket.
When the app fails to discover a bulb during the setup phase, the issue is often related to wireless signal strength or frequency conflicts. Ensure your smartphone is physically close to the bulb during pairing to maintain a strong Bluetooth connection. Additionally, double-check your phone’s Wi-Fi settings to confirm it is connected to the 2.4GHz band rather than the 5GHz band. If your router broadcasts both bands under a single name, temporarily disabling the 5GHz band in your router’s settings can resolve discovery issues. You should also ensure that your phone’s location permissions are granted to the app, as this is required for local network scanning.
If you notice that grouped bulbs respond out of sync, or if some bulbs fail to apply group settings uniformly, the cause is typically network latency or outdated firmware. Check the signal strength of each individual bulb within the app; bulbs positioned far from the router or behind thick concrete walls may experience delayed commands. To resolve this, consider installing a Wi-Fi range extender or a mesh network node to improve coverage in weaker areas. Additionally, check the device settings for each bulb to ensure they are all running the latest firmware version, as mismatched firmware can cause communication discrepancies within a group.
Frequently Asked Questions (FAQ)
Can I use Tapo smart bulbs with existing dimmer switches?
No, you should not install Tapo smart bulbs on circuits controlled by traditional wall dimmers. Standard wall dimmers alter the electrical current to reduce brightness, which starves the smart bulb’s internal electronics of the steady voltage they require to operate. This can lead to persistent flickering, audible buzzing, frequent connection drops, or permanent physical damage to the bulb’s internal circuitry. To control brightness safely, keep the physical wall switch fully on and use the dimming controls within the official app or compatible smart controllers.
Do all grouped bulbs need to be the exact same Tapo model?
No, you can group different models of Tapo smart bulbs together within the app. However, the group’s collective control options will be limited to the features shared by all member bulbs. For example, if you group a multi-color bulb with a tunable white bulb, the group control panel will only allow you to adjust brightness and white color temperatures. Color-changing features will not be available for the group as a whole, though you can still adjust the color of the multi-color bulb individually when needed.
How do I reset a Tapo light bulb if the setup fails?
To reset a Tapo smart bulb and restore its factory default settings, you must perform a specific physical power-cycling sequence using the wall switch. Turn the light switch off and on five times in quick succession, leaving the light on for approximately one second during each step. After completing the fifth cycle, the bulb should blink or pulse several times to confirm that the reset was successful. Once the bulb begins blinking, it has re-entered pairing mode and is ready to be set up again in the app.
Community discussion
Share your experience or ask a question. Comments are reviewed before publication.