
Selecting the perfect chandelier light for a dining room requires a careful balance of aesthetics, scale, and safety. In Singapore, where urban homes like Housing & Development Board (HDB) flats and private condominiums often feature compact, open-plan layouts, this choice becomes even more critical. The Japandi design style—a harmonious fusion of Japanese rustic minimalism and Scandinavian functional warmth—has become a favored approach for creating serene, clutter-free sanctuaries. However, achieving this tranquil atmosphere depends heavily on selecting a light fixture that respects the physical proportions of your space.
A well-proportioned dining light does more than illuminate your meals; it acts as a visual anchor that defines the dining zone without physical walls. When a fixture is too large, it dominates the room, making the ceiling feel lower and the surrounding area cramped. Conversely, a light that is too small looks disconnected and fails to provide adequate illumination. By understanding how to measure, scale, and position your lighting, you can create a balanced dining environment that honors both form and function.
Understanding Japandi Proportions in Compact Dining Spaces
The Japandi aesthetic is built on the core principles of simplicity, natural materials, and intentionality. In lighting design, this translates to fixtures crafted from organic textures such as solid timber, woven rattan, bamboo, washi paper, and fine linen. Rather than drawing attention through glitz or complex ornamentation, these pieces celebrate clean lines, soft textures, and warm, diffused illumination. While choosing a warm color temperature (typically 2700K to 3000K) is a popular conditional preference to enhance the cozy, welcoming feel of a dining space, the physical size of the fixture remains the foundation of your room’s layout.
Products mentioned in this guide
![[SG Stock] Nordic Glass & Iron Chandelier Ceiling Light Modern Pendant Light Dining Light LED Dimmable 10-14 Inch](https://img.lazcdn.com/g/p/d8df39f7c886cb188cf8caccec219082.jpg_400x400q80.jpg_.webp)
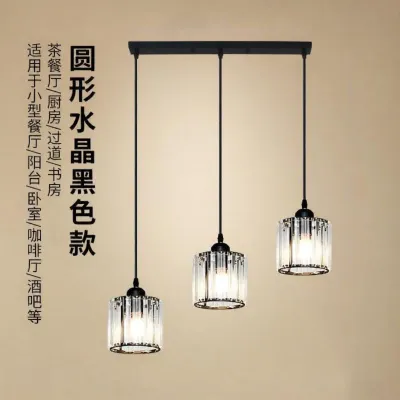
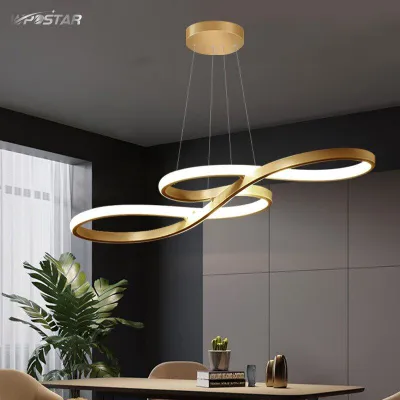
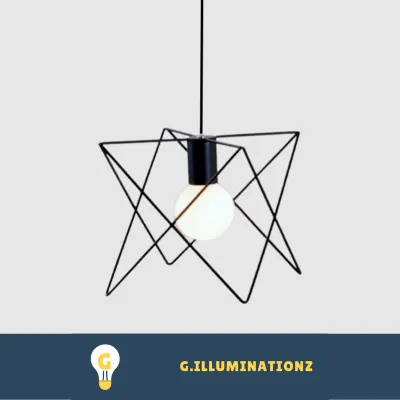
Prices are valid at publication and may change. Please refer to the product page for the latest price.
In typical HDB and condominium floor plans, the dining area often shares a single open space with the living room and kitchen. In these layouts, the Japanese concept of Ma—the artistic use of negative space or visual breathing room—is vital. Every piece of furniture and decor must be given room to breathe to prevent the home from feeling cluttered. A heavy, highly ornate light fixture can easily disrupt this delicate balance, while a simple, organic Japandi fixture maintains a sense of calm and openness.
Visual weight plays a significant role in how we perceive the size of a light fixture. Different materials interact with light and space in distinct ways. For instance, a dense, solid oak dome pendant has a heavy visual presence because it completely blocks the line of sight. On the other hand, a hand-woven rattan basket or a delicate paper lantern of the exact same physical dimensions feels much lighter because air and light pass through it. Understanding this distinction allows you to make smarter choices when matching a fixture to your dining table.
Ultimately, a successful Japandi dining space relies on a grounded focal point. The light fixture should draw the eye downward toward the table, creating an intimate gathering spot for family and guests. By choosing a design that aligns with the scale of your room and furniture, you ensure that the lighting enhances the overall architectural flow of your home rather than fighting against it.
Calculating the Ideal Chandelier Light Diameter and Length
To find the perfect dimensions for your dining lighting, you can rely on established design guidelines tailored to your specific table size. The primary rule of thumb focuses on the diameter of the fixture relative to the width of the dining table. Generally, the width or diameter of your chandelier light should be between one-half and two-thirds the width of the table beneath it. This proportion ensures that the light spread covers the dining surface adequately without extending past the table’s edges, which could create a collision hazard.

For example, if you have a standard rectangular 4-to-6 seater dining table that measures 90 centimeters in width, your ideal fixture diameter should range from 45 to 60 centimeters. If your table is a compact 4-seater measuring 80 centimeters wide, you should look for a light with a diameter between 40 and 53 centimeters. Adhering to these ratios prevents the lighting from visually swallowing the table or looking like an afterthought.
The shape of your dining table also dictates the configuration of your lighting. For round or square tables, a single, central round pendant or a soft dome works beautifully, echoing the symmetrical lines of the furniture. However, for longer rectangular tables common in 6-to-8 seater HDB layouts, a single round fixture might leave the ends of the table in shadow. In these scenarios, you can opt for a linear chandelier or a series of smaller clustered pendants hung in a row to distribute light evenly across the entire length of the surface.
Material density should also guide your final size selection within the recommended proportional range. If you are drawn to airy, open-weave rattan, light bamboo, or delicate paper shades, you can safely lean toward the upper end of the sizing scale (closer to two-thirds of the table width) because their visual weight is minimal. If you prefer solid timber, dense ceramics, or heavy opaque glass, it is wiser to choose a size closer to the lower end of the range (one-half of the table width) to prevent the space from feeling top-heavy.
Before making a purchase, it is highly recommended to visualize the fixture’s physical footprint in your actual room. Do not rely solely on measurements on a screen. You can easily create a simple cardboard mockup of the fixture’s diameter or use blue painter’s tape on your floor or ceiling to map out its boundaries. This practical step gives you a realistic sense of how the light will occupy the three-dimensional space and helps prevent buying mistakes.
Determining the Correct Hanging Height and Installation Safety
Once you have selected the correct diameter, determining the hanging height is the next crucial step in creating an inviting dining atmosphere. The standard clearance guideline is to position the bottom of the fixture between 75 and 90 centimeters above the surface of your dining table. Hanging the light within this range ensures that the illumination remains focused on the table, creating a warm, intimate ambiance while keeping the light source out of the direct line of sight of seated diners.
Adjusting this height requires careful consideration of Singapore’s typical residential ceiling heights. Standard HDB flats generally feature ceiling heights ranging from 2.6 to 2.8 meters, while private condominiums may have slightly higher ceilings. If your ceiling is on the lower end of the spectrum, hanging a large fixture too low can make the entire room feel compressed. Conversely, pulling the light too close to a high ceiling causes it to lose its connection to the dining table, turning it into a generic ambient light rather than a dedicated dining feature.
To achieve the perfect balance, look for fixtures equipped with adjustable hardware. Quality Japandi pendant lights typically feature adjustable textile-wrapped cords, metal chains, or slim aircraft suspension cables. These components allow you to fine-tune the drop length during the installation process to match your specific table height and ceiling clearance perfectly.
Safety must always be your top priority when installing any electrical fixture in your home. Before conducting any inspection or attempting to mount a new light, ensure that the main power supply is switched off at your home’s distribution board (DB box). Additionally, you must verify that the existing ceiling junction box or hook is rated to support the weight of your chosen fixture, especially if you are installing a heavier wooden or metal design.
In Singapore, structural and electrical compliance rules are strict. For any installation involving fixed electrical wiring, drilling into concrete HDB ceilings, or mounting heavy fixtures, you should always engage a licensed electrical worker (LEW) registered with the Energy Market Authority (EMA). Furthermore, ensure that the light fixture you purchase carries the appropriate local electrical safety labels, such as the Enterprise Singapore SAFETY Mark, to guarantee it meets local voltage (220V–240V AC, 50Hz) and safety standards. Always verify the bulb socket types (such as E27 or E14), maximum wattage limits, and dimming compatibility with your wall switches before finalizing your setup.
Factoring in Room Layout and Traffic Flow
A dining table does not exist in isolation; it is part of a dynamic household environment where people move constantly. Therefore, you must evaluate how your chosen chandelier light interacts with the surrounding room layout and daily traffic patterns. This is especially important in modern open-concept HDB and condo layouts, where the dining zone often sits directly in the pathway between the kitchen, living room, and bedrooms.
Ensure that the outer edges of your light fixture do not encroach on primary walkways. If a main path runs closely alongside your dining table, a wide fixture hung at a lower height can easily become an obstacle that people might bump into as they walk past. If your space constraints require the table to be pushed against a wall or shifted occasionally, a highly centered, low-hanging fixture can limit your flexibility.
Head clearance is another vital consideration, particularly if you plan to use an extendable dining table or if you occasionally rearrange your furniture for hosting. If the table is moved away, the light fixture will hang over an open floor area. In such cases, the fixture must be hung high enough to provide safe clearance for walking underneath—typically at least 2 meters from the floor—or it should be a lightweight design that can be easily adjusted or repositioned.
You must also consider the clearance of adjacent furniture and seating. When guests push back their dining chairs to stand up, they should have ample space without worrying about colliding with a low-hanging light. Aim to maintain a comfortable buffer zone of at least 30 to 45 centimeters between the outer perimeter of the light fixture and the vertical plane of any nearby tall furniture, such as display cabinets or sideboards.
By carefully placing your lighting, you can use the warm glow of your Japandi fixture to establish a subtle visual boundary for your dining area. The light acts as an invisible partition, anchoring the dining set and separating it from the rest of the open-plan living space without the need for physical dividers that block natural light and airflow.
Common Sizing Mistakes to Avoid
One of the most frequent mistakes homeowners make is selecting a fixture that is far too small for their dining table. Often driven by a fear of overwhelming a compact HDB space, buyers opt for tiny pendants that end up looking lost and insignificant. A tiny light fails to define the dining zone and often results in inadequate, uneven task lighting that leaves the ends of the table in deep shadow.
Another common error is ignoring the visual weight of the materials. Pairing a visually heavy, solid-timber dome with a delicate, glass-topped dining table with thin metal legs creates an uncomfortable, top-heavy aesthetic. The light fixture should complement the visual language of the furniture below it. A delicate table pairs best with lighter, airy materials like paper or fine linen, while a solid oak or walnut table can easily support a more substantial wooden or ceramic fixture.
Hanging height mistakes can also ruin the design of an otherwise beautiful room. Hanging a chandelier light too high—close to the ceiling—makes it function as general ambient lighting, stripping the dining area of its cozy, intimate character. On the other hand, hanging it too low creates a physical barrier that blocks eye contact across the table and can cause uncomfortable glare for seated diners.
Finally, do not overlook the size of the ceiling canopy and the mounting hardware. The canopy is the metal or plastic plate that covers the electrical junction box on your ceiling. In many Singapore homes, existing ceiling roses or concrete junction boxes can be bulky or uneven. Ensure that the canopy of your new light is wide enough to cover these elements neatly, and verify that the mounting bracket is fully compatible with your ceiling structure before starting the installation.
Frequently Asked Questions (FAQ)
Can I use multiple smaller pendant lights instead of one chandelier?
Yes, using multiple smaller pendant lights is an excellent alternative, especially for longer rectangular dining tables. Instead of a single large fixture, hanging two or three smaller matching Japandi pendants in a row provides even light distribution across the entire tabletop. To maintain a balanced look, ensure the combined width of the fixtures does not exceed two-thirds of the table’s length, and space them evenly with about 30 to 40 centimeters of gap between each light.
How do I clean and maintain natural Japandi materials like rattan or wood?
Natural materials require gentle, low-risk maintenance to preserve their beauty and structural integrity. For rattan, bamboo, and wood, dust the surfaces regularly using a dry, soft microfiber cloth or a soft-bristle brush to clear out dust from woven crevices. Avoid using harsh chemical cleaners, wet wipes, or excessive moisture, which can cause natural wood to warp or lead to mold growth on organic fibers. For delicate washi paper or linen shades, a light dusting is usually sufficient; always check the manufacturer’s specific care instructions for treated materials.
Do I need a licensed electrician to install a chandelier in an HDB flat?
Yes, for safety and compliance, you should engage a licensed electrical worker (LEW) registered with the Energy Market Authority (EMA) of Singapore. While swapping a very lightweight bulb might be simple, installing a new chandelier light involves dealing with fixed electrical wiring, mounting brackets, and drilling into concrete structural ceilings. A professional installation ensures that the fixture is securely anchored, wired correctly to prevent short circuits, and fully compliant with local housing regulations.
Community discussion
Share your experience or ask a question. Comments are reviewed before publication.