
Selecting the right lighting fixture is a critical step in achieving the serene, balanced aesthetic of Japandi design. This style, which harmoniously blends Japanese minimalism with Scandinavian functionality, relies heavily on proportion, natural materials, and a sense of open space. In Singapore homes, where ceiling heights and room volumes vary significantly between HDB flats, modern condominiums, and landed properties, choosing the correct chandelier ceiling proportions is essential. A fixture that is too large can make a room feel cramped and heavy, while one that is too small will lose its visual impact and fail to anchor the space.
To find the ideal chandelier size, you must balance mathematical spatial formulas with the unique visual characteristics of Japandi design. This guide outlines how to measure your space, calculate baseline dimensions, adjust for materials like washi paper and light oak, and ensure a safe, compliant installation that respects both aesthetic preferences and local structural requirements.
Assess Your Room Dimensions and Ceiling Height
Before browsing local showrooms or online marketplaces, you must gather precise measurements of the room where the chandelier ceiling fixture will be installed. Begin by measuring the length and width of the room using a standard tape measure. Multiply these two figures to calculate the total floor area in square meters. For open-plan layouts, which are common in modern Singapore apartments, focus specifically on the designated zone—such as the dining nook or the living room seating area—rather than the entire open floor plate. This prevents you from choosing an oversized fixture that dominates the entire living space.
Products mentioned in this guide
![[SG Stock] Nordic Glass & Iron Chandelier Ceiling Light Modern Pendant Light Dining Light LED Dimmable 10-14 Inch](https://img.lazcdn.com/g/p/d8df39f7c886cb188cf8caccec219082.jpg_400x400q80.jpg_.webp)
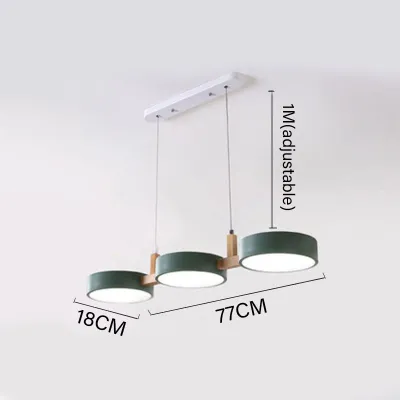
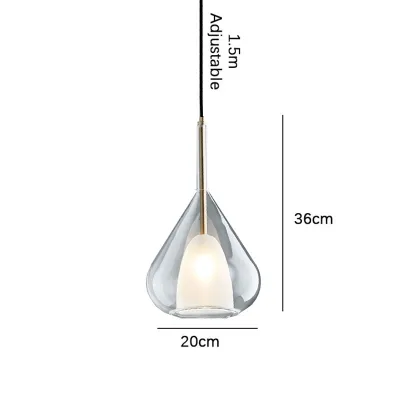
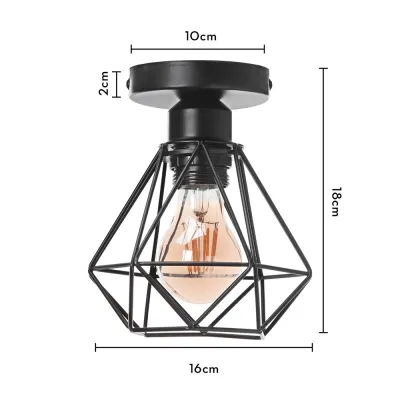

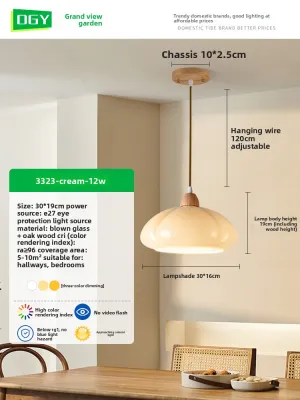
Prices are valid at publication and may change. Please refer to the product page for the latest price.
Next, measure the exact ceiling height from the finished floor to the concrete slab or plaster false ceiling. In Singapore, standard HDB flat ceilings typically range from 2.6 to 2.8 meters, while some top-floor units, condominiums, or landed homes may feature double-volume ceilings. Take note of any architectural features that could interfere with the chandelier, such as recessed plaster ceilings, structural beams, air conditioning ducting, or existing ceiling fan installations. If you have a false ceiling, identify where the internal support joists are located, as this affects where a heavy fixture can be safely anchored.
Finally, consider the room’s primary function and the layout of your furniture. A chandelier placed in the center of a bedroom or living room walkway requires significantly more vertical clearance than one suspended directly over a dining table or a coffee table. Mapping out your furniture layout beforehand allows you to determine whether the chandelier will serve as a central ambient light source or a localized focal point, which directly influences both the height and diameter limits of the fixture.
Calculate the Ideal Chandelier Diameter and Height
To establish a baseline for your search, you can use standard interior design formulas that translate room dimensions into appropriate fixture sizes. While Singapore uses the metric system for construction, many lighting manufacturers still utilize imperial measurements for sizing rules. A reliable industry method is the room-dimension formula: convert your room’s length and width from meters to feet (multiply meters by 3.28). Add these two numbers together, and the resulting sum represents the recommended diameter of your chandelier in inches.

For example, if you are sizing a chandelier for a living room that measures 3 meters by 4 meters, this converts to approximately 10 feet by 13 feet. Adding 10 and 13 gives you 23, which means a chandelier with a diameter of roughly 23 inches (or approximately 58 centimeters) will be visually proportional to the room’s footprint. If your room is exceptionally compact, such as a study measuring 2.5 meters by 2.5 meters (roughly 8 feet by 8 feet), the formula suggests a diameter of 16 inches (about 40 centimeters).
Once you have determined the baseline diameter, you must calculate the appropriate height of the fixture body itself. A standard guideline is to allow 2 to 3 inches of fixture height for every foot of overall ceiling height. For a typical Singapore home with a 2.6-meter (8.5-foot) ceiling, the maximum height of the chandelier body—excluding the suspension chain or rod—should be between 17 and 25 inches (approximately 43 to 64 centimeters). This calculation ensures that the fixture remains proportional to the vertical volume of the room, preventing it from hanging too low or looking awkwardly squashed against the ceiling.
In large open-plan spaces, these baseline calculations should be adjusted downward. Because open-plan areas lack physical walls to frame the lighting, a chandelier sized for the entire combined living-dining area would be overwhelmingly large. Instead, treat the specific functional zone as an independent “room” and apply the formulas to those localized dimensions to maintain a balanced, harmonious environment.
Adapt Proportions for the Japandi Aesthetic
While mathematical formulas provide an excellent starting point, Japandi design principles require a more nuanced approach to proportions. The core philosophy of Japandi style centers on yugen (subtle grace) and shibui (uncluttered simplicity). This means that preserving negative space—the empty air around furniture and fixtures—is just as important as the physical items themselves. When selecting a chandelier ceiling fixture, it is often wise to lean toward the slightly smaller or more streamlined end of your calculated size range to maintain an airy, uncluttered feel.
The visual weight of the materials used in your chandelier plays a significant role in how large it appears in a room. Natural materials are a hallmark of Japandi style, and they interact with light and space in different ways. Fixtures made from pleated paper, linen, or lightweight fabric shades have a very low visual weight. Because they allow light to filter through and feature soft, organic textures, you can often choose a slightly larger diameter without making the room feel crowded.
Woven wood, rattan, or bamboo shades offer a semi-translucent quality. The gaps in the weave allow the eye to see through the fixture, which reduces its perceived mass and makes it suitable for compact spaces. Conversely, chandeliers featuring heavy oak, dark walnut, or ceramic elements have a high visual weight. These solid, opaque materials draw the eye immediately and can dominate a room. If you select a fixture with these characteristics, it is best to stick strictly to the lower end of your calculated diameter range.
Additionally, the drop length of the chandelier should be adjusted to create the desired atmosphere. Japandi interiors often aim for a grounded, intimate feel, which can be achieved by hanging a fixture slightly lower over specific furniture zones, such as a low-profile coffee table. However, this must always be balanced against the physical clearances required for daily movement within the home.
Evaluate Installation Requirements and Safety Limits
Before purchasing any chandelier, you must ensure that your home’s ceiling structure and electrical system can safely support the fixture. This is particularly important for Japandi chandeliers that incorporate solid timber, heavy ceramic components, or metal frames, which can weigh significantly more than standard plastic or lightweight aluminum fixtures.
First, verify the weight rating of your ceiling’s junction box. In Singapore, standard concrete ceilings can support substantial loads when fitted with appropriate masonry anchors, but false ceilings made of gypsum board or plasterboard have strict weight limits. If your chosen chandelier is heavy, you must ensure it is anchored directly into the concrete slab above the false ceiling or that the false ceiling has been reinforced with structural timber bents or metal brackets. Never hang a heavy chandelier directly from plasterboard without structural reinforcement.
Second, verify the electrical specifications of the fixture. Singapore operates on a standard domestic voltage of 230V AC at 50Hz. Ensure the chandelier is compatible with this voltage and check for appropriate electrical certifications, such as the Enterprise Singapore Safety Mark on any local electrical components or drivers. You must also verify the base or interface type (such as E27 or GU10) and the maximum wattage limit of the sockets to prevent overheating, especially if you plan to use high-output bulbs or integrate dimming systems.
Safety must be your top priority during any electrical work. Before attempting to inspect wiring or install a fixture, always isolate the power at the main distribution board (DB box) by switching off the relevant circuit breaker. For any fixed wiring installations, working at heights, or mounting heavy suspended loads, it is highly recommended to engage a licensed electrical worker (LEW) in Singapore. If you encounter unclear wiring configurations, lack proper mounting hardware, or are unsure of your ceiling’s load-bearing capacity, stop immediately and consult a qualified professional.
Finalize Your Selection and Verify Clearances
The final step before purchasing your Japandi chandelier is to perform a thorough clearance check to ensure the fixture fits functionally within your daily living patterns. For general walkways and open areas where people walk freely, maintain a minimum clearance of 2.1 meters (approximately 7 feet) from the bottom of the chandelier to the floor. This prevents taller family members and guests from colliding with the light and ensures a comfortable flow of movement through the room.
In specialized zones, such as above a dining table or a kitchen island, the clearance rules change. Here, the primary goal is to provide adequate illumination without obstructing sightlines or causing glare. The bottom of the chandelier should hang between 75 and 90 centimeters (30 to 36 inches) above the tabletop. This height keeps the light source out of direct eye line when seated, allowing for comfortable face-to-face conversation while still anchoring the dining area as an intimate, cozy zone.
You must also ensure the chandelier does not interfere with other household fixtures. In Singapore’s tropical climate, ceiling fans are incredibly common for ventilation. Carefully measure the distance between the proposed chandelier location and the blades of any nearby ceiling fan. There must be sufficient clearance to prevent the fan blades from hitting the chandelier or creating a highly distracting “strobing” light effect when both are turned on. Additionally, check that the fixture does not obstruct the swing of wardrobe doors, kitchen cabinets, or entryways. Always review the manufacturer’s detailed specification sheet for exact dimensions, weight, and required mounting hardware before finalizing your purchase to guarantee a seamless integration into your home.
Frequently Asked Questions (FAQ)
Can I use a Japandi chandelier in a room with low ceilings?
Yes, you can successfully integrate Japandi lighting into rooms with low ceilings, such as standard HDB flats with heights under 2.6 meters. Instead of a traditional hanging chandelier with a long chain, look for flush-mount or semi-flush mount fixtures that sit close to the ceiling. Many of these designs utilize classic Japandi materials like pleated washi paper, light-colored wood veneers, or woven rattan, providing the desired aesthetic without sacrificing valuable headroom. Alternatively, you can hang low-profile pendant clusters over furniture zones where foot traffic does not occur, such as directly over a side table or in a corner reading nook, which keeps the walkway clear while adding visual interest.
How do I size a chandelier for a Japandi dining table?
To size a chandelier for a Japandi dining table, choose a fixture with a diameter that is approximately one-half to two-thirds the width of the table. For example, if your dining table is 90 centimeters wide, your chandelier’s diameter should be between 45 and 60 centimeters. This ratio ensures the light remains visually balanced and does not extend past the edges of the table, which could lead to accidental bumps when people stand up. For circular dining tables, select a single central fixture that is roughly half the table’s diameter, and hang it so the lowest point is 75 to 90 centimeters above the tabletop to maintain clear sightlines and a comfortable dining experience.
Community discussion
Share your experience or ask a question. Comments are reviewed before publication.