
Mounting a kodak digital frame 10-inch display on your wall elevates your home decor by transforming a static wall space into a dynamic gallery of your favorite memories. Achieving a clean, secure, and visually appealing installation requires a systematic approach that addresses both physical mounting and digital configuration. To complete this project successfully, you must select the appropriate hardware for your specific wall type, safely secure the mounting anchors, manage the power cord to prevent clutter, and connect the device to your home network for seamless photo sharing.
Gather Your Tools and Check the Wall for Your Kodak Digital Frame 10
Before making any marks on your wall, you must assemble the correct tools and understand the structural composition of your mounting surface. The installation environment dictates the specific hardware you need to ensure the frame remains securely attached to the wall over time.
Essential Tools and Hardware To mount your Kodak 10-inch digital frame, prepare the following items:
Products mentioned in this guide
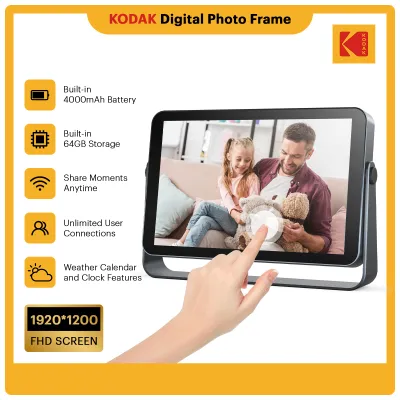



Prices are valid at publication and may change. Please refer to the product page for the latest price.
- A power drill with variable speed control
- Drill bits matching your wall type (masonry bits for concrete, twist bits for drywall)
- High-quality wall anchors (such as plastic wall plugs or heavy-duty hollow-wall anchors)
- Screws that fit the wall anchors and the frame's mounting slots
- A spirit level to ensure a perfectly straight alignment
- A measuring tape and a lead pencil for marking
- Safety goggles and a dust sheet to catch drilling debris
Identifying Your Wall Material In Singapore, the structural characteristics of your home heavily influence how you drill and anchor items. Most Housing & Development Board (HDB) flats and private condominiums feature solid concrete or structural masonry walls. These walls provide exceptional load-bearing capacity but require a rotary hammer drill and masonry drill bits to penetrate. Standard plastic wall plugs are highly effective in solid concrete when paired with matching screws. Conversely, if you are mounting the frame on a drywall partition or a plasterboard stud wall, you must use specialized hollow-wall anchors, such as toggle bolts or self-drilling threaded anchors, to distribute the weight safely and prevent the plasterboard from crumbling.
Inspecting the Frame’s Mounting Interface Turn your Kodak 10-inch digital frame over to inspect its rear panel. Most models feature built-in keyhole slots designed for portrait or landscape orientation, while some may include a standardized VESA mounting pattern. Use your measuring tape to determine the exact distance between the centers of the keyhole slots. If your frame uses a single keyhole slot, identify its precise offset from the outer edges of the frame.
Additionally, verify the electrical specifications printed on the power adapter. Ensure the input voltage matches your local mains supply (such as the standard 230V in Singapore) and check that the cable length is sufficient to reach your planned power source without tension.
Planning the Cable Route and Power Access A digital frame requires a continuous power supply to display your photos. Before drilling, locate the nearest electrical outlet and measure the distance from the outlet to your desired mounting height. Ensure the path is free of obstructions and that the cable can hang naturally or run along a planned conduit route. Avoid placing the frame directly above heat sources, such as radiators or cooking appliances, as elevated temperatures can degrade the internal electronic components and screen display over time.
Step-by-Step Guide to Mounting the Frame
Physical installation requires precision to ensure the frame is both level and securely anchored. Taking your time during the measuring and drilling phases prevents unsightly mistakes and structural damage.

Measuring and Marking the Wall
Determining the perfect position for your digital frame ensures comfortable viewing for everyone in your household. A standard rule of thumb is to position the center of the display at average eye level, which is approximately 145 to 150 centimeters from the finished floor.
Marking the Mounting Points Once you have decided on the height, use your measuring tape to mark the vertical center line on the wall with a pencil. If your Kodak frame utilizes two keyhole mounting slots, divide the total distance between the slots by two. Measure this distance to the left and right of your center mark, making two distinct pencil crosses.
Verifying the Alignment Place a spirit level flat against the wall, aligning its top edge with your two pencil marks. Adjust the level until the indicator bubble rests perfectly between the two center lines. Adjust your pencil marks as necessary to ensure they are completely horizontal. Double-check the distance between the marks one final time against the physical slots on the back of the frame to prevent drilling holes that do not align with the hardware.
Drilling and Securing the Hardware
With your marks verified, you can proceed to drilling. Always prioritize safety by wearing protective eyewear and checking for hidden hazards behind the wall surface.
Executing the Drill Phase Select a drill bit that matches the diameter of your chosen wall anchors. For concrete walls, set your drill to hammer mode and hold the tool completely perpendicular to the wall. Apply steady, forward pressure as you drill to the depth of the anchor plus an additional 5 millimeters. Pull the drill bit in and out of the hole a few times while it is spinning to clear out accumulated concrete dust, which can prevent the anchor from seating fully.
Inserting Anchors and Screws Push the wall anchors into the drilled holes. If they resist, tap them gently with a hammer until they sit completely flush with the wall surface. Insert the screws into the anchors and drive them in using a screwdriver or your drill on a low-torque setting. Leave a small gap of approximately 3 to 5 millimeters between the screw head and the wall. This gap allows the keyhole slots on the back of the Kodak frame to slide over the screw heads securely.
Hanging and Stability Check Carefully align the keyhole slots on the back of the frame with the protruding screw heads. Gently slide the frame downward until the screws lock into the narrow neck of the keyholes. Slowly release your grip while keeping your hands close to the frame to ensure it is fully supported by the hardware. Gently wiggle the frame to verify that it does not slide off or wobble. If the frame feels loose, remove it and tighten the screws slightly, then rehang the device.
Safety Boundary Warning Before you begin drilling, you must verify that the path is clear of hidden utility lines. If your drill encounters sudden, unexpected resistance, hits metal, or if you suspect the presence of electrical wiring or water pipes behind the wall, stop drilling immediately. Consult a qualified professional electrician or contractor to inspect the wall cavity. Never drill directly above or below electrical outlets, light switches, or water fixtures, as these zones typically house active utility lines.
Manage the Power Cable for a Clean Display
An exposed, dangling power cord can detract from the clean aesthetic of a wall-mounted digital frame. Implementing an effective cable management strategy keeps your space tidy and protects the power cord from damage.
Surface-Level Cable Management The most accessible way to manage the power cord without altering your wall structure is by using surface-mounted cable raceways. These slim, paintable plastic conduits adhere directly to your wall and enclose the cable. You can paint the exterior of the raceway to match your wall color, making it virtually invisible. Alternatively, you can use small, self-adhesive cable clips spaced evenly along the corner of a wall or baseboard to guide the wire neatly toward the power outlet.
In-Wall Cable Routing Considerations Routing the power cable through the wall cavity provides the cleanest possible look, but this method is subject to strict structural and safety limitations. In Singapore, HDB regulations strictly prohibit chasing or cutting deep channels into structural concrete walls to hide cables. If you have a hollow drywall partition, you can use an approved in-wall cable routing kit. However, you must never run a standard low-voltage DC power cable directly through a wall cavity without a protective conduit, as this violates electrical safety standards. If you are uncertain about local building codes or electrical safety, always hire a licensed electrical worker to perform the installation.
Preventing Cable Damage and Fire Hazards When routing and securing your power cable, avoid bending it at sharp angles, pinching it behind the frame, or stretching it tightly to reach a distant outlet. Physical stress on the cable can damage the copper conductors inside, leading to intermittent power loss, short circuits, or potential fire hazards. Leave a small amount of slack near the connection point on the frame to prevent tension on the input port.
Maintaining Power Access Ensure that the main power plug remains easily accessible. Do not block the outlet permanently with heavy, immovable furniture. You will need to access the plug occasionally to perform system resets, apply firmware updates, or safely disconnect the frame during severe electrical storms to protect it from lightning-induced power surges.
Power On and Connect to Wi-Fi
With the physical installation complete, you can begin the software configuration. Setting up your Kodak 10-inch digital frame correctly ensures a stable connection to your home network and optimal display performance.
Initial Power-Up and Calibration Plug the power adapter into the wall outlet and turn on the frame using the physical power button located on the back or side of the device. Once the screen illuminates and displays the startup logo, follow the on-screen prompts to select your preferred language. Adjust the screen brightness to match the ambient lighting of the room; a display that is too bright can cause eye strain in dim environments, while a display that is too dim will look washed out in well-lit spaces. Set the correct time zone (such as Singapore Standard Time, UTC+8) to ensure that scheduled sleep modes and clock displays function accurately.
Connecting to Your Wi-Fi Network The frame will scan for available wireless networks. Select your home Wi-Fi network from the list. Note that most Kodak digital frames operate on the 2.4GHz wireless frequency band. If your home router broadcasts a combined dual-band network (2.4GHz and 5GHz) under a single name, ensure your router is configured to allow 2.4GHz devices to connect, or temporarily split the bands in your router settings if the frame fails to connect. Enter your Wi-Fi password carefully using the on-screen keyboard.
Troubleshooting Network Connection Issues If the frame displays a weak signal or fails to connect, inspect the physical path between the frame and your router. Solid concrete walls, common in Singaporean homes, are highly effective at blocking wireless signals. If the signal is weak, consider repositioning your router, clearing physical obstructions, or installing a Wi-Fi range extender or mesh node closer to the frame’s location to ensure a stable, continuous connection.
Pairing the Companion App Once connected to the internet, the frame will display a unique activation code or a QR code on the screen. Download the official Kodak companion app (such as the Kodak Classic Frame app) from your smartphone’s application store. Open the app, create a user account, and select the option to add a new frame. Scan the QR code displayed on the frame or enter the device ID manually to complete the pairing process.
Add Photos and Invite Family to Share
The primary value of your Kodak 10-inch digital frame lies in its ability to display a curated, evolving collection of your favorite memories. The companion app makes it easy to manage your media and collaborate with loved ones.
Linking and Navigating the App Once paired, your smartphone app acts as the control hub for your digital frame. The user interface allows you to view the frame’s storage capacity, manage existing albums, and adjust display settings remotely. Take a moment to familiarize yourself with the app’s layout, ensuring you can easily access the media upload section.
Uploading Media to the Frame To send photos or short videos to your frame, open the companion app and select the media upload tool. Choose the desired photos directly from your smartphone’s gallery. You can upload multiple images simultaneously. The app will compress the files automatically to optimize storage space while maintaining high display quality on the 10-inch screen. Once you confirm the upload, the photos will transfer via the cloud and appear on your frame within moments, provided both devices are connected to the internet.
Inviting Family and Friends to Share One of the most appealing features of the Kodak digital frame is the ability to receive photos from family members worldwide. Within the app, navigate to the user management or sharing settings. Generate an invitation code or send an email link to your family members. They can download the companion app, enter your unique frame code, and begin sending their own photos directly to your display. This allows grandparents, distant relatives, or friends to share their daily moments instantly.
Optimizing Your Slideshow Settings To create a pleasant viewing experience, organize your uploaded photos into specific albums based on themes, such as family holidays, daily life, or milestone celebrations. Access the frame’s settings menu (either on the device itself or via the app) to customize the slideshow behavior. Adjust the transition speed—setting it to 10 or 15 seconds per photo is generally comfortable for casual viewing. Select your preferred transition effects (such as fade or slide) and set up an automatic sleep schedule so the frame turns off automatically during the night to conserve energy and prolong the lifespan of the display panel.
Frequently Asked Questions (FAQ)
Can I mount the digital frame in a bathroom or kitchen?
You should avoid mounting standard Kodak digital frames in bathrooms. The high humidity, steam, and condensation typical of bathrooms can easily penetrate the frame’s non-sealed casing, leading to short circuits, corrosion of internal components, and permanent screen damage. Standard digital frames do not possess an ingress protection (IP) rating for wet environments. For kitchens, you may install the frame, but you must place it well away from direct cooking zones, stoves, and sinks. Grease buildup from cooking can coat the screen and clog ventilation ports, while direct heat can cause the device to overheat. Ensure the kitchen location is well-ventilated and easy to wipe down.
What should I do if the frame frequently loses its Wi-Fi connection?
If your frame experiences frequent disconnections, first check the signal strength indicator on the frame’s screen. If the signal is weak, try restarting both your wireless router and the digital frame to clear any temporary network glitches. Verify that your router’s firmware is updated to the latest version. In high-density living environments, such as Singapore HDB blocks, wireless congestion from neighboring routers can interfere with your signal. Access your router settings and switch to a less congested Wi-Fi channel, or use a dedicated 2.4GHz network channel to ensure a more stable connection for your frame.
Community discussion
Share your experience or ask a question. Comments are reviewed before publication.