
Living in an open-concept home offers an airy, spacious feel, but without clear boundaries, a combined living and dining area can easily feel chaotic, cluttered, or devoid of purpose. In modern apartments where building permanent walls is either restricted by tenancy agreements or undesirable because it blocks natural light, finding non-structural ways to define your space is essential. You can successfully zone an open-concept layout by using strategic furniture placement, carefully sized area rugs, layered lighting fixtures, and subtle vertical dividers that establish distinct functional areas while keeping the overall space cohesive and fluid.
How can you use furniture placement to define separate zones?
Arranging your furniture thoughtfully is the most direct way to establish physical boundaries and guide foot traffic without erecting permanent walls. By treating your furniture as architectural elements, you can carve out distinct functional areas while maintaining an open, inviting atmosphere.
Floating the Sofa to Create a Natural Barrier
Instead of pushing all your seating against the walls, float your primary sofa in the middle of the room. The back of the sofa acts as a natural, low-profile barrier that clearly separates the lounging zone from the dining area. This placement immediately signals where the living room ends and the dining space begins, creating a cozy, enclosed feel for the seating area.
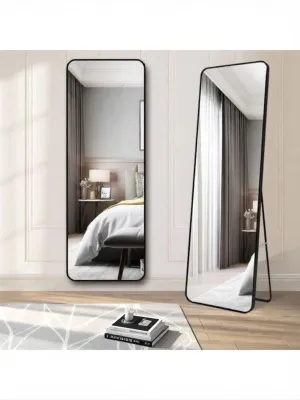
Products mentioned in this guide
8 Lazada user ratings
Really happy with this purchase! The quality feels premium and it arrived sooner than expected. Definitely worth the price!
I've ordered from here before and they never disappoint. This time was no different. Quality always on point!
Top-notch quality at a fair price. Love it! This is now my go-to shop for great finds.
Couldn't resist this deal and I'm thrilled with my purchase. Everything was top-tier.
The build quality is impressive and it feels like it'll last a long time. Great buy!
Prices are valid at publication and may change. Please refer to the product page for the latest price.
Utilizing Low Console Tables and Bookcases
Place a low console table or a low bookcase directly behind the floated sofa. This setup not only reinforces the physical boundary but also provides practical storage and a surface for decorative items, table lamps, or books. It prevents the back of the sofa from looking bare and adds a layer of functional depth to the transition zone.
Aligning the Dining Table with Architectural Anchors
Anchor your dining area by aligning the dining table with an existing architectural feature, such as a kitchen island, a structural pillar, or a specific accent wall. This alignment creates a sense of architectural intention, making the dining set feel like a permanent fixture rather than an afterthought. It helps ground the dining zone, giving it a dedicated purpose within the larger layout.
Maintaining Clear and Safe Walkways
Ensure there are clear, unobstructed pathways between the living and dining zones. Aim for a clearance of at least 80 to 90 centimeters for main walkways so that family members can move comfortably without squeezing past chairs or bumping into the sofa. Proper traffic flow is essential for keeping the open-concept layout functional and safe for daily use.
How do area rugs help anchor the living and dining spaces?
Area rugs serve as visual anchors that define the boundaries of individual zones by grouping furniture pieces onto distinct “islands” of texture and color. They provide an immediate visual cue that tells the eye where one functional zone ends and another begins.

Sizing the Living Room Rug for Unity
For the living area, select a rug large enough so that at least the front legs of your sofa and accent chairs rest comfortably on it. This physical connection unifies the seating arrangement, preventing the furniture from looking like it is floating aimlessly in a vast room. A generous rug size helps define the boundaries of the conversation area clearly.
Ensuring Proper Clearance for the Dining Rug
In the dining zone, the rug must extend sufficiently beyond the edges of the dining table—ideally by at least 60 to 70 centimeters on all sides. This extra space ensures that when guests pull their chairs out to sit down, the chair legs remain securely on the rug, preventing frustrating wobbles or tripping hazards. It also protects your flooring from scratches caused by moving chairs.
Balancing Patterns and Colors Across Zones
To maintain a harmonious flow, choose rugs that complement each other without being identical. You might pair a subtle geometric pattern in the living room with a solid, highly textured weave in the dining area, ensuring their color palettes share at least one common hue. This approach distinguishes the two areas while keeping them visually connected.
Avoiding the Pitfalls of Undersized Rugs
Avoid using rugs that are too small for either zone, as undersized rugs visually shrink the space and make the individual zones feel disconnected, cramped, and disjointed. A small rug can make even a spacious open-concept room feel cluttered and poorly planned.
What lighting techniques work best for zoning an open layout?
Layered lighting allows you to create distinct atmospheric zones by highlighting specific functional areas and controlling the mood independently in each space. By using different types of fixtures, you can change the feel of each zone depending on the time of day and the activity.
Hanging Statement Fixtures Over the Dining Table
Hanging a statement pendant light or a low-slung chandelier directly over the center of the dining table draws the eye upward and establishes a clear vertical anchor for the eating area. This fixture acts as a visual focal point, defining the dining zone even when the light is turned off. It creates an intimate, inviting atmosphere perfect for meals and gatherings.
Layering Soft, Warm Light in the Living Zone
In contrast, the living area benefits from a softer, more relaxed ambiance created by a combination of floor lamps, table lamps, and warm recessed ceiling lights. This layered approach allows you to dim the living room lights for a cozy movie night while keeping the dining area bright enough for dinner or board games. It offers flexibility in how you use the combined space throughout the evening.
Avoiding the Pitfalls of Uniform Ceiling Grids
Avoid installing a uniform grid of identical ceiling downlights across the entire open-concept ceiling. A uniform grid flattens the spatial distinction, strips the room of character, and makes your home feel more like a commercial office than a comfortable living space. Instead, vary the height, intensity, and placement of your light sources to create depth and interest.
Prioritizing Electrical Safety and Installation Standards
When planning new lighting installations, always verify the fixture’s voltage, base interface, wattage limits, and compatibility with your existing dimming methods. For any fixed wiring, heavy suspended loads, or work at height, ensure you isolate the power at the main distribution board, follow the manufacturer’s installation instructions, and consult a qualified electrician in Singapore to ensure compliance with local electrical safety standards and weight limits. This ensures your beautiful new fixtures are installed safely and function reliably.
How can decorative screens and plants create subtle boundaries?
Incorporating vertical elements like open shelving, tall plants, and lightweight screens allows you to block direct sightlines and define zones without sacrificing natural light or airflow. These elements add height and texture to your design while keeping the layout feeling open and breezy.
Using Open-Back Shelving for Light and Storage
Positioning an open-back shelving unit perpendicular to a wall offers a functional divider that separates the living and dining spaces. Because the shelves are open, they allow light and sightlines to pass through, keeping the room feeling spacious while providing a place to display curated decor, books, and plants. It is an excellent way to add storage without closing off the room.
Incorporating Tall Indoor Plants as Green Screens
Using tall indoor plants, such as a fiddle-leaf fig, a monstera, or a row of matching planters, creates a natural, breathable screen. The organic shapes and vibrant greenery soften the hard lines of your furniture while establishing a gentle visual boundary. Plants also improve indoor air quality and bring a touch of nature into your living space.
Employing Flexible Folding Screens and Slatted Panels
For flexible privacy, consider folding screens or slatted wood panels. These elements can be easily adjusted or moved aside when you want to open up the entire space for hosting larger gatherings. Slatted panels, in particular, offer a modern, architectural look that filters light beautifully while providing a clear sense of separation.
Protecting Light and Cross-Ventilation
When placing vertical elements, always check that they do not block natural light from your windows or disrupt the cross-ventilation that is crucial for keeping compact apartments cool and comfortable. Maintaining a free flow of air and light is essential for a healthy, comfortable living environment.
How should you coordinate colors and textures to unify the zones?
Coordinating your color palette and material textures ensures that while your living and dining zones are functionally distinct, they still feel like part of a cohesive, well-designed home. A thoughtful color and texture strategy ties the entire open-concept space together beautifully.
Establishing a Cohesive Base Color Palette
Start by selecting a unified base color palette for your walls, flooring, and largest furniture pieces, such as neutral tones of beige, grey, or soft off-white. This consistent backdrop allows the eye to travel smoothly across the entire open-concept space without jarring transitions. It provides a calm, cohesive foundation for your design.
Introducing Zone-Specific Accent Colors and Textures
Introduce distinct accent colors or varied textures in each zone to signal a change in function. For instance, you might use rich velvet textures and deep blue accents in the living room, while incorporating natural wood tones and woven rattan textures in the dining area. These subtle shifts in material and color help define the unique character of each space.
Tying Elements Together with Decor
Tie the two zones together by repeating subtle design elements across both spaces. You can use throw pillows on the sofa that match the upholstery of your dining chairs, or select artwork for the dining wall that shares a color scheme with your living room rug. These small, intentional repetitions create a sense of harmony and completeness.
Balancing Visual Weight Across the Entire Layout
Balance the visual weight of both areas so that neither zone completely overpowers the other. If your living room features a large, dark sectional, balance it by choosing a dining table with a similar visual presence or a striking light fixture to ensure the layout feels perfectly poised. A balanced room feels more comfortable and visually appealing.
Community discussion
Share your experience or ask a question. Comments are reviewed before publication.