
Installing Philips 4000K spot and track lights in your home is an excellent way to achieve a bright, neutral white lighting scheme that balances functional clarity with cozy warmth. To execute this project safely and successfully, you must evaluate your ceiling structure, acquire the correct installation tools, follow precise electrical safety protocols, and understand where local regulatory boundaries lie. Whether you are aiming to illuminate a modern kitchen countertop or highlight artwork in your living room, proper planning ensures your fixtures perform optimally for years to come.
The 4000K color temperature, often referred to as cool white or neutral white, occupies a middle ground between the yellow tones of warm white (3000K) and the clinical blue-white of daylight (6500K). This makes it highly versatile for Singaporean homes, where spaces often serve multiple purposes, from home offices to relaxation zones. However, achieving the perfect lighting layout requires careful physical and electrical preparation. This guide breaks down the complete process step-by-step, from structural checks to final beam adjustments.
Pre-Installation Checks: Ceiling Types and Singapore Safety Rules
Before purchasing any fixtures or drilling any holes, you must identify the structural composition of your ceiling. Singaporean homes generally feature two main ceiling designs: solid concrete slabs or suspended false ceilings. Most standard Housing & Development Board (HDB) flats are built with reinforced concrete ceilings. Installing recessed spotlights directly into a concrete slab is structurally impossible without constructing a secondary plasterboard false ceiling. If you have a concrete ceiling and do not wish to build a false ceiling, surface-mounted spot lights or track light systems are your primary options, as they mount directly onto the concrete surface using masonry plugs and screws.
Products mentioned in this guide
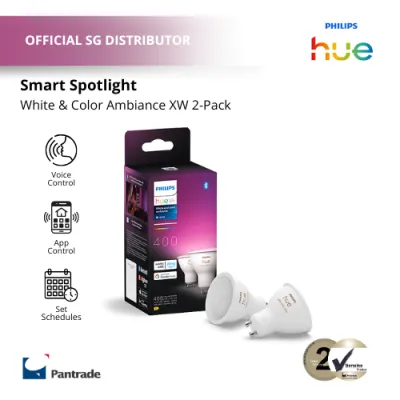
Prices are valid at publication and may change. Please refer to the product page for the latest price.
In contrast, condominiums and renovated HDB flats frequently feature false or suspended ceilings made of gypsum plasterboard panels supported by a lightweight metal framework. False ceilings provide a hollow cavity that is ideal for concealing the drivers and wiring of recessed spotlights. However, plasterboard has limited load-bearing capacity. While lightweight recessed spots can be supported directly by the plasterboard using spring clips, heavier track light systems must be anchored directly into the underlying metal furring channels or the structural concrete slab above using specialized long-reach toggle bolts.
Electrical work in Singapore is strictly regulated to prevent fire hazards and electrocution. Under the Energy Market Authority (EMA) guidelines, any modification to your home’s fixed electrical wiring must be carried out by a Licensed Electrical Worker (LEW). This includes running new electrical cables behind walls or ceilings, installing new circuit breakers, or adding brand-new lighting points. Homeowners are generally permitted to perform simple, direct replacements of existing light fixtures on a like-for-like basis, provided the circuit is fully isolated. If your installation involves creating new lighting points or modifying your distribution board (DB), you must engage a registered LEW to ensure compliance with Singapore Standard SS 638.
Finally, you must assess your existing electrical circuit’s load capacity and fixture specifications. Verify that your selected Philips 4000K fixtures are rated for Singapore’s standard voltage of 230V AC at 50Hz. Although modern LED fixtures are highly energy-efficient—typically drawing between 5 and 15 watts per light head—adding a large number of fixtures to a single circuit can still pose risks if the circuit is already heavily loaded. Locate your DB and identify the Miniature Circuit Breaker (MCB) dedicated to your lighting circuit, which is usually rated at 6 amps or 10 amps. Calculate the cumulative wattage of all existing and new lights on that circuit to verify that the total load remains well below the safe operating limit of the breaker.
Essential Tools and Materials for the Job
Having the right tools on hand is essential for a safe, efficient, and clean installation. For electrical safety and diagnostics, a non-contact voltage tester is your most critical tool. This device allows you to verify that no electrical current is flowing through the wires before you touch them. You will also need a pair of high-quality wire strippers to prepare the cable ends, and insulated screwdrivers rated up to 1000V to secure terminal connections safely.

For physical installation, your tool requirements will depend on your ceiling type. If you are installing recessed spotlights in a plasterboard false ceiling, a hole saw attachment for your power drill is indispensable. Ensure the hole saw diameter matches the exact cutout dimensions specified in your product manual. For surface-mounting track rails onto concrete ceilings, you will need a rotary hammer drill, masonry drill bits, and heavy-duty plastic wall anchors (rawlplugs). A spirit level and a measuring tape are also necessary to ensure your track rails are perfectly aligned and straight.
Before starting, unbox your Philips 4000K spot or track light kit and verify that all components are present and undamaged. Recessed spotlight kits typically include the LED luminaire, an external or integrated driver, and spring-loaded mounting clips. Track light kits should contain the track rail, a live end power feed connector, a dead end cap, mounting brackets, and the individual track heads. Verify that any drivers or power adapters carry the Enterprise Singapore Safety Mark on their packaging to guarantee compliance with local safety standards. Lastly, do not overlook personal protective equipment; always wear safety goggles and a dust mask to protect yourself from falling plaster dust or concrete debris while drilling overhead.
Step-by-Step Installation Process
Preparing the Ceiling and Cutouts
The physical installation begins with meticulous layout planning. Use a measuring tape and a pencil to mark the exact center point for each recessed spotlight or the path of your track rail. If you are installing recessed spots in a false ceiling, use a stud finder to locate the metal furring channels behind the plasterboard. Your cutout holes must be positioned at least 50mm away from these metal studs to avoid structural interference and to ensure the spotlight’s spring clips can deploy fully.
When drilling cutouts in a false ceiling, attach the correctly sized hole saw to your drill. Place the pilot drill bit on your pencil mark and begin drilling at a slow, controlled speed. Holding a plastic cup or a specialized dust catcher around the hole saw can help catch falling gypsum dust, keeping your living space clean. If you encounter resistance, stop immediately to check for hidden obstructions such as electrical conduits or water pipes.
Once the hole is cut, inspect the ceiling cavity. Recessed spotlights require a specific clearance depth—typically between 50mm and 100mm depending on the model—to allow proper air circulation and heat dissipation. Ensure that the cavity is free of loose insulation material, which must not come into direct contact with the hot surface of the LED driver or luminaire housing unless the fixture is explicitly rated for insulation contact (IC-rated).
Wiring and Mounting Recessed Spot Lights
Before performing any electrical wiring, you must absolutely isolate the power. Go to your home’s main distribution board and switch off the circuit breaker for the lighting circuit. For maximum safety, switch off the main incoming Residual Current Circuit Breaker (RCCB) as well. Use your non-contact voltage tester at the ceiling wire point to confirm that the circuit is completely dead. Never rely solely on the wall switch to isolate the power, as some switches may only cut the neutral wire, leaving the live wire active.
Once safety is verified, prepare the wires. Strip approximately 10mm of insulation from the ends of the live (brown), neutral (blue), and earth (green/yellow) wires protruding from the ceiling. Connect these wires to the input terminal block of the LED driver, matching live to live, neutral to neutral, and earth to earth. Ensure that all terminal screws are tightened securely and that no bare copper is exposed outside the terminal block. If your spotlight is a Class II double-insulated device, it may not feature an earth terminal; in this case, safely terminate the green/yellow earth wire from your ceiling in an isolated connector block rather than cutting it off.
After completing the wiring, carefully push the LED driver up through the cutout and place it flat inside the ceiling cavity. Next, pull back the two spring-loaded clips on the sides of the spotlight housing. Hold them firmly against the body of the fixture, insert the spotlight into the cutout hole, and slowly release the clips. The springs will snap outward, pulling the spotlight tight and flush against the plasterboard. Ensure that no electrical wires are pinched between the spring clips and the ceiling edge, as this can damage the insulation over time.
Assembling and Connecting Track Light Systems
Track light systems offer exceptional flexibility and are ideal for surface mounting on both concrete and false ceilings. Begin by holding the empty track rail against your pencil marks on the ceiling. Use a spirit level to ensure the rail is perfectly straight, and mark the pre-drilled mounting holes onto the ceiling. For concrete ceilings, drill holes using a masonry bit, insert plastic wall plugs, and screw the track rail securely into place. For false ceilings, use heavy-duty toggle bolts that expand behind the plasterboard to distribute the weight of the track rail and heads safely.
With the track rail physically secured, you must connect the power supply. Track systems utilize a specialized live end feed connector to transfer electricity to the internal copper conductors running along the inside of the rail. Route the ceiling wires into this feed connector, ensuring the live, neutral, and earth wires are connected to their respective terminals. Snap the protective plastic cover of the feed connector shut, slide the connector into the end of the track rail, and tighten the locking screw to secure it. Insert the dead end cap into the opposite end of the rail to seal the exposed copper tracks.
Finally, mount your track heads onto the rail. Most track systems feature a user-friendly twist-and-lock mechanism. Align the electrical contacts on the base of the track head with the grooves inside the track rail, insert the head, and rotate the locking dial or lever 90 degrees until it clicks into place. This action establishes both the mechanical support and the electrical connection. You can slide the track heads along the rail to position them precisely where light is needed.
Post-Installation Testing and Beam Adjustment
Once all physical and electrical connections are complete, it is time to test your new lighting system. Return to your distribution board, restore the main power, and switch on the lighting circuit breaker. Flip the wall switch to turn on your lights. All spotlights or track heads should illuminate immediately with a consistent, flicker-free neutral white glow. If any light fails to turn on or exhibits flickering, turn off the power at the DB immediately and check for loose wire connections or improperly seated track heads.
With the lights functioning correctly, you can adjust the beam directions to create the perfect lighting environment. The 4000K neutral white light is highly effective for highlighting specific features without distorting colors. If you installed adjustable recessed spotlights, gently press the inner gimbal ring to tilt the beam toward feature walls, artwork, or work surfaces. For track lights, loosen the adjustment screws on the swivel joints of the track heads, aim the beams at your desired targets—such as a kitchen island, a dining table, or a bookshelf—and tighten the joints. Ensure that beams are angled away from direct eye level to prevent uncomfortable glare.
To maintain the performance and longevity of your fixtures, establish a simple routine maintenance schedule. Over time, dust can accumulate on the lenses, reducing light output and trapping heat. Every few months, turn off the lights, allow them to cool completely, and wipe the lenses and outer housings gently with a dry, anti-static microfiber cloth. Never use wet cloths, chemical spray cleaners, or abrasive pads, as these can damage the protective coatings or seep into the electronic components. Additionally, periodically check that the track heads remain securely locked and that there are no signs of discoloration around the connections.
DIY Boundaries: When to Hire a Licensed Electrical Worker
While replacing an existing light fixture with a new spotlight or track light can be a rewarding DIY project for those with basic electrical knowledge, it is vital to recognize the legal and safety limits of DIY work in Singapore. Under local regulations, any work that involves altering the fixed wiring of your home must be performed by an EMA-licensed electrical worker (LEW). Attempting to run new cables through concrete walls, extending electrical circuits from one room to another, or modifying your distribution board yourself is not only illegal but also highly dangerous.
You should immediately stop and hire an LEW if you encounter any complex or uncertain situations during your installation. For example, if you discover that your existing ceiling points lack an earth wire—a common issue in older HDB flats—you must have a professional upgrade your wiring, as operating metallic light fixtures without a proper earth connection poses a severe shock hazard. You should also call an LEW if your false ceiling shows signs of water damage or structural weakness, or if your circuit breakers trip repeatedly when you turn on your lights.
Finally, remember that unauthorized electrical modifications can have severe financial and legal consequences. In the unfortunate event of an electrical fire, home insurance providers in Singapore will thoroughly investigate the cause. If the fire is traced back to unlicensed or non-compliant electrical work, your insurance claim will likely be rejected, leaving you personally liable for all damages. Hiring an LEW not only guarantees that your lights are installed safely and in compliance with SS 638, but it also protects your investment and ensures your peace of mind.
Community discussion
Share your experience or ask a question. Comments are reviewed before publication.