
Whether you can perform a fan led replacement yourself depends entirely on the design of your fan’s light kit. Before retrieving your tools, turn off the light and look closely at the fixture. If you can see individual glass bulbs through a shade or if the glass globe simply unscrews to reveal standard screw-in bulbs, you have a highly serviceable system. However, if the light cover is a completely flat, sealed acrylic or glass panel that glows uniformly, the fan likely uses an integrated LED disc or module. While some modular LED discs feature plug-and-play connectors that make them straightforward to swap, others are permanently soldered to the fan’s main circuitry, meaning the entire light kit or the ceiling fan itself must be replaced. The following sections will guide you through safely identifying your light kit design, reading technical specifications, and matching the exact parameters required for a successful replacement.
Identify Your Ceiling Fan's LED Design Type
To determine if a replacement is physically possible and what level of DIY effort is required, you must first categorize your ceiling fan’s lighting system. Ceiling fans generally fall into one of three design categories, ranging from highly serviceable traditional setups to sealed, non-serviceable modern units.
Standard Screw-In or Pin Bulbs
Traditional ceiling fans often feature a light fixture equipped with standard sockets. These setups typically accommodate E27 (medium screw), E14 (small screw), or GU10 (twist-and-lock pin) bulbs. If your fan uses this design, replacement is incredibly straightforward and requires no technical wiring knowledge. You simply need to unscrew the old bulb and replace it with a new energy-efficient LED bulb of the same base type. Always check the maximum wattage rating printed inside the socket housing to ensure your new bulb does not exceed the fixture’s thermal limits.
Products mentioned in this guide
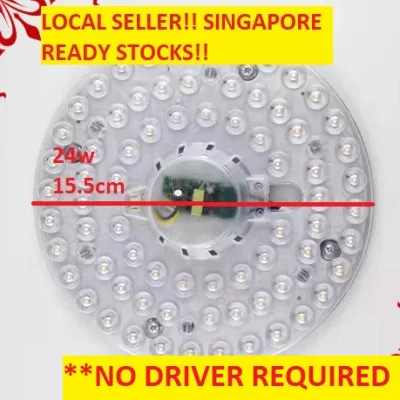
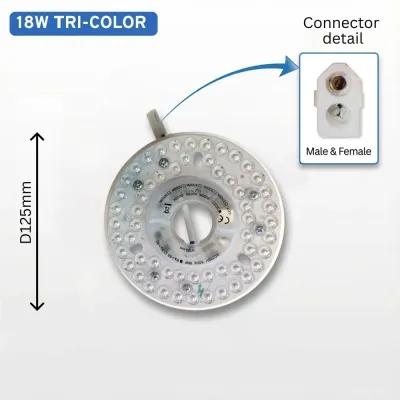
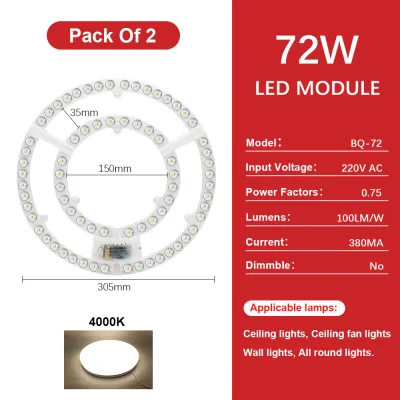
![[SG Local] Ceiling Fan Light Source Triple Color LED Ceiling Light replacement Magnetic](https://img.lazcdn.com/g/ff/kf/S564c671afdef454d838c54e4ee432723N.jpg_400x400q80.jpg_.webp)
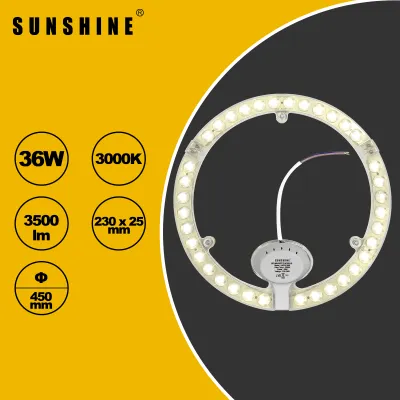
Prices are valid at publication and may change. Please refer to the product page for the latest price.
Replaceable LED Modules or Light Kits
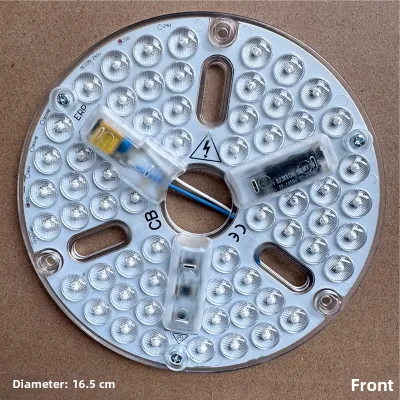
Many modern ceiling fans utilize a separate, plug-and-play LED module rather than standard bulbs. These modules often consist of a circular metal plate populated with multiple light-emitting diode chips, held in place inside the fan’s light pan by magnets or small screws. They connect to the fan’s internal wiring via a quick-disconnect plastic plug, usually a two-pin or three-pin snap connector. If this module fails, you can generally replace it yourself if you can source a compatible proprietary or universal LED module from the original manufacturer or a specialized lighting supplier.
Fully Integrated LED Boards
In many ultra-slim, minimalist ceiling fans, the LED chips are soldered directly onto a metal-core printed circuit board that is permanently affixed or hardwired into the fan’s main circuitry. These systems are designed as sealed units where the LED board and the fan’s internal controller operate as a single system. If individual diodes burn out or the board fails, these units are generally considered non-serviceable by consumers. Attempting to desolder and replace individual chips is highly technical and carries safety risks, meaning you will typically need to replace the entire light kit assembly or, in some cases, the entire ceiling fan.
How to Safely Inspect the Light Kit and Internal Components
Working with ceiling fan light kits involves both working at heights and handling electrical wiring. Prioritizing safety prevents personal injury and protects your home’s electrical system from damage.

First, check the applied product’s label and the treated item’s manufacturer instructions before proceeding with any disassembly. If instructions conflict, the item is unidentified, or the use is not covered, stop and consult the manufacturer or a qualified professional. Before touching any electrical components, you must isolate the power. Do not rely solely on the wall switch or remote control to turn off the electricity. Locate your home’s main distribution board (DB box) and switch off the circuit breaker dedicated to the ceiling fan’s circuit. Use a reliable non-contact voltage tester at the fan switch or light kit to verify that the power is completely off before proceeding.
Once power isolation is verified, position a sturdy A-frame ladder on a flat, stable surface. Avoid overreaching while working; keep your body centered between the ladder rails. Carefully remove the light cover, diffuser, or glass globe. Depending on your fan model, the cover may secure via a twist-lock mechanism, magnetic attachments, or small retaining screws situated around the collar of the light pan. Support the cover with one hand as you loosen it to prevent it from falling and shattering.
With the cover removed, inspect the internal components to identify the wiring structure. Look for a distinct, self-contained LED driver box and a separate LED board. Note how the components connect to one another. If you observe a quick-disconnect plastic plug-and-play terminal linking the driver to the LED board, the system is designed for modular replacement.
Stop immediately and consult a qualified electrician or a licensed electrical worker if you encounter any of the following warning signs during your inspection:
- The LED board wires are soldered directly to the main fan circuitry without any terminal plugs.
- There are visible scorch marks, melted plastic, or a distinct burnt odor inside the light pan.
- You discover frayed, cracked, or brittle wire insulation.
- The ceiling fan is mounted on a very high ceiling or double-volume space that cannot be safely reached with standard home ladders.
Read and Match LED Specifications for a Compatible Replacement
If you have confirmed that your ceiling fan uses a replaceable LED module, you must match the replacement unit’s technical specifications precisely. Installing an incompatible module can damage the LED driver, shorten the lifespan of the light, or create an electrical hazard.
Electrical Specs: Wattage, Voltage, and Driver Compatibility
Locate the specification label printed on the back of the existing LED board or on the casing of the LED driver. While Singapore’s standard mains voltage is 230V AC at 50Hz, the LED driver steps this voltage down to power the LED board safely. You must determine whether your system uses a constant voltage driver (typically outputting 12V DC or 24V DC) or a constant current driver (typically rated in milliamperes, such as 300mA or 350mA). The replacement LED board must match these output specifications exactly. Additionally, verify the wattage of the existing board (common sizes include 18W, 24W, or 32W) and ensure the new board does not exceed the maximum wattage output supported by your driver.
Physical Specs: Dimensions and Connector Types
An LED module must fit physically within the recessed space of the fan’s light pan. Use a precise measuring tape or caliper to measure the outer diameter of the circular LED board, its total thickness, and the diameter of the center hole if the fan’s central spindle or downrod passes through the middle of the light kit. Note the mounting method; many universal replacement modules feature magnetic feet that cling directly to the steel light pan, which simplifies installation. Take a clear, high-resolution photograph of the power connector plug. Connector shapes, pin layouts, and spacing vary widely across brands, and a visual match is crucial when sourcing parts from online marketplaces or local lighting shops.
Light Quality: Color Temperature and Lumens
Consider the light quality to ensure the replacement matches your living space’s ambiance. Color temperature is measured in Kelvin (K). A rating of 3000K provides a warm white light suitable for bedrooms, 4000K offers a neutral cool white ideal for living rooms, and 6500K delivers a bright daylight appearance suited for task areas. Many ceiling fans in Singapore feature “3-tone” or “triple-color” lighting that toggles between these three temperatures via the wall switch or remote control. If you are replacing a 3-tone LED module, you must purchase a specific 3-tone replacement board that contains alternating warm and daylight LED chips designed to work with your driver’s switching sequence. Finally, check the lumen rating (lm) to ensure the replacement provides adequate brightness for your room size.
When to Call an Electrician or Replace the Entire Fan
Understanding the limits of a DIY repair helps prevent unnecessary expenses and safety hazards. If your ceiling fan light kit lacks plug-and-play connectors, or if the wiring inside the housing is complex and integrated with a multi-speed fan receiver, attempting a self-repair is not recommended. Complex dimmer integrations or smart home control modules also require professional diagnostic tools to troubleshoot safely.
Consider the practical cost-benefit ratio of replacing the LED module versus replacing the entire ceiling fan. In Singapore, a standard ceiling fan with an integrated LED light kit can range from S$150 to S$400 depending on the brand and motor type. Sourcing a proprietary, out-of-warranty LED replacement module from overseas manufacturers can sometimes cost upwards of S$80 to S$120 and take several weeks to arrive. If your fan is more than five to eight years old, its AC or DC motor may also be nearing the end of its natural lifespan. In such cases, investing in a brand-new, energy-efficient ceiling fan with a comprehensive local warranty is often a more economical and reliable long-term decision.
If you decide to replace the light kit or the entire fan, dispose of the old electronic components responsibly. LED boards, drivers, and fan remote receivers contain electronic circuitry and must not be thrown into standard household waste. Take these components to designated e-waste recycling points, such as the National Environment Agency (NEA) e-waste collection bins located across Singapore, to ensure they are processed safely.
Frequently Asked Questions (FAQ)
Can I upgrade my ceiling fan LED to a higher wattage for more brightness?
No, you should not install an LED board with a higher wattage than the original driver’s rated capacity or the fixture’s maximum thermal limit. Doing so will overload the LED driver, causing it to overheat and fail prematurely, and can create a serious fire hazard. If you require more light, look for a replacement LED module that offers a higher lumen-per-watt efficiency rating rather than a higher wattage, allowing you to achieve greater brightness within the same safe power threshold.
Why does my new replacement LED flicker or buzz after installation?
Flickering or buzzing usually points to an electrical mismatch between the new LED board and the existing components. This issue often occurs when the new board’s voltage or current requirements do not align perfectly with the output of the old LED driver. It can also stem from compatibility issues between the LED driver and an older wall dimmer switch, or from a loose connection within the plug-and-play plastic terminal. Double-check all physical connections and verify that your wall switch is compatible with LED loads.
Do I need to replace the LED driver when changing the LED board?
While you do not always have to replace the driver, doing so is highly recommended. Unless you can find a replacement LED board that perfectly matches the exact voltage, constant current milliampere rating, and wattage requirements of your old driver, replacing both components as a matched set is the safest approach. Many universal fan led replacement kits are sold with a matching driver included, which ensures optimal performance, eliminates compatibility issues, and extends the overall lifespan of your new light kit.
Community discussion
Share your experience or ask a question. Comments are reviewed before publication.