
Finding the perfect led light with remote control that aligns with the serene, minimalist principles of Japandi design requires balancing visual warmth with modern convenience. In Singapore, where urban apartments demand both space optimization and clean interior lines, a Japandi-style LED pendant light serves as a functional centerpiece. It bridges the gap between cozy Scandinavian hygge and rustic Japanese wabi-sabi, while the remote control offers seamless light adjustment without disrupting the clean aesthetic with cluttered wall switches. Selecting the right fixture involves evaluating material authenticity, driver compatibility with local electrical grids, and the physical integration of the remote receiver.
Recognizing Authentic Japandi Aesthetics in Pendant Lights
To identify true Japandi design, one must understand the intersection of its two foundational cultures. Japanese wabi-sabi celebrates the beauty of natural imperfection, organic textures, and weathered simplicity. Scandinavian hygge contributes a sense of warmth, comfort, and practical functionality. When these philosophies merge in a pendant light, the result is a fixture that feels grounded, understated, and highly tactile.
Authentic Japandi pendant lights rely heavily on natural, sustainable materials. Woven bamboo, fine rattan, solid white oak, walnut, and handmade washi paper are staples of this style. These materials are often left in their natural state or treated with matte, low-VOC finishes that preserve the raw texture of the grain. Spun aluminum and steel are also common, but they are invariably finished in soft, ultra-matte powder coatings—such as sand, charcoal, off-white, or muted terracotta—to avoid any cold, industrial glare.
Products mentioned in this guide
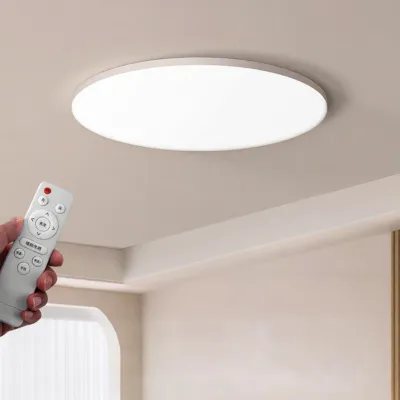
Prices are valid at publication and may change. Please refer to the product page for the latest price.
The silhouette of a Japandi pendant is defined by clean geometric lines and soft, organic curves. You will find simple domes, perfect spheres, flat discs, and gentle bell shapes. Ornate details, exposed screws, shiny chrome, polished brass, and crystal embellishments are entirely absent. The design relies on the purity of the form and the texture of the material to create visual interest.
When shopping for these fixtures in Singapore, use these observable checkpoints to verify authentic Japandi design:
- Surface Texture: Run your hand over the fixture if viewing it in a showroom. It should feel textured, dry, and matte. Avoid any surfaces that have a glossy, reflective, or highly polished lacquer.
- Material Integrity: Check the product specifications to ensure the wood components are solid timber or high-quality veneers rather than printed plastic laminates. Real wood ages gracefully, developing a unique character over time that aligns with wabi-sabi.
- Concealed Hardware: Inspect how the light shade connects to the suspension cable. High-quality designs use matching wooden or matte-finished strain reliefs and hidden brackets to keep the hardware invisible.
- Earthy Color Palette: Ensure the color scheme consists of neutral, muted tones. Bright primary colors or high-contrast metallic finishes deviate from the calming, nature-inspired Japandi palette.
Evaluating Remote Control and LED Performance
Integrating a modern led light with remote control into a Japandi interior requires careful attention to the light’s performance and the remote’s functionality. The primary benefit of an integrated LED system is the ability to adjust both brightness and color temperature dynamically, allowing you to transition the room’s mood from a bright, productive workspace to a cozy, relaxing sanctuary.

Stepless dimming and adjustable Correlated Color Temperature (CCT) are essential features for a premium lighting experience. A high-quality Japandi pendant should offer a smooth, flicker-free transition from warm white (around 2700K) to cool or neutral white (up to 4000K). Warm white light mimics the glow of traditional incandescent bulbs or candlelight, making it ideal for dining areas and evening relaxation. Neutral white light provides clear, high-contrast illumination that is perfect for food preparation, reading, or working from home. Stepless dimming ensures that these adjustments occur gradually, avoiding the jarring jumps in brightness associated with cheaper, stepped dimming drivers.
The underlying technology of the remote control signal significantly impacts daily usability. Most remote-controlled pendant lights use one of three signal types:
- Infrared (IR): This technology requires a direct line-of-sight between the remote handset and the receiver on the light fixture. If your pendant has a solid wood or metal shade that blocks the receiver, you may have to stand directly underneath the light and point the remote upward to operate it, which can be frustrating.
- Radio Frequency (RF): RF remotes operate on a frequency that does not require line-of-sight. The signal easily penetrates wooden slats, paper shades, and even lightweight partition walls. This allows you to adjust the lighting from anywhere in the room, or even from an adjacent hallway, offering a much more seamless user experience.
- Bluetooth and Wi-Fi: Smart-enabled pendants use these protocols to connect to smartphone apps or voice assistants. While highly versatile, they often require a more complex initial setup and a stable home network to function reliably.
Beyond basic dimming, look for convenient features like a built-in memory function and a dedicated night-light mode. A memory function ensures that the LED driver retains your last used brightness and color temperature settings when you turn the light off and on again, whether using the remote or the physical wall switch. Without this, the light may default to its brightest, coldest setting every time it is switched on, disrupting your carefully curated ambiance. A night-light mode drops the light output to a minimal level (typically 5% to 10%) at a very warm color temperature, providing just enough illumination for safe navigation at night without straining your eyes.
Finally, evaluate the physical remote control itself. A cheap, cluttered plastic remote with dozens of colorful buttons detracts from the minimalist aesthetic of a Japandi home. Look for remotes with a clean, ergonomic layout, matte finishes, and intuitive button designs that can be easily stored out of sight or placed on a side table without looking out of place.
Localized Sizing and Electrical Standards for Singapore Homes
When importing or purchasing a pendant light in Singapore, local housing characteristics and electrical regulations dictate strict installation boundaries. Singapore’s standard electrical utility grid operates at a voltage of 230V AC with a frequency of 50Hz. It is critical to verify that the integrated LED driver of your chosen pendant is rated for 220V–240V. Many fixtures sourced directly from overseas markets like North America are configured for 110V; connecting these to a Singaporean power supply without a compatible step-down transformer will cause immediate driver failure, permanent LED damage, and a significant electrical fire hazard.
To ensure safety and compliance, always check for the Enterprise Singapore Safety Mark on the LED driver or the integrated power supply. The Safety Mark indicates that the electrical component has been independently tested and certified to meet local safety standards, protecting your home against short circuits, overcurrents, and overheating.
Ceiling height is another crucial factor, particularly in Singapore’s public housing. Standard Housing & Development Board (HDB) flats typically have a floor-to-ceiling height of approximately 2.6 meters, while some newer developments and private condominiums may offer slightly higher ceilings. To calculate the ideal pendant drop length, consider the specific location of the fixture:
- Above a Dining Table: The standard height of a dining table is around 75cm. The bottom of the pendant light should hang approximately 75cm to 90cm above the tabletop. In a standard 2.6-meter HDB flat, this places the bottom of the light fixture roughly 1.5m to 1.65m above the floor, leaving a suspension cable length of about 95cm to 1.1m. This height ensures optimal illumination of the dining surface while preventing the shade from obstructing face-to-face conversations or causing direct glare.
- In Walkways or Living Areas: If the pendant is installed in an open living space where people walk underneath, the bottom of the fixture must clear at least 2.0 to 2.1 meters from the floor. In a 2.6-meter ceiling, this leaves only 50cm to 60cm for both the fixture body and the suspension cable, meaning you should opt for a flatter, wide-disc Japandi design rather than a tall, vertical dome.
Weight limitations are equally important, especially when dealing with false ceilings. Many modern HDB flats and condominiums utilize gypsum board false ceilings to conceal air conditioning ducts and electrical wiring. A standard false ceiling can safely support lightweight pendant lights (under 2kg to 3kg) using specialized spring-loaded toggle bolts, also known as butterfly anchors, which distribute the weight across the back of the gypsum board. However, authentic Japandi pendants crafted from solid hardwood or heavy metal can easily exceed 5kg. For these heavier fixtures, the mounting bracket must be anchored directly into the concrete structural ceiling slab (soffit) above the false ceiling using threaded rods or heavy-duty concrete expansion bolts. Hanging a heavy fixture solely from a gypsum board false ceiling risks structural failure and severe injury.
Balancing Minimalist Design with Remote Control Integration
One of the primary design challenges of a modern led light with remote control is maintaining a clean, uncluttered aesthetic. Traditional remote-controlled lights often rely on bulky, external receiver boxes that must be stuffed into the ceiling canopy during installation. In a minimalist Japandi interior, a bloated or poorly fitting ceiling canopy ruins the flush, clean lines of the ceiling.
To achieve a seamless look, search for pendant lights that feature ultra-slim, integrated LED drivers and compact remote receivers. High-quality manufacturers design the ceiling canopy—the metal or wooden cup that sits flush against the ceiling—to perfectly house all necessary electrical components without requiring excess physical volume. Some advanced designs even integrate the driver and receiver directly into the main body of the light fixture, allowing for an incredibly slim, low-profile ceiling mount.
The choice of Japandi material also dictates how the LED light is distributed throughout the room. Different materials interact with light in unique ways, affecting both the visual weight of the fixture and the quality of the illumination:
- Rice Paper and Washi: These materials act as highly efficient diffusers. The light from the internal LED is scattered evenly in all directions, creating a soft, shadowless ambient glow that mimics natural paper lanterns. This is ideal for creating a calm, serene atmosphere in living rooms or bedrooms.
- Woven Bamboo and Rattan: Woven shades allow light to escape through the gaps in the weave, casting intricate, organic patterns of light and shadow across the walls and ceiling. While visually stunning and rich in texture, these patterns can sometimes be distracting in a dedicated study or workspace.
- Solid Wood and Spun Aluminum Domes: These opaque materials block lateral light transmission entirely, directing the entire output of the LED downward in a focused cone. This creates a dramatic, high-contrast pool of light on the surface below, making it highly suitable for dining tables or kitchen islands.
To help you evaluate the best control integration for your home, consider the following comparison of common control methods:
| Control Method | Range | Wall-Penetration | Aesthetic Impact | Setup Complexity |
|---|---|---|---|---|
| IR Remote | Short (up to 5m) | None (requires direct line-of-sight) | Low (requires a visible sensor on the fixture) | Very Low (works out of the box) |
| RF Remote | Medium (up to 15m) | High (works through shades and walls) | Minimal (receiver is completely hidden) | Low (pre-paired at the factory) |
| Smart App/Voice | Unlimited (via internet) | High (uses home Wi-Fi or Bluetooth) | None (no physical remote handset needed) | Medium (requires app pairing and network setup) |
When selecting a pendant, balance the visual weight of the fixture with the size of your room. A large, dark solid-wood dome has high visual weight and can easily dominate a small dining nook. Conversely, an airy, light-colored woven bamboo pendant has low visual weight, allowing it to fill a large physical volume without making the space feel cramped or cluttered.
Installation Safety and Professional Boundaries
Installing a pendant light involves working with high-voltage electricity and suspended loads, making safety the absolute highest priority. Before undertaking any inspection, maintenance, or installation work, the mandatory first step is to isolate the power supply. Locate your home’s main distribution board (DB box) and switch off the circuit breaker dedicated to the lighting circuit. Do not rely solely on the wall switch, as some wiring configurations may leave the neutral wire live, posing a severe shock hazard. Use a reliable non-contact voltage tester at the ceiling wires to verify that the power is completely off before touching any components.
Next, verify the structural integrity of the existing ceiling mount. If you are replacing a lightweight plastic or glass fixture with a heavier wood or metal Japandi pendant, inspect the mounting area for any signs of cracking, moisture damage, or loose plaster. The mounting bracket must be secured to a solid structural member, such as a concrete slab or a sturdy wooden ceiling joist, using appropriate screws and wall plugs.
It is important to establish clear boundaries between simple DIY tasks and work that requires professional expertise. In Singapore, while cosmetic tasks like cleaning a light shade or replacing a standard light bulb are safe for homeowners, any work involving fixed electrical wiring, modifying the ceiling structure, or installing new electrical points must be handled by a Licensed Electrical Worker (LEW) registered with the Energy Market Authority (EMA). Attempting to wire a new fixture without proper licensing is not only illegal under local regulations but also voids your home insurance policy in the event of an electrical fire or accident.
Additionally, consider the environmental conditions of the installation site. If your dining area is located adjacent to an open-concept kitchen or near a balcony where humidity levels fluctuate, the pendant light will be exposed to airborne grease, steam, and moisture. For these environments, verify that the fixture has an appropriate Ingress Protection (IP) rating. While a standard IP20 rating is sufficient for dry, enclosed living rooms, a rating of IP44 or higher is recommended for areas prone to moisture, ensuring the internal LED driver and remote receiver remain protected against water ingress and corrosion over time.
Frequently Asked Questions (FAQ)
Can I use a smart switch instead of a physical remote for Japandi pendants?
Using a standard smart wall switch with an integrated LED pendant light that has its own remote control system often leads to technical conflicts. Standard smart switches operate by physically cutting or restoring power to the electrical circuit. When you turn off the smart switch, the power to the pendant’s built-in remote receiver is completely cut. When turned back on, the LED driver loses its memory and typically resets to its default factory settings—which are often maximum brightness and a cold, harsh white light. To avoid this, it is best to keep the physical wall switch permanently turned on and use the dedicated RF remote control supplied with the fixture to adjust the light. Alternatively, you can install a smart relay module behind a traditional retractive switch, which keeps the circuit constantly energized while sending digital commands to control the light.
How do I conceal the remote control receiver in a minimalist ceiling setup?
To maintain the clean, flush ceiling lines characteristic of Japandi design, you must ensure the remote control receiver is completely hidden from view. High-quality Japandi pendant lights are designed with a spacious, custom-engineered ceiling canopy that sits flush against the concrete or false ceiling. This canopy is specifically sized to house both the LED driver and the compact remote receiver module. When purchasing a fixture, check the product specifications for the canopy dimensions. A canopy with a diameter of at least 12cm and a depth of 3cm to 4cm is generally sufficient to neatly tuck away the receiver, wire connectors, and excess suspension cable without pinching the wires. Avoid buying cheap, generic aftermarket remote control kits, as their bulky external receiver boxes rarely fit inside minimalist canopies and will force you to leave an unsightly plastic box exposed on your ceiling.
Community discussion
Share your experience or ask a question. Comments are reviewed before publication.