
When a ceiling light suddenly begins to flicker, dim unexpectedly, or refuses to turn on, the culprit is rarely the LED panel itself. Instead, the issue usually lies with the LED driver—the dedicated power supply that regulates the electrical current flowing through the light-emitting diodes. Finding an exact replacement requires more than just picking a unit with a matching brand name or physical shape.
Installing an incompatible driver can lead to persistent flickering, premature LED failure, severe overheating, or even hazardous electrical shorts. The most reliable starting point is always to inspect the label of your existing driver to identify its electrical parameters before purchasing a replacement. This systematic check ensures your light operates safely and at peak performance.
Critical Electrical Specs: Voltage and Wattage
Before buying a replacement led driver for ceiling fixtures, you must first verify the input voltage to ensure it matches your household electricity supply. In Singapore, the standard utility mains electricity runs at 230V AC at a frequency of 50Hz. When browsing for a replacement, verify that the driver’s label explicitly lists an input voltage range that covers this standard, such as “220-240V AC” or a wide-range “100-240V AC.” Choosing a driver designed solely for a 110V grid will cause the unit to fail instantly and could damage your ceiling light permanently.
Products mentioned in this guide
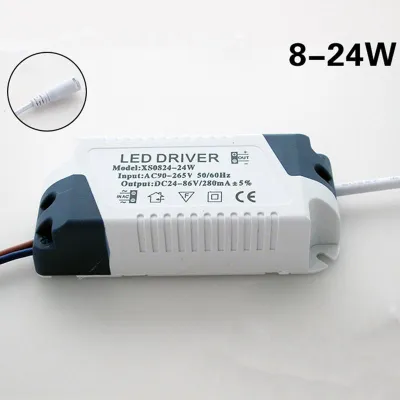
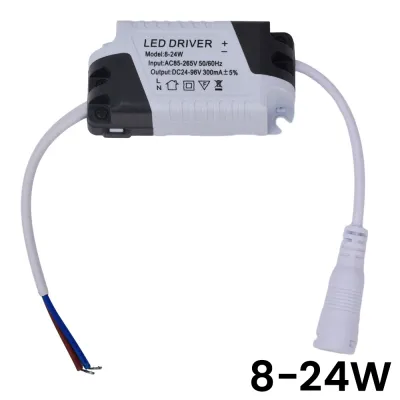
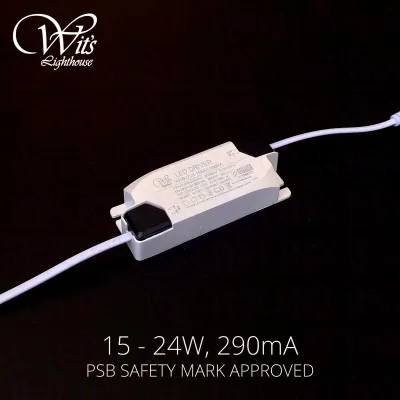
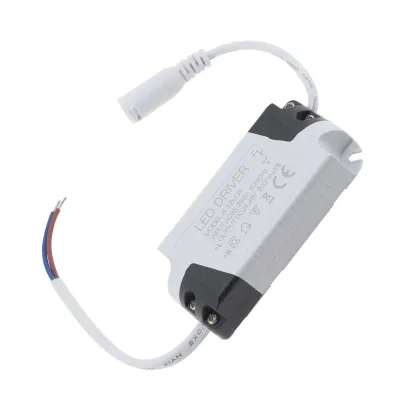
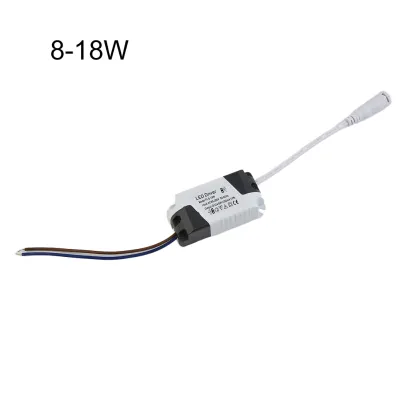
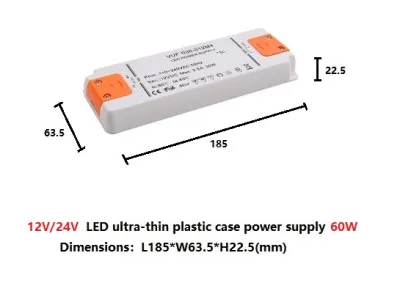
Prices are valid at publication and may change. Please refer to the product page for the latest price.
Next, examine the output voltage and output current specifications, which are highly critical for the safe operation of the LED module. Unlike traditional incandescent bulbs, LEDs are highly sensitive to small shifts in electrical supply. The replacement driver’s output voltage range must align precisely with the requirements printed on your old driver or the ceiling light’s internal LED plate. For instance, if your fixture requires an output of 30-42V DC, the replacement driver must support that exact range to prevent underpowering or overpowering the diodes.
Calculating the wattage requirements follows a strict sizing principle to prevent premature component wear. The general rule is that the driver’s maximum wattage rating must be equal to or slightly higher than the total wattage consumed by the ceiling light. For example, if your ceiling light is rated at 20W, you should select a driver rated for at least 20W or 25W. This overhead ensures the driver does not run at 100% capacity constantly, which can cause excessive heat buildup and shorten its operational lifespan.
However, avoid the common misconception that choosing a significantly higher wattage driver is always safer. If you install a 60W driver to power a tiny 10W ceiling light, the driver may fail to regulate the electrical load correctly. Many LED drivers require a minimum load to operate stably; running a driver far below its intended capacity can cause the light to flicker, buzz, or fail to illuminate entirely. Always consult the manufacturer’s specification sheet to ensure your light’s load falls comfortably within the driver’s minimum and maximum wattage limits.
Output Type: Constant Current (CC) vs. Constant Voltage (CV)
Understanding the distinction between Constant Current (CC) and Constant Voltage (CV) drivers is crucial, as using the wrong output type will immediately damage your light or prevent it from working. LED drivers are engineered to regulate either the current or the voltage, but never both simultaneously. Connecting a constant voltage driver to a fixture designed for constant current will typically burn out the LEDs within seconds due to thermal runaway.

Constant Current (CC) drivers are the standard choice for most integrated ceiling lights, downlights, and oyster lights. These drivers maintain a steady electrical current (measured in milliamperes, or mA) while allowing the voltage to fluctuate within a specified range depending on the load. Common current ratings for ceiling downlights include 300mA, 350mA, 500mA, or 700mA. When replacing a CC driver, the output current of the new unit must match the original driver’s milliampere rating exactly, while the output voltage range must encompass the original voltage requirement.
Constant Voltage (CV) drivers, on the other hand, maintain a fixed voltage output—most commonly 12V DC or 24V DC—while the current fluctuates based on how many lights are connected. These drivers are typically utilized for LED strip lights, cabinet lighting, or specific modular ceiling systems that have built-in current-limiting resistors on the light boards. To determine which type your ceiling light requires, look closely at the “Output” section of your old driver’s label. If it lists a single, fixed voltage (e.g., “Output: 24VDC”) and a variable current, it is a CV driver; if it lists a fixed current (e.g., “Output: 350mA”) and a variable voltage range (e.g., “Output: 30-40VDC”), it is a CC driver.
Dimmability and Smart Switch Compatibility
If your ceiling light is connected to a wall dimmer, you must select a replacement driver that is explicitly labeled as “dimmable.” Standard, non-dimmable drivers are designed to receive a steady, uninterrupted flow of mains power. If you attempt to dim a non-dimmable driver, the reduced voltage or chopped waveform from the switch will cause severe flickering, loud buzzing, and rapid component degradation, which can ruin both the driver and the dimmer switch.
Furthermore, you must match the dimmable driver to the specific dimming technology installed in your home. The most common analog dimming method for residential properties is TRIAC (leading-edge or trailing-edge phase-cut) dimming, but some modern setups or commercial spaces utilize 0-10V or DALI (Digital Addressable Lighting Interface) systems. Review your dimmer switch’s technical specifications or consult the manufacturer’s manual to ensure the replacement driver supports the exact control protocol your switch uses.
If you use smart switches or home automation modules to control your ceiling lights, pay extra attention to driver compatibility. Smart switches often leak a microscopic amount of standby current through the circuit to power their internal wireless chips, even when the light is turned “off.” If the replacement driver has a very low minimum load threshold or lacks proper filtering, this standby current can cause the ceiling light to glow faintly in the dark (ghosting) or flash intermittently. Choosing a driver verified by the manufacturer to work with smart lighting systems is key to preventing these issues.
Physical Dimensions and Connector Types
While electrical specifications are paramount, physical compatibility determines whether you can actually complete the installation. Ceiling lights, particularly slim downlights and flush-mount oyster fixtures, have highly restricted internal cavities or canopy housings. Before purchasing a replacement, use a ruler to measure the length, width, and height of the original driver, and compare these measurements against the dimensions of the candidate driver. Even a difference of a few millimeters can prevent the driver from fitting inside the fixture housing or passing through a narrow ceiling cutout.
You must also inspect the input and output connection interfaces of the driver. Many pre-packaged ceiling lights utilize proprietary quick-connect plugs—such as 2-pin or 3-pin push-in male/female connectors—to link the driver to the LED board. If the replacement driver features bare wire leads instead of a matching plug, you will need to splice the wires manually.
Splicing wires without proper connectors or insulation can introduce safety hazards, void the manufacturer’s warranty, or lead to loose connections over time. If the replacement driver does not come with a compatible plug-and-play connector, verify if you can safely transfer the old connector or if you need to purchase a matching adapter. Always refer to the installation instructions of both the driver and the ceiling fixture before modifying any wiring.
Safety Certifications and Professional Installation
Electricity carries inherent risks, making safety compliance non-negotiable when sourcing lighting components. When buying an LED driver in Singapore, look for recognized safety certifications on the product casing. The Singapore Safety Mark is a crucial indicator that the electrical appliance has been tested and registered to meet local safety standards. Other globally recognized certifications, such as the CE mark or UL listing, also indicate compliance with rigorous international safety and electromagnetic compatibility regulations.
Before attempting to inspect, disconnect, or install any electrical components, you must prioritize personal safety. Always isolate the power supply by switching off the main circuit breaker at your home’s distribution board (DB box), rather than relying solely on the wall switch. Use a reliable voltage tester to verify that the wires are completely dead before touching them.
Finally, recognize the boundaries of safe DIY work. If the existing wiring inside your ceiling is complex, lacks clear labeling, or involves fixed mains connections without a plug, do not attempt to replace the driver yourself. If you are unsure about calculating the electrical load, matching the dimming protocols, or working at heights, stop immediately. In these scenarios, always consult a licensed electrical worker or a qualified professional to handle the installation, ensuring your home’s electrical system remains safe and compliant.
Community discussion
Share your experience or ask a question. Comments are reviewed before publication.