
When planning a renovation or upgrading the illumination in your Singapore Board (HDB) flat or private condominium, choosing the right lighting layout is a critical decision. Modern homes rely heavily on recessed fixtures to maximize vertical space and create a clean, contemporary aesthetic. However, selecting incorrect specifications can leave your home feeling either like a sterile office or a dimly lit cave.
To achieve the perfect balance of comfort, safety, and functionality, you must tailor individual LED light specifications to the demands of each room. There is no universal solution; instead, a successful home lighting plan depends on a careful analysis of brightness, color temperature, beam angles, and moisture resistance.
By taking a systematic, room-by-room approach, you can design a versatile lighting scheme that enhances your daily activities while maintaining a safe and energy-efficient electrical system. This guide breaks down the essential technical metrics and practical placement strategies to help you make informed decisions.
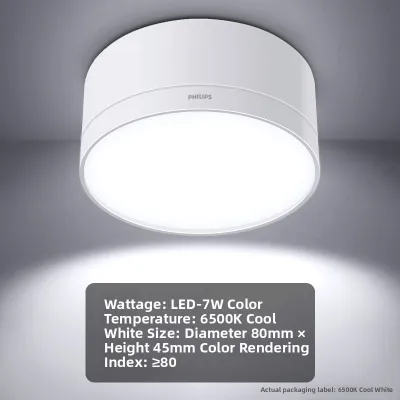
Products mentioned in this guide
Prices are valid at publication and may change. Please refer to the product page for the latest price.
Understanding Key LED Light and Downlight Specifications
Before selecting fixtures, you must understand the core technical metrics that define modern LED light performance. Historically, homeowners relied on wattage to estimate brightness. Today, wattage only indicates power consumption, whereas actual light output is measured in lumens. Comparing lumens is the only reliable way to ensure your fixtures deliver the appropriate amount of light.
Color temperature, measured on the Kelvin (K) scale, determines the visual warmth or coolness of the light. Lower numbers (2700K to 3000K) produce a warm, cozy glow that promotes relaxation. Neutral white (around 4000K) offers balanced, crisp illumination that enhances focus. Cool white or daylight (5700K to 6500K) delivers bright, blue-toned light that maximizes visibility but can feel harsh in resting areas.
Beam angle dictates how light is distributed. A narrow beam angle (15 to 36 degrees) concentrates light into a focused spot, ideal for accentuating artwork or specific task areas. Conversely, a wide beam angle (60 to 120 degrees) spreads light over a larger surface area, providing the broad, even coverage necessary for general ambient lighting.
Ingress Protection (IP) ratings identify which fixtures are safe for damp or wet environments. The first digit measures dust protection, while the second measures liquid resistance. While standard indoor spaces require basic IP20-rated fixtures, wet zones like bathrooms or open balconies demand IP44 or IP65 ratings to prevent moisture from compromising components.
Finally, verify physical and electrical compatibility before purchasing. This includes checking that the input voltage matches Singapore’s standard 230V grid, verifying the interface type, and measuring ceiling cutout dimensions. Because false ceilings in HDB flats and condos have limited recess depth, choosing a downlight with the correct physical height is vital to prevent installation bottlenecks.
Living and Dining Areas: Layered Lighting for Flexibility
Living and dining rooms are multi-functional hubs, serving as spaces for family gatherings, remote work, dining, and evening relaxation. To accommodate these activities, your lighting design must be highly adaptable. Relying on a single, uniform grid of bright downlights often results in a flat, uninviting atmosphere. Instead, combine ambient, task, and accent lighting to create depth.

For general ambient lighting, install wide-beam downlights spaced evenly across the ceiling. This provides a soft, continuous wash of light that eliminates dark corners. To maintain a comfortable environment, pair these fixtures with dimming capabilities, allowing you to lower light levels when watching television or hosting guests.
Accent lighting highlights focal points like textured feature walls or framed artwork. Adjustable downlights with narrow beam angles are perfect for this, as they direct a focused beam of light precisely onto the desired object. This contrast between bright focal points and softer ambient light adds a sophisticated dimension to the room.
When selecting color temperatures for communal areas, flexibility is key. Many homeowners prefer warm white (3000K) or neutral white (4000K) to create an inviting atmosphere. If you use your living room for reading or working, smart LED light systems allow you to adjust brightness and color temperature throughout the day, transitioning from an energizing neutral light to a relaxing warm glow.
If you plan to use dimmable fixtures, verify the compatibility of your dimmer switches. Standard wall dimmers designed for older bulbs often cause LED lights to flicker, buzz, or fail prematurely. Ensure both the LED driver and the wall switch are explicitly rated for LED dimming, and consult a qualified professional to verify the wiring configuration.
Kitchen: Bright, Shadow-Free Task Lighting
The kitchen is a high-activity workspace where safety, cleanliness, and precision are paramount. Preparing ingredients, operating appliances, and handling hot cookware require excellent visibility. Consequently, your lighting design must prioritize high lumen output and minimize shadows over key work zones like countertops, sinks, and cooktops.
To ensure safe food preparation, select downlights that deliver high lumen output for bright, uniform illumination. A well-lit kitchen reduces eye strain and makes it easier to maintain hygiene standards by highlighting spills, dirt, or grease.
Neutral white (4000K) to cool white (5000K) color temperatures are recommended for kitchens. These cooler tones offer superior color rendering compared to warm light, allowing you to accurately judge the freshness of ingredients and the cleanliness of surfaces. High Color Rendering Index (CRI) fixtures are beneficial here, as they reveal colors in their truest form.
Proper placement of downlights is critical to preventing shadows. A common mistake is installing fixtures directly behind your standing position, which projects a shadow over the countertop. To avoid this, position downlights directly above the front edge of the countertops, ensuring light falls directly on your work surface.
Because kitchens are subject to airborne grease, steam, and heat, fixture design is an important consideration. Choose downlights with flat, sealed profiles or glass covers that prevent grease and moisture from entering the housing. These designs are easier to wipe clean and protect internal components from premature degradation.
Bedroom: Relaxing, Glare-Free Illumination
The bedroom is a personal sanctuary dedicated to rest, recovery, and sleep. Unlike high-activity zones, bedroom lighting should focus on creating a soothing, low-stimulation environment that supports your body’s natural circadian rhythm. Harsh, bright lights disrupt melatonin production, making it difficult to wind down.
Opt for lower lumen outputs and warm color temperatures (2700K to 3000K). This warm, golden glow mimics sunset, signaling to your brain that it is time to relax. Avoid cool white or daylight fixtures in the bedroom, as the blue light spectrum they emit can interfere with sleep quality.
To maximize visual comfort, avoid placing downlights directly above the bed or pillows. Looking up into a bright light source while lying down causes immediate glare and eye strain. Instead, position fixtures around the perimeter of the room, near wardrobes, or along walkways, allowing light to reflect softly off the walls.
Deep-recessed or anti-glare downlights are excellent choices. These fixtures feature a light source set deep within the housing, often paired with a dark baffle or frosted diffuser. This design conceals the direct glare of the LED chip from your immediate line of sight, providing a soft, indirect glow.
For convenience, divide your bedroom lighting into separate switching zones or circuits. This allows you to control general ambient lighting independently from accent or reading lights. Installing a dimming system in the bedroom is highly recommended, giving you the ability to lower light levels gradually as you prepare for bed.
Bathroom and Wet Areas: Moisture Resistance and Safety
Bathrooms present a challenging environment due to high humidity, steam, and potential water splashing. Selecting the wrong downlight in these areas leads to premature fixture failure and poses significant electrical safety hazards.
To ensure safety, choose downlights with appropriate Ingress Protection (IP) ratings based on installation zones. Singapore’s electrical guidelines define specific safety zones. Any fixture installed near a shower cubicle, bathtub, or sink must have a minimum rating of IP44, while IP65 is highly recommended directly inside wet zones.
For dry vanity areas, general-purpose downlights are acceptable if designed to withstand high humidity. When lighting the vanity mirror, prioritize neutral white light (4000K) with a high Color Rendering Index (CRI of 90 or above). This ensures accurate color representation, essential for grooming and shaving without a distorting yellow cast.
Never install standard, non-waterproof indoor downlights in wet zones. Moisture easily penetrates unsealed housings, causing driver corrosion, short circuits, or electrical shocks. Always verify that the product packaging or manufacturer specifications explicitly certify the fixture for wet-area use.
Furthermore, electrical work in wet areas must strictly adhere to local safety standards, manufacturer instructions, and professional guidelines. Because water conducts electricity, improper wiring carries severe risks. Prioritizing safety-certified fixtures and professional installation is the only way to guarantee long-term reliability.
Installation Boundaries and Electrical Safety
Whether renovating an HDB flat or upgrading fixtures in a condo, understanding safe installation boundaries is essential. While modern LED downlights are highly efficient, they must be installed and maintained with strict adherence to electrical safety protocols to prevent accidents and protect your property.
Simple maintenance, such as replacing a plug-and-play LED module or bulb in an existing, compatible fixture, is generally low-risk. Before attempting any replacement, always isolate the power supply at the main distribution board (DB box) and verify that the electricity is off. Ensure the replacement matches the exact voltage, wattage limit, and physical dimensions.
For complex tasks, such as cutting new holes in false ceilings, modifying circuits, installing fixed wiring, or mounting fixtures in damp areas, you must engage a licensed electrician. In Singapore, carrying out complex electrical work without a license is illegal, voids home insurance, and poses fire or shock hazards.
Proper heat dissipation is critical in false ceiling installations. Although LED lights generate less heat than older bulbs, their internal drivers and chips still produce heat that must escape. If fixtures are tightly packed against insulation or installed in unventilated cavities, trapped heat will degrade components, shorten fixture lifespan, and potentially create a fire hazard.
If you encounter outdated wiring, unclear product specifications, or conflicting manufacturer instructions, stop immediately. Do not attempt to complete the installation yourself. Consult a qualified professional to assess your home’s electrical infrastructure and ensure all work is completed safely and in compliance with local regulations.
Frequently Asked Questions (FAQ)
Can I use the exact same LED downlight model for every room?
Using a single downlight model throughout your entire home is highly impractical because different rooms have distinct functional and environmental needs. A fixture designed for a cozy bedroom will not provide the high brightness and neutral color rendering required for safe kitchen prep, nor will a standard living room downlight have the moisture-resistant IP rating necessary for a shower zone. Adopting a zoned approach allows you to customize the specifications of each light to match the specific activities and safety requirements of each individual space.
How do I know if my existing dimmer switch is compatible with new LED downlights?
To check compatibility, review the downlight’s packaging or the manufacturer’s technical specifications for a list of certified dimmer switches. Older dimmers designed for incandescent or halogen bulbs often operate on leading-edge technology, which causes modern LED lights to flicker, buzz, or experience rapid driver failure. If you experience these issues after installing your new downlights, you should consult a licensed electrician to upgrade your wall switches to compatible trailing-edge or dedicated LED dimming systems.
Community discussion
Share your experience or ask a question. Comments are reviewed before publication.