
Selecting the right DIY photo frame kit is the defining step in turning loose prints and personal artwork into a cohesive gallery display. The ideal kit style does not merely hold your picture; it acts as a visual bridge that integrates the artwork with your room’s existing architectural lines, furniture textures, and color palette. By choosing a frame style that matches or intentionally contrasts with your wall decor, you elevate the entire room from a collection of individual objects into a curated, harmonious space.
To find the perfect match, you must evaluate how frame materials, profiles, and finishes interact with your wall’s color and texture. A mismatched frame can easily make a beautiful print look out of place, while a well-selected DIY kit enhances the art and complements the surrounding environment. Embracing the DIY route gives you the unique advantage of customizing finishes, adjusting matting widths, and arranging layouts to fit your specific wall dimensions perfectly.
How to Assess Your Wall Decor for Frame Matching
Before purchasing any assembly kit, taking a step back to analyze your room’s current design narrative prevents costly aesthetic mismatches. Visual harmony relies on a balanced relationship between the frame, the artwork, the wall surface, and the nearby furniture. A frame should never compete with the art it holds, nor should it clash with the texture of the wall it hangs upon.
Products mentioned in this guide
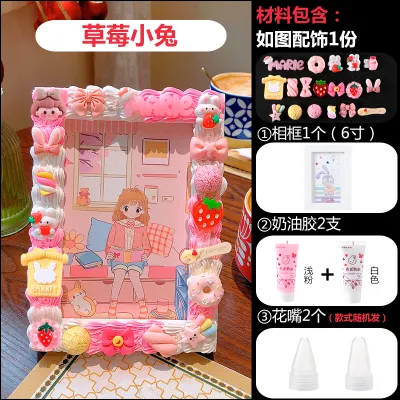
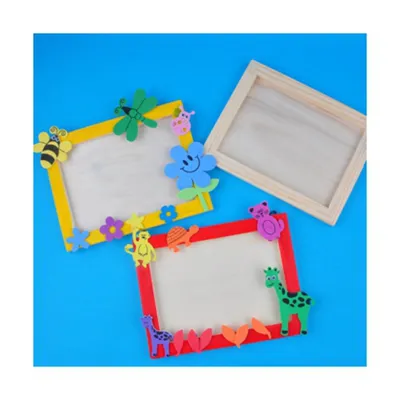
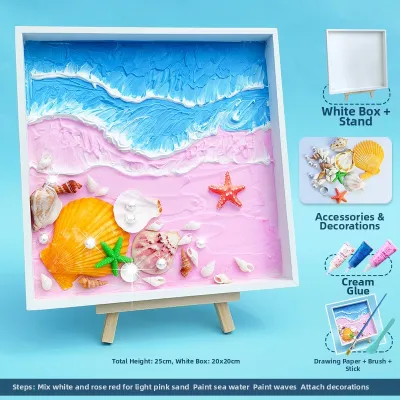
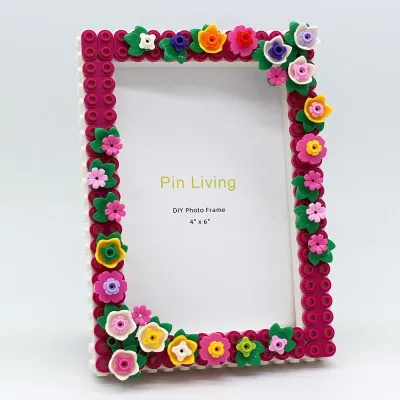


Prices are valid at publication and may change. Please refer to the product page for the latest price.
A straightforward three-step assessment method helps clarify your design direction:
- Identify the Dominant Room Style: Look at the major furniture pieces and architectural details in the space. Determine whether your room leans toward clean minimalism, cozy rustic warmth, bold modernism, or classic traditional elegance.
- Note Existing Textures and Colors: Observe the wall finish, whether it is smooth plaster, textured paint, exposed brick, or patterned wallpaper. Take note of the dominant color tones and accent shades present in your soft furnishings and decor.
- Determine the Focal Point: Decide if the framed art will be the singular dramatic focus of the wall or if it is meant to blend softly into a larger, multi-layered gallery arrangement.
Once you have mapped these elements, you can confidently choose from the four primary DIY photo frame kit styles: minimalist, rustic, modern, or vintage. Each style brings distinct visual weight and structural characteristics to your walls.
Opting for a DIY photo frame kit offers significant advantages over buying pre-assembled, off-the-shelf frames. These kits allow you to control the assembly process, giving you the flexibility to stain or paint unfinished wood, select custom matboard widths, and choose precise backing materials. This hands-on approach ensures that the final product matches your exact creative vision while maintaining a high level of structural integrity.
Minimalist DIY Photo Frame Kits: Clean Lines for Airy Spaces
Minimalist DIY photo frame kits are defined by their understated elegance and structural simplicity. These kits typically feature ultra-thin profiles, crisp geometric shapes, and a lack of ornamental details that could distract from the artwork. They are designed to recede into the background, allowing the framed content to take center stage while providing a clean, architectural border.

Common material choices for minimalist kits include lightweight aluminum, slim-profile composite wood, and matte-finished plastics. The color palette is strictly neutral, focusing on matte black, pristine white, and light, natural wood tones like birch or pale oak. These finishes work exceptionally well in contemporary, Scandinavian, or Japandi-style interiors where space, light, and simplicity are highly valued.
To make the most of minimalist frames, pair them with specific types of wall art and layouts:
- Uniform Gallery Walls: Arrange a series of identical minimalist frames in a precise grid with consistent spacing to create a sense of order and balance.
- Abstract Line Art: The simplicity of thin black or white frames perfectly complements minimalist line drawings and geometric prints.
- Monochrome Photography: High-contrast black-and-white photos gain a sophisticated, gallery-like quality when paired with slim matte-black frames and wide white matboards.
- Airy, Uncluttered Layouts: Use these frames in rooms with plenty of negative space, light-colored walls, and low-profile furniture to maintain an open, breathable atmosphere.
Assembling a minimalist DIY kit requires a high degree of precision and attention to detail. Because the frames are so simple, any misalignment, gap in the corner joints, or uneven hanging will be highly visible. Always use a spirit level during installation, and handle the frame corners carefully during assembly to ensure the mitered joints meet perfectly without gaps.
While highly versatile, minimalist frames do have aesthetic limitations. They can easily get visually lost when placed against busy, heavily patterned wallpapers or dark, highly textured accent walls. In rooms filled with chunky, ornate traditional furniture, an ultra-slim minimalist frame may look too fragile or insignificant, failing to establish the necessary visual presence.
Rustic DIY Photo Frame Kits: Warm Textures for Cozy Walls
Rustic DIY photo frame kits bring a sense of warmth, history, and organic texture to your living space. These kits celebrate natural imperfections, showcasing features like visible wood grain, knots, distressed surfaces, and weathered finishes. They are ideal for creating a relaxed, lived-in atmosphere in farmhouse, bohemian, or cozy traditional homes.
The materials used in rustic kits are heavily focused on natural elements, often utilizing reclaimed wood, rough-sawn pine, or simulated distressed composites. Many rustic kits also incorporate tactile accents such as natural jute rope, twine hangers, or industrial metal corner brackets. The color palette is deeply rooted in nature, featuring rich browns, warm grays, weathered whites, and earthy forest tones.
These textured frames are particularly well-suited for specific wall environments and art styles:
- Textured Wall Surfaces: Rustic frames look exceptional against exposed brick, stone veneer, shiplap, or walls finished with textured plaster.
- Warm, Earthy Palettes: They complement rooms painted in terracotta, olive green, warm beige, or deep mustard tones.
- Botanical and Nature Prints: Pressed ferns, botanical illustrations, and landscape photography pair naturally with the organic feel of wooden frames.
- Travel and Personal Memorabilia: Hand-drawn maps, vintage postcards, and candid family photos look right at home in a relaxed, rustic border.
When assembling a rustic DIY kit, you have unique opportunities for personalization. If the kit includes unfinished or lightly sanded wood, you can apply your own non-toxic wood stains, colored waxes, or clear sealants to match your furniture. Always perform a light sanding along any rough edges to prevent splinters, and ensure you work in a well-ventilated space when applying any finishes or protective topcoats.
However, the strong visual personality of rustic frames means they must be used selectively. The heavy textures and rugged appearance of distressed wood can easily clash with sleek, high-gloss modern furniture, minimalist metal fixtures, or ultra-modern lighting. If placed in a highly polished, contemporary space, a rustic frame can look out of place rather than intentionally eclectic.
Modern and Contemporary DIY Photo Frame Kits: Bold Statements
Modern and contemporary DIY photo frame kits are designed to make a strong visual statement, utilizing innovative materials and striking design concepts. Unlike traditional frames that border an image, modern kits often play with perception, using floating designs, metallic accents, and asymmetrical structures to draw the eye. They are perfect for eclectic, mid-century modern, or bold, high-contrast spaces.
Key design elements of these kits include polished metals like brass, copper, and chrome, as well as high-grade acrylic panels that create a borderless, floating effect. Asymmetrical frame shapes and multi-layered designs add a sculptural quality to the wall. The color schemes often include high-gloss black, brushed gold, or vibrant, saturated hues that demand attention.
To maximize the impact of modern DIY frames, consider the following wall pairings and design strategies:
- Vibrant Pop Art: Bold, colorful prints and graphic posters benefit from the clean, high-gloss border of an acrylic or metallic frame.
- High-Contrast Photography: Dramatic, colorful landscapes or architectural photos are enhanced by the depth created by a floating frame kit.
- Bold Accent Walls: Install metallic or borderless acrylic frames against dark, dramatic accent walls—such as charcoal, navy, or emerald green—to create a striking contrast.
- Sculptural Spaces: Place these frames in rooms featuring statement lighting, geometric rugs, and sculptural mid-century modern furniture.
Assembling modern kits, especially those involving acrylic or glass floating panels, requires a clean environment and careful handling. Acrylic surfaces are highly susceptible to scratching, so always assemble them on a soft, clean towel and use a microfiber cloth to wipe away dust or fingerprints. Be sure to carefully peel away any protective plastic films only after the frame is fully assembled, and verify that all mounting hardware is securely fastened to support the weight of solid metal or thick glass components.
One major limitation of highly reflective modern frames is their susceptibility to glare. In rooms with large windows, bright direct sunlight, or poorly positioned overhead lighting, the reflective surfaces of glass or polished acrylic can obscure the artwork behind them. Careful placement away from direct light sources or opting for kits with anti-glare acrylic panels is essential to ensure your art remains visible from all angles.
Vintage and Classic DIY Photo Frame Kits: Traditional Elegance
Vintage and classic DIY photo frame kits bring a sense of timeless elegance, heritage, and grandeur to your walls. These kits are characterized by their elaborate detailing, mimicking the hand-carved plaster and wood frames found in historic galleries and grand estates. They are the perfect addition to classic, maximalist, or heritage-inspired interiors that embrace rich textures and historical references.
The defining features of vintage kits include ornate moulding profiles, intricate corner scrollwork, beaded details, and layered matboards. Finishes often feature antique gold, burnished bronze, tarnished silver, or rich, dark wood stains like mahogany and walnut. These frames carry a significant amount of visual weight, making them feel like works of art in their own right.
Vintage-style frames are best paired with classic art forms and rich interior backdrops:
- Rich Jewel Tones: These frames stand out beautifully against walls painted in deep burgundy, sapphire blue, forest green, or plum.
- Patterned Wallpapers: Classic damask, floral, or William Morris-style wallpapers provide a luxurious backdrop that matches the complexity of ornate frames.
- Oil Painting Reproductions: Canvas prints of classic portraits, still lifes, or historical landscapes look authentic when housed in a heavy, gold-leafed frame.
- Sepia and Heritage Portraits: Black-and-white or sepia-toned family photographs gain an heirloom quality when paired with layered matboards and classic detailing.
When working with vintage DIY kits, assembly must be approached with patience and care. The decorative mouldings and corner ornaments can be delicate and prone to chipping if dropped or handled roughly. If your kit requires assembling the frame corners yourself, you may need to apply a small amount of matching touch-up paint or gold wax to hide any visible seams or minor gaps in the mitered joints. Additionally, ensure the backing board and hanging hardware are heavy-duty, as classic frames often use thicker glass and heavier materials.
The primary limitation of vintage frames is their physical and visual bulk. In small rooms, narrow hallways, or spaces with low ceilings, large, ornate frames can quickly overwhelm the area, making the room feel cramped and cluttered. It is important to balance the heavy visual weight of classic frames by leaving adequate empty wall space around them, preventing the decor from feeling suffocating.
Practical Checks for Buying and Hanging DIY Frames in Singapore
When purchasing and installing DIY photo frame kits in Singapore, local housing structures and the tropical climate require specific practical considerations. Most homes in Singapore, whether HDB flats or private condominiums, feature solid concrete or structural brick walls, which differ significantly from the drywall common in Western countries. Understanding these local factors ensures your DIY project is safe, durable, and beautiful.
Before you begin mounting your newly assembled frames, perform these essential structural and environmental checks:
- Wall Compatibility and Fasteners: For solid concrete walls, standard picture hanging nails will bend or damage the plaster. You must use a masonry drill to insert plastic wall plugs (anchors) and screws, or utilize specialized concrete hard-wall hangers. If you prefer a drill-free option for lighter frames, ensure you use high-quality, humidity-resistant adhesive strips rated for the exact weight of your frame, and follow the manufacturer’s instructions for surface preparation.
- Dimension and Matboard Verification: Always measure your printed artwork and the available wall space before ordering a kit. If your kit includes a matboard (the cardboard border surrounding the image), check both the outer frame dimensions and the inner mat opening. The inner opening should be slightly smaller than your print (usually by about 5mm to 10mm) to prevent the picture from falling through the opening.
- Tool and Assembly Safety: Review the kit's requirements before starting. While many DIY kits provide basic assembly materials, you may need household tools such as a small screwdriver, craft glue, or a utility knife. Always handle sharp cutting tools with care, and if your kit requires strong craft adhesives or spray sealants, work in a well-ventilated area—such as near an open window or on a balcony—to avoid inhaling fumes.
- Tropical Climate Protection: Singapore’s high relative humidity can cause unfinished wood to swell, warp, or develop mold, while paper prints can buckle or stick to the glass. To protect your artwork, avoid hanging frames in high-moisture zones like bathrooms or directly opposite unventilated kitchen stoves. Additionally, keep framed pieces out of direct, harsh sunlight streaming through windows, as UV rays will rapidly fade both the print colors and any stained wood finishes.
Frequently Asked Questions (FAQ)
Can I use DIY photo frame kits for thick items like canvas or dried flowers?
Standard DIY photo frame kits are designed for flat paper prints or thin photographs and do not have the internal depth required for three-dimensional items. Forcing thick items like stretched canvas, wood panels, or dried flowers into a standard flat frame can cause the glass to crack, warp the backing board, or damage the artwork itself. To frame thick or dimensional objects, you must use a specialized deep-set DIY kit, commonly known as a shadow box frame kit, which provides the necessary clearance between the glass and the backing board. Always check the internal depth specifications of the kit before purchasing to ensure it accommodates your item’s thickness.
How do I protect DIY wooden frames from high humidity?
To safeguard wooden DIY frames against Singapore’s tropical humidity, it is highly recommended to seal any unfinished or raw wood surfaces before assembly. Apply a thin, even coat of a clear, non-toxic wood sealant, polyurethane varnish, or natural wood wax to create an effective moisture barrier. This prevents the wood from absorbing atmospheric moisture, which leads to warping, swelling, or mold growth. Additionally, ensure your home maintains good ventilation, and avoid hanging wooden frames on damp walls or in unventilated areas. Using acid-free backing boards and adding small felt bumpers to the back corners of the frame will also improve air circulation behind the frame, further protecting both the wood and your artwork.
Community discussion
Share your experience or ask a question. Comments are reviewed before publication.