
Selecting the right PowerPac LED downlights for your Singapore home requires balancing functional brightness, visual comfort, and structural compatibility. Because different rooms serve distinct purposes—from high-focus food preparation in the kitchen to winding down in the bedroom—a single lighting specification cannot serve the entire household. By matching specific product labels, such as wattage, color temperature, beam angle, and Ingress Protection (IP) ratings, to the physical layout of your HDB flat or condominium, you can establish an efficient, safe, and visually cohesive lighting scheme.
How to Match PowerPac LED Specifications to Your Room Needs
Understanding the technical specifications printed on PowerPac LED packaging is the first step toward a successful lighting plan. Wattage indicates the electrical power consumption, while lumens measure the actual light output. For general ambient lighting in standard residential spaces, lower-wattage fixtures with moderate lumen outputs are typically sufficient, whereas task-oriented zones require higher lumen packages to ensure adequate visibility. Always check the product label to verify the lumen-to-wattage ratio, which indicates the energy efficiency of the specific fixture.
Color temperature, measured in Kelvin (K), determines the warmth or coolness of the light. Lower Kelvin ratings, such as 2700K to 3000K, produce a warm, yellowish glow that promotes relaxation. Neutral white light, around 4000K, offers a balanced, natural appearance suitable for multi-purpose spaces, while cool daylight, at 6000K or higher, provides a crisp, bluish-white light that enhances alertness. Matching these temperatures to the psychological and functional needs of each room prevents visual fatigue and supports daily routines.
Products mentioned in this guide
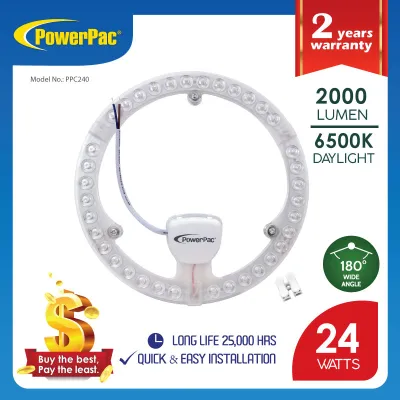
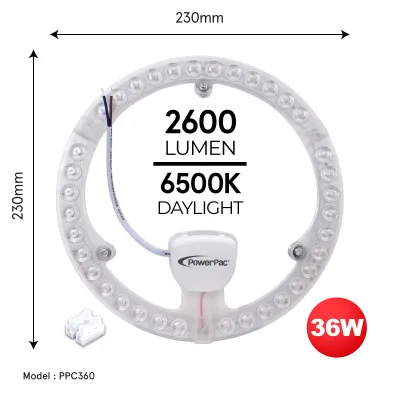
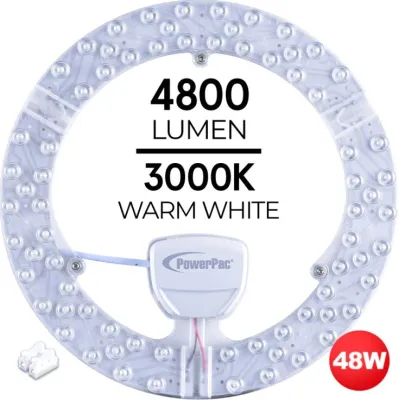
Prices are valid at publication and may change. Please refer to the product page for the latest price.
Beam angle is another critical factor that dictates how light is distributed across a room. A wide beam angle, typically 100 degrees or more, disperses light broadly, making it ideal for general ambient illumination in rooms with standard ceiling heights of 2.6 to 2.8 meters. Conversely, a narrow beam angle, such as 36 to 60 degrees, concentrates the light into a focused cone, which is perfect for accentuating artwork, architectural features, or specific work surfaces.
Finally, dimmability must be verified before purchase if you plan to adjust light levels throughout the day. Not all LED downlights are compatible with dimming circuits, and using a non-dimmable PowerPac model on a dimmer switch can lead to flickering, buzzing, or premature driver failure. Check the product specifications carefully to confirm dimming compatibility, and ensure your wall switch hardware matches the driver requirements.
Living Room: Selecting Downlights for Ambient and Accent Layers
The living room is the heart of a Singapore home, serving as a space for family gatherings, entertainment, and relaxation. To accommodate these diverse activities, the lighting design should incorporate layers of ambient and accent illumination. Opting for neutral white (4000K) or warm white (3000K) color temperatures helps create a welcoming atmosphere that transitions smoothly from daytime activities to cozy evening settings.

For general ambient light, select PowerPac downlights with wide beam angles to ensure an even wash of light across the entire floor plan. This minimizes harsh shadows and makes the living area feel more spacious, which is particularly beneficial in compact HDB layouts. If you have feature walls, shelving, or artwork, position narrower beam downlights closer to the walls to create focused pools of light that highlight these design elements.
Integrating dimmable PowerPac models in the living room provides the flexibility needed to alter the mood instantly. Dimmable fixtures allow you to lower the light levels for movie nights or raise them for reading and socializing. When planning a dimmable setup, verify that the LED driver supplied with the downlight is compatible with trailing-edge or leading-edge dimmers, depending on your existing wall switch configuration.
To determine the correct spacing for your living room downlights, consider the ceiling height and the beam angle of the fixtures. In a typical Singapore living room with a ceiling height of approximately 2.7 meters, spacing wide-beam downlights roughly 1.0 to 1.2 meters apart is a common guideline to prevent dark spots. Adjust this spacing near walls and corners, keeping the fixtures at least 0.5 meters away from the walls to avoid creating intense, distracting light cones on the vertical surfaces.
Kitchen: Choosing High-Brightness Downlights for Food Prep
Kitchens are highly functional workspaces that demand bright, clear, and shadow-free illumination to ensure safety during food preparation and cooking. For these task-oriented zones, selecting PowerPac downlights with higher lumen outputs and cooler color temperatures, such as cool white (4000K) or daylight (6000K), is highly recommended. This crisp lighting enhances visibility, helping you spot fine details and maintain focus while handling sharp utensils or hot cookware.
When evaluating downlights for the kitchen, pay close attention to the Color Rendering Index (CRI) listed on the product packaging. A higher CRI, ideally 80 or above, ensures that the colors of fresh ingredients, meats, and vegetables appear natural and vibrant under artificial light. Accurate color rendering is not only aesthetically pleasing but also practical for assessing the freshness and doneness of food during preparation.
Proper physical placement of the downlights is essential to avoid casting shadows over your primary work areas. If downlights are positioned directly behind where you stand, your body will block the light, casting a shadow over the countertop or stovetop. To prevent this, align the fixtures directly above the front edge of the countertops or open shelving, ensuring the light falls directly onto the prep surfaces.
Additionally, kitchens generate significant heat and moisture, which can accumulate near the ceiling. When installing recessed downlights close to kitchen cabinetry or within enclosed soffits, verify the manufacturer’s clearance requirements for heat dissipation. Ensuring adequate space around the fixture housing prevents heat buildup, which is crucial for preserving the lifespan of the integrated LED driver and maintaining safe operating temperatures.
Bedroom: Picking Warm, Low-Glare Downlights for Rest
The bedroom should serve as a personal sanctuary designed to promote rest and recovery. To support the body’s natural circadian rhythms, the lighting in this space should be soft, warm, and free from harsh glare. Selecting PowerPac downlights with a warm white color temperature, typically between 2700K and 3000K, mimics the warm tones of sunset, signaling to the brain that it is time to wind down for sleep.
To minimize glare when lying in bed, avoid placing downlights directly overhead or near the headboard. Looking directly up into an exposed light source can cause visual discomfort and disrupt relaxation. Instead, position the downlights around the perimeter of the room, over wardrobes, or along walkways, allowing the light to reflect softly off vertical surfaces rather than shining directly into your eyes.
Choosing lower-wattage downlights or installing dimmable options is highly effective for bedroom spaces. Lower light levels are ideal for early mornings and late evenings when your eyes are adjusting to changes in ambient light. If you require focused light for reading or working in bed, supplement the general ambient downlights with dedicated bedside reading lamps or adjustable wall sconces rather than relying on high-wattage ceiling fixtures.
When planning the layout, consider how the downlights interact with other bedroom furniture, such as wardrobes with sliding doors. Ensure that the fixtures are positioned far enough from the wardrobe doors so that the doors do not block the light when opened, and the interior of the closet remains well-illuminated.
Bathroom: Verifying IP Ratings and Wet Zone Safety
Bathrooms present unique challenges for electrical installations due to the constant presence of moisture, steam, and direct water spray. To ensure safety and prevent electrical short circuits, you must verify the Ingress Protection (IP) ratings of any PowerPac downlights before installation. The IP rating consists of two digits: the first indicates protection against solid particles, and the second indicates protection against liquids.
For residential bathrooms, the space is divided into distinct safety zones based on proximity to water sources. Zone 0, which is the interior of the bathtub or shower basin, and Zone 1, the area directly above the shower up to a height of 2.25 meters, require fixtures with high water resistance, typically IP65 or higher. Zone 2, which extends 0.6 meters beyond the bath or shower, requires at least an IP44 rating to protect against splashing water from any direction. Dry areas of the bathroom, far from water sources, may use standard fixtures, though damp-rated options are always safer due to steam accumulation.
In addition to IP ratings, check the construction materials of the downlight trim and housing. Bathrooms are highly humid environments where metal components can easily rust or corrode over time. Opt for PowerPac models featuring corrosion-resistant materials, such as high-grade polycarbonate or treated aluminum, to ensure the fixtures maintain their structural integrity and appearance in damp conditions.
Because water and electricity pose severe safety risks, any bathroom lighting installation must comply strictly with local electrical regulations. Never attempt to install or modify wiring in wet zones as a DIY project. Always engage an Energy Market Authority (EMA) licensed electrician in Singapore to assess the zones, verify the IP ratings of your chosen fixtures, and perform the physical installation safely.
Pre-Installation Checks and Electrical Safety Boundaries
Before purchasing your PowerPac LED downlights, conducting a thorough pre-installation assessment of your home’s electrical and structural setup is essential. First, verify that the voltage rating of the downlights matches Singapore’s standard residential voltage of 230V AC at 50Hz. Additionally, check whether the downlights feature integrated drivers or require external transformers, and ensure that your existing wiring can accommodate the specific driver configuration.
Physical dimensions are equally critical, especially when installing recessed downlights into false ceilings. Measure the ceiling cavity depth—the space between the concrete slab and the plasterboard ceiling—to ensure there is sufficient clearance for the fixture housing and its driver. You must also measure the cut-out hole diameter accurately; purchasing downlights that are too large or too small for existing ceiling cut-outs will lead to installation delays and additional plastering costs.
If your home requires fire-rated ceilings, particularly in multi-story condominium units or specific HDB layouts, you must ensure that the installation of recessed downlights does not compromise the ceiling’s fire barrier. In such cases, you may need to install fire-rated downlights or use approved fire hoods over the fixtures to maintain the structural fire rating of the ceiling assembly.
Finally, establish clear boundaries between simple tasks and complex electrical work. While replacing an existing, identical downlight bulb or fixture on an active, safe circuit can sometimes be straightforward, cutting new holes in ceilings, running new electrical conduits, or modifying the distribution board are tasks that carry significant safety risks. For all fixed wiring, structural modifications, or installations in damp areas, always hire a qualified, EMA-licensed electrician to ensure compliance with Singapore’s CP 5 safety standards.
Frequently Asked Questions (FAQ)
Can I mix different color temperatures in an open-concept layout?
Mixing different color temperatures in a single, open-concept living and dining area can create a jarring visual disconnect. When you have continuous sightlines, abrupt shifts between warm yellow light and cool blue-white light can make the space feel fragmented and uncoordinated. To maintain visual harmony, it is best to use a consistent color temperature, such as neutral white (4000K), for the primary ambient downlights across the entire open space. You can then introduce warmth or focus through localized accent lighting, such as warm under-cabinet LED strips in the kitchen or a warm pendant light over the dining table. Some advanced PowerPac downlight models feature a Correlated Color Temperature (CCT) switch on the back of the fixture, allowing you to select and lock in your preferred color temperature before installation, ensuring perfect consistency across all units.
Do PowerPac LED downlights require special dimmer switches?
Yes, if you choose dimmable PowerPac LED downlights, they generally require compatible LED-rated dimmer switches to function correctly. Traditional dimmer switches designed for older incandescent bulbs operate on different electrical principles and often supply insufficient or unstable voltage to LED drivers. Pairing an LED downlight with an incompatible legacy dimmer can result in persistent flickering, audible buzzing, reduced dimming range, or even permanent damage to the LED driver. Before installation, check the PowerPac product packaging or technical datasheet for a list of recommended dimmer models or specific requirements, such as trailing-edge (electronic) dimming compatibility. If your existing wall switches are standard on/off toggles, you will need to have a licensed electrician upgrade them to compatible LED dimmers to enjoy smooth, flicker-free light control.
How do I clean and maintain installed LED downlights?
Maintaining your installed LED downlights is straightforward but requires strict adherence to safety protocols. Before performing any cleaning or maintenance, always isolate the power supply at the main wall switch and allow the fixtures to cool down completely to avoid electrical shocks or burns. To clean the outer trim and lens, use a dry or slightly damp microfiber cloth to gently wipe away accumulated dust and cobwebs; never spray water or liquid cleaners directly onto the fixture, and avoid harsh chemical solvents that could degrade the plastic or metal finishes. It is also important to note that most modern recessed downlights feature integrated LED modules, meaning the light source and driver are built into a single unit. If the light fails, the entire fixture or its external driver must be replaced, as individual LED chips are not user-serviceable.
Community discussion
Share your experience or ask a question. Comments are reviewed before publication.