
Quick Answer: Is a Premium Monitor Lightbar Worth the Investment?
When evaluating a monitor lightbar, the price premium of high-end models is justified primarily by advanced asymmetric optical engineering and robust metal construction. Premium lightbars utilize precise internal reflectors to cast light downward and forward, illuminating your desk space while completely avoiding the screen. This optical path prevents screen glare and reflections, directly reducing eye strain during extended work or gaming sessions.
In contrast, budget models often rely on basic symmetrical diffusion. This design scatters light in all directions, causing noticeable screen reflections and hazy glare on your monitor panel. Additionally, budget options frequently feature lightweight plastic housings and basic spring clamps that may not sit securely on curved or thick-bezel displays.
For professionals, software engineers, and digital artists who spend long hours in front of a screen, investing in a premium tier monitor lightbar is a highly practical decision for long-term eye comfort and structural durability. Casual users or those who primarily require simple, intermittent ambient desk lighting for reading physical documents will find that a budget-friendly model offers adequate basic utility.
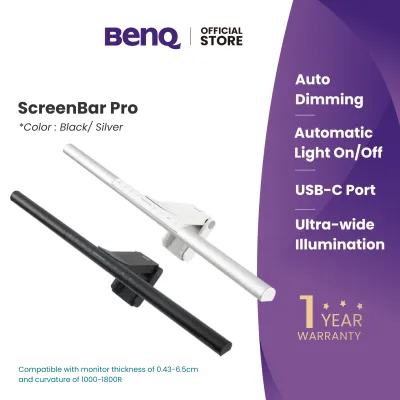
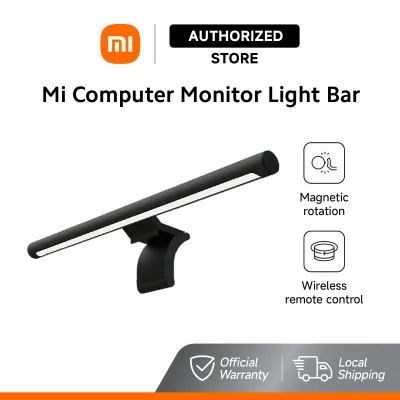
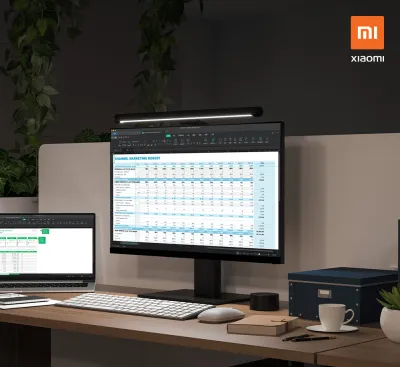
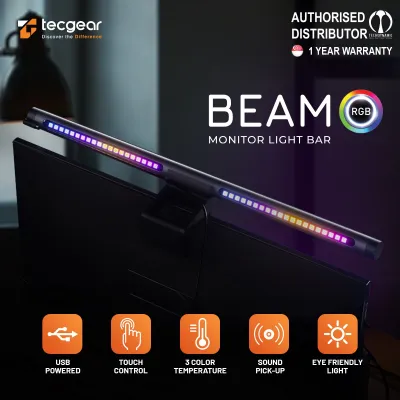
Products mentioned in this guide
![[New] BenQ ScreenBar Halo 2 | Monitor Light | Wireless Control | Auto Dimming & Auto On/Off | Back Light | Desk Lamp | 3 Light Modes](https://img.lazcdn.com/g/p/3efb87ef278da69695a8c36fca44e243.png_400x400q80.png_.webp)
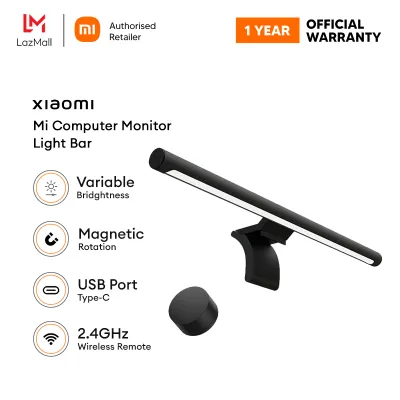
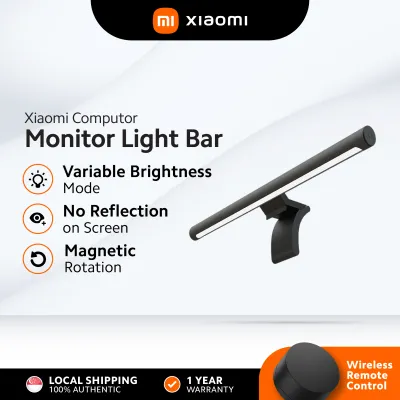
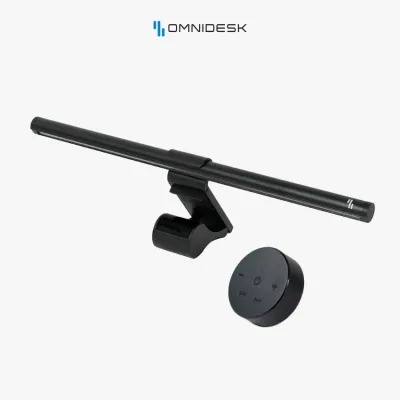
Prices are valid at publication and may change. Please refer to the product page for the latest price.
Light Quality and Eye Care: Asymmetric Optics vs Basic Diffusion
The primary functional purpose of a monitor lightbar is to illuminate your immediate workspace without interfering with the visual output of your display. The engineering behind how light is directed determines whether a lightbar actively protects your eyes or contributes to visual fatigue. Understanding the difference between asymmetric and symmetric light paths is essential before making a purchase.

True asymmetric optical design is the hallmark of premium monitor lightbars. Instead of pointing the LEDs directly downward, premium manufacturers mount the LED strip horizontally inside a specialized housing and use a highly polished, custom-angled internal reflector or a micro-lens array. This optical configuration projects a precise, forward-throwing beam of light. The rear boundary of this light beam features a sharp cut-off line that aligns perfectly with the top edge of your monitor screen. As a result, the light illuminates your keyboard and desk surface while leaving the screen panel entirely in shadow, preventing specular reflections and maintaining the native contrast ratio of your display.
Budget monitor lightbars typically compromise on this optical precision to lower manufacturing costs. Many budget brands mount the LEDs facing downward through a simple frosted plastic diffuser. This creates a symmetrical, wide-angle light spread similar to a miniature fluorescent tube. Because the light scatters in a 180-degree arc, a significant portion of the light strikes the screen panel directly. On matte screens, this creates a distracting, washed-out grey veil over your content; on glossy screens, it produces a sharp, bright reflection of the light strip itself. Both scenarios force your eyes to constantly adjust to competing light levels, leading to dry eyes, accommodation fatigue, and headaches over time.
Beyond the optical path, color quality and electrical performance vary significantly between price tiers. Premium lightbars generally feature light-emitting diodes with a high Color Rendering Index (CRI), often rated at Ra ≥ 95, including strong performance in the R9 (saturated red) spectrum. This ensures that colors on your desk appear natural and vibrant. They also utilize high-quality constant-current direct current (DC) dimming circuits or ultra-high-frequency Pulse Width Modulation (PWM) to regulate brightness. This eliminates low-frequency flicker, which is invisible to the naked eye but can cause neurological fatigue and eye strain during long hours of exposure.
Budget models, on the other hand, often use lower-grade LED chips with a CRI rating of Ra ≥ 80. While acceptable for basic reading, this can cause colors to look dull or shifted toward green or yellow hues. To save on component costs, budget lightbars may also employ lower-frequency PWM dimming. This can introduce a subtle, high-frequency strobe effect that is highly fatiguing to the visual cortex, particularly when viewed in a dark room.
To evaluate a lightbar’s optical performance in your own space, perform a dark screen test. Turn off all ambient room lights, set your monitor to a solid black background, and turn on the lightbar. Look at the screen from your normal sitting position. If you see a visible gradient of light washing down the screen, or if you can see the reflection of the individual LED beads on the panel, the lightbar lacks true asymmetric optics. A high-quality asymmetric lightbar will keep the screen completely dark while brightly illuminating the desk surface directly in front of it.
Build Materials and Durability: Metal vs Plastic Constructs
The physical construction of a monitor lightbar dictates not only its aesthetic appeal on your desk but also its long-term durability and electronic reliability. The materials used directly impact thermal management, structural stability, and resistance to environmental wear.
Premium monitor lightbars are almost exclusively constructed with high-grade extruded aluminum alloys, typically finished with an anodized coating. Aluminum serves a critical dual purpose: it provides a rigid, premium physical structure and acts as a highly efficient passive heat sink. LEDs are highly sensitive to operating temperatures. When LED chips run hot, their internal junction temperatures rise, which accelerates the degradation of the phosphor coating. This degradation leads to premature color shifting—often turning a cool white or a dull yellow—and dramatically reduces the overall lifespan of the lightbar. The high thermal conductivity of an aluminum housing ensures that heat is rapidly drawn away from the LED circuit board and dissipated into the surrounding air.
Budget lightbars are primarily manufactured using Acrylonitrile Butadiene Styrene (ABS) or Polycarbonate (PC) plastics. While these materials are lightweight and inexpensive to mold, they possess extremely poor thermal conductivity. Heat generated by the LEDs remains trapped inside the plastic housing, raising the operating temperature of the components. Over months of continuous use, this thermal retention can cause the plastic housing to warp slightly, embrittle, or crack. Additionally, if you select a model with white plastic components, the combination of heat and UV exposure from the LEDs can cause the plastic to yellow and degrade aesthetically.
Weight and structural balance are also heavily influenced by material choice. An aluminum lightbar has a reassuring heft, which helps anchor it securely to the top of your monitor. However, this weight requires a carefully engineered mounting bracket to distribute the load safely. Plastic lightbars are incredibly light, which minimizes the physical load on your monitor frame, but they can feel flimsy to the touch. If you need to adjust the angle of a plastic lightbar, the flexible nature of the material can make it difficult to achieve a precise, stable position, and the joints are more prone to stripping or cracking if over-tightened.
In warm, humid tropical environments like Singapore, material selection becomes even more critical. High ambient humidity and warm indoor temperatures can accelerate the degradation of cheap plastics and low-grade adhesives. When choosing a lightbar, always verify the manufacturer’s specified operating temperature ratings and material specifications to ensure the product is designed to withstand local environmental conditions over several years of daily operation.
Mounting Mechanisms and Monitor Compatibility
A monitor lightbar must attach securely to your display without obstructing your view, damaging the screen panel, or slipping out of alignment. The engineering of the mounting bracket is a key differentiator between premium and budget product tiers.
Premium brands typically utilize a gravity pivot clamp mechanism. This design features a heavy, counterweighted base connected to a non-slip, rubberized hinge. The lightbar rests gently on the top bezel of your monitor, while the weighted base hangs down the back of the display, using gravity to pull the front lip of the mount securely against the bezel. This mechanism requires virtually no active clamping force, which is incredibly important for modern thin-bezel displays and fragile OLED or LCD panels. Because there is no pinching action, there is no risk of localized pressure causing backlight bleeding or physical damage to the delicate glass layers of your screen.
Budget lightbars often rely on spring-loaded clamps or basic mechanical tension clips to stay in place. These clamps use physical spring pressure to grip the front and back of the monitor frame. While functional on standard, flat monitors with thick plastic bezels, this design poses several risks for modern setups. The high clamping force can put concentrated pressure directly on the edge of a borderless screen, potentially damaging the panel. Furthermore, on ultra-thin displays, the front lip of a spring-loaded clamp may extend past the bezel and block a small portion of the active screen area.
Monitor compatibility becomes highly complex when dealing with curved, ultra-wide, or highly specialized displays. Curved monitors (ranging from gentle 1800R curves to aggressive 1000R curves) present a physical challenge for straight lightbars. If a straight lightbar is mounted too close to a curved screen, the corners of the screen will physically block the light path, or the lightbar will cast glare onto the upper corners of the display. Premium manufacturers solve this by designing curved lightbars that match standard screen radiuses, or by engineering extended mounting arms that position the lightbar further forward, clearing the curve entirely. Budget spring clamps often struggle to grip the angled, sloping backs of curved monitors, leading to instability or slippage.
Additionally, you must consider physical clearance for other desktop accessories. A bulky, poorly designed clamp can block built-in pop-up webcams, ambient light sensors, or top-mounted microphones. If you use an external webcam, a premium mount often includes a dedicated flat top surface or an integrated magnetic adapter to let you stack your webcam directly on top of the lightbar. Budget clamps rarely offer this integration, forcing you to choose between using your lightbar or mounting your camera.
Before purchasing any monitor lightbar, use this practical compatibility checklist:
- Measure Bezel Thickness: Check the depth of your monitor's top bezel to ensure the lightbar's front lip will not overlap the active screen area.
- Check Back Panel Profile: Inspect the back of your monitor for sudden curves, built-in VESA mounts, or ventilation bumps that might interfere with a weighted counterweight.
- Verify Curvature: If you have a curved monitor, verify that the lightbar clamp is explicitly rated for your screen's curvature (e.g., 1000R, 1500R, or 1800R).
- Assess Top Clearance: Ensure there is sufficient space above your monitor if it is positioned close to a shelf, wall, or secondary stacked display.
Controls and Smart Features: Touch, Dials, and Wireless Remotes
How you interact with your desk lighting throughout the day significantly affects your productivity and overall user experience. The control interfaces and smart features offered by different price tiers can transform a simple lightbar from a manual utility into a seamless part of your daily workflow.
Premium monitor lightbars frequently feature advanced control interfaces designed to keep your workspace clean and ergonomic. The most popular premium configuration is a dedicated wireless desktop dial. Operating on a low-latency 2.4GHz wireless frequency, these weighted, metal-rimmed dials sit comfortably next to your keyboard or mouse. They allow you to adjust brightness and color temperature with smooth, analog rotation, and toggle power with a simple tap. This completely eliminates the need to reach up and touch the lightbar itself, preventing monitor wobble and keeping fingerprints off your display. Other premium models feature highly responsive capacitive touch sensors on the bar, which require only a feather-light tap to adjust settings.
Budget models typically opt for inline cable controllers or physical clicky buttons mounted directly on the lightbar housing. Inline controllers can add cable clutter to your desk and are often awkward to reach. Physical buttons mounted on the lightbar itself require you to apply downward force to press them. This force can easily push the lightbar out of its carefully adjusted angle, wobble your monitor, or require you to use two hands—one to hold the bar steady and one to press the button—every time you want to adjust the light.
Smart features and automation also vary widely across price points. Premium lightbars often incorporate built-in ambient light sensors that continuously monitor the brightness of your room. When enabled, an auto-dimming function automatically adjusts the lightbar’s output to maintain a constant, ergonomically optimal illuminance level on your desk (typically around 500 lux, which is the standard recommendation for office work). They also feature reliable internal memory chips that retain your exact brightness and color temperature settings even if the device is completely powered down or unplugged.
While some budget models claim to offer auto-dimming or smart sensors, these are often basic photoresistors that lack precise calibration. They may over-compensate in dark rooms or fail to adjust smoothly, leading to sudden, distracting steps in brightness. Their memory functions can also be unreliable, resetting to a default, blinding 6500K cool white every time your computer restarts or enters sleep mode.
When deciding which control style fits your setup, consider your daily routine. If you work in a space with changing natural light throughout the day, a wireless remote or a calibrated auto-dimming sensor provides immense value by letting you adjust your environment instantly and effortlessly. If you only turn your light on once in the evening and leave it at a single setting, simpler manual controls may be perfectly adequate.
Price-to-Value Assessment: When to Upgrade Your Desk Lighting
To make an informed purchasing decision, it is helpful to view the price difference between premium and budget lightbars not merely as a premium brand tax, but as a direct investment in your physical comfort, visual health, and equipment longevity.
In the Singapore market, budget monitor lightbars generally range from S$25 to S$60, while premium models typically command prices between S$120 and S$250 or more. While a three-to-four-fold price increase is substantial, the long-term cost of ownership and ergonomic benefits paint a more nuanced picture. A cheap plastic lightbar with poor thermal management may experience LED dimming, color shifting, or mechanical failure within a year or two, requiring a complete replacement. A premium aluminum lightbar, engineered with superior heat dissipation and robust electronics, is built to last for many years, easily outlasting several budget replacements.
Furthermore, the value of eye care cannot be understated. If you are a software developer, creative professional, writer, or student spending 8 to 12 hours a day looking at a screen, even minor screen glare or high-frequency flicker can cause cumulative eye strain, physical fatigue, and decreased productivity. In this scenario, the cost of a premium lightbar is a highly justifiable investment in occupational health.
Conversely, if your screen time is limited to casual web browsing, occasional administrative tasks, or short evening sessions, a budget lightbar is highly cost-effective. It provides the necessary downward illumination to read physical documents or take notes at your desk without the need for a bulky, space-consuming traditional desk lamp.
Decision Framework: Which Tier Fits Your Workspace?
To finalize your choice, use this structured framework to align your specific workspace needs, monitor specifications, and budget with the correct lightbar tier.
Choose Premium if:
- You work or game for long hours: You spend more than 4 hours a day in front of a monitor and are highly sensitive to eye strain, dry eyes, or headaches.
- You own a high-end, curved, or borderless monitor: Your display has thin bezels, a curved panel, or a delicate screen surface that cannot tolerate mechanical clamping pressure.
- You require precise color accuracy: You work in graphic design, photo editing, or video production where a high CRI (Ra ≥ 95) and stable color consistency are non-negotiable.
- You value a clean, premium aesthetic: You prefer anodized aluminum construction, zero cable clutter, and the convenience of a wireless desktop control dial.
Choose Budget if:
- Your usage is casual and intermittent: You only use your desk setup for short periods in the evening or for basic administrative tasks.
- You have a standard, flat monitor: Your display has a flat back panel and a standard plastic bezel that can easily accommodate a basic spring-loaded clamp.
- You are on a strict budget: You need functional task lighting for your desk surface but cannot justify spending over S$100 on an accessory.
- You primarily read physical books: You need a light source to illuminate paper documents, notebooks, or textbooks, and screen glare is a secondary concern.
Verify First if:
- You use a specialized display: If you have an ultra-wide monitor, a glass-backed display, or a monitor with a built-in pop-up webcam, consult the manufacturer's manual to ensure the lightbar's mounting mechanism is physically compatible.
- You plan to connect to a USB hub: Check the voltage and wattage requirements of the lightbar. Most run on standard 5V USB power, but some premium models with high-output LEDs require a dedicated 5V/2A USB port. Ensure your monitor's built-in USB ports or your external hub can supply sufficient amperage to prevent flickering or auto-shutdowns.
- You are installing in a warm environment: If your home office does not have continuous air conditioning, prioritize models with metal housings to facilitate proper heat dissipation and protect the longevity of the internal LEDs.
Frequently Asked Questions (FAQ)
Do monitor lightbars work on curved monitors?
Yes, many monitor lightbars work on curved monitors, but compatibility depends heavily on the clamp design and the lightbar’s shape. Standard straight lightbars with short mounting brackets can sometimes cast light onto the upper corners of a curved screen, causing glare. To avoid this, look for lightbars specifically engineered with an extended mounting arm that projects the light further forward, or opt for a curved monitor lightbar designed to match the curvature (such as 1000R or 1500R) of your display. Always verify the manufacturer’s maximum curvature rating before purchasing.
Can a monitor lightbar replace a traditional desk lamp?
A monitor lightbar is designed specifically for forward-facing task lighting directly over your keyboard and immediate desk area while minimizing screen glare. It is highly efficient at saving desk space. However, it cannot fully replace a traditional desk lamp if you require highly adjustable, omnidirectional lighting, or if you need to illuminate a very large, deep desk surface for physical crafts, drawing, or reading large architectural blueprints. For standard computer-centric work, a lightbar is an excellent and often superior alternative, but for diverse hands-on hobbies, a traditional adjustable desk lamp remains highly useful.
Community discussion
Share your experience or ask a question. Comments are reviewed before publication.