
Selecting the right downlight for a standard Housing & Development Board (HDB) flat with a 2.6-meter ceiling requires balancing physical dimensions, light spread, and brightness. To achieve comfortable, glare-free illumination without making your rooms feel cramped, opt for low-profile downlights with a wide beam angle of 90 to 120 degrees and a moderate light output of 400 to 600 lumens per fixture. This combination ensures even light distribution across your living spaces while keeping the fixtures visually unobtrusive.
Because a 2.6-meter ceiling height places the light sources relatively close to eye level, choosing oversized or overly bright fixtures can easily lead to visual discomfort and harsh shadows. By focusing on shallow-recessed designs and verifying the physical clearance behind your false ceiling, you can create a bright, airy home that feels spacious and welcoming.
Understanding the 2.6m Ceiling Constraint
A ceiling height of 2.6 meters is standard for most modern HDB flats, but it presents unique challenges for interior lighting design. Unlike high-ceiling properties where light has ample vertical space to disperse, a lower ceiling brings the light source much closer to your line of sight. This proximity means that any design misstep, such as choosing the wrong fixture depth or excessive brightness, is immediately noticeable.
Products mentioned in this guide
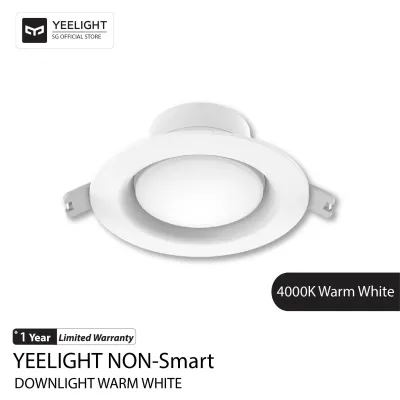
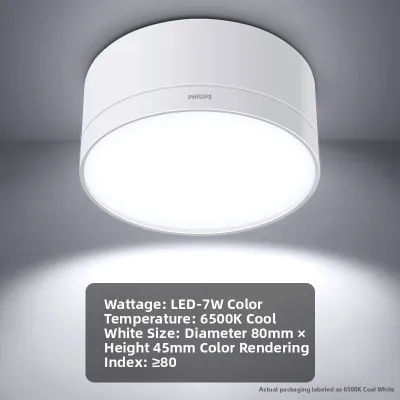
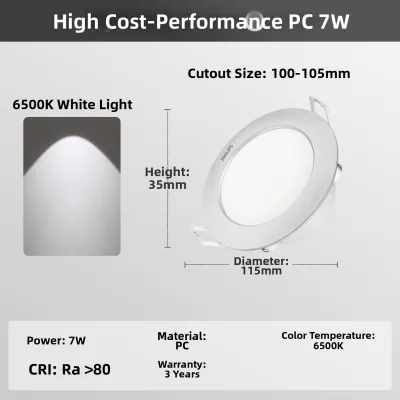
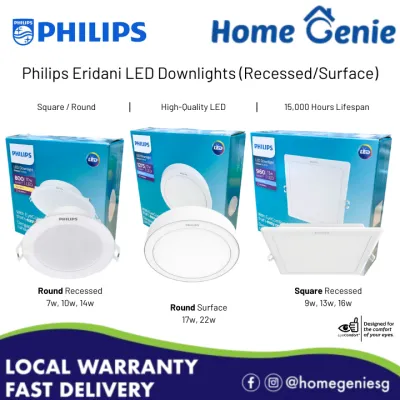
![[Climate Voucher] PHILIPS 3 Color Meson LED Downlight 5.5W 9W 13W 17W Tri Tone Scene Switch for False Ceiling Local Warranty](https://img.lazcdn.com/g/p/4f25f6fa6bf4fcf754b08b97b4102da3.jpg_400x400q80.jpg_.webp)
![[2x Efficiency] Megaman Classic Downlight (V3) 7/9/12W Ultra Bright · Visual Comfort CRI92](https://img.lazcdn.com/g/p/4f152f765f55b5ad35e8c27e5cbfb5d5.jpg_400x400q80.jpg_.webp)
Prices are valid at publication and may change. Please refer to the product page for the latest price.
The physical depth of your downlight directly impacts the usable headroom in your home. If you install a false ceiling to house recessed downlights, the drop required to accommodate deep fixtures can lower your ceiling height even further. This loss of vertical space can make a standard living room feel restrictive and cave-like.
Furthermore, when light sources are positioned closer to eye level, the risk of direct glare increases significantly. If a downlight has an exposed bulb or a shallow bezel, you are more likely to catch the intense light source in your peripheral vision as you walk through the room. This constant exposure can cause eye strain and discomfort over time.
The visual weight of the fixtures themselves also plays a role in how spacious a room feels. Bulky, thick-trimmed downlights draw the eye upward and emphasize the physical boundary of the ceiling. Selecting minimalist, flush-mounted, or trimless designs helps the fixtures blend seamlessly into the ceiling plane, creating an illusion of height and openness.
Matching Downlight Size and Cut-Out Dimensions
When shopping for downlights, it is crucial to understand the difference between the trim diameter and the cut-out hole size. The trim diameter refers to the outer edge of the fixture that remains visible on the ceiling surface, while the cut-out dimension is the actual diameter of the hole that must be cut into your plasterboard or false ceiling. Misunderstanding these measurements can lead to costly installation errors or unsightly gaps.

For a 2.6-meter ceiling, smaller downlight sizes are generally more aesthetically pleasing and practical. Fixtures with a cut-out size of 3 to 4 inches (approximately 75mm to 100mm) offer a clean, modern look that does not dominate the ceiling. These compact sizes provide sufficient illumination when spaced correctly, without the overwhelming visual presence of larger commercial-grade fixtures.
If your ceiling cavity is highly restricted, ultra-slim or shallow-recessed LED downlights are excellent alternatives. These models often require as little as 20mm to 30mm of clearance behind the plasterboard, allowing you to install a false ceiling with a minimal drop. This preserves as much of your original 2.6-meter headroom as possible while still achieving a modern recessed look.
Before purchasing any fixtures, always measure your existing ceiling cavities and locate the structural concrete slab and metal joists. You can use a stud finder to map out the support framework behind the plasterboard. Ensuring that your planned cut-out locations do not conflict with these structural elements is essential to preserve the integrity of your ceiling and avoid installation delays.
Selecting the Right Beam Angle for Even Illumination
The beam angle of a downlight determines how wide the cone of light spreads as it travels downward from the ceiling. At a height of 2.6 meters, the light cone has a relatively short distance to expand before it hits the floor or furniture surfaces. Consequently, choosing the wrong beam angle can result in a patchy, uneven lighting scheme with harsh bright spots and dark corners.
For general ambient lighting in living rooms, bedrooms, and kitchens, wide beam angles ranging from 90 to 120 degrees are highly recommended. These wide angles allow the light cones from adjacent fixtures to overlap smoothly at a lower height, creating a soft, continuous wash of light across the entire room. This even distribution eliminates dark zones and makes the space feel larger and more cohesive.
In contrast, narrow beam angles of 15 to 36 degrees project a concentrated, intense beam of light. While these are excellent for task lighting over a kitchen island or highlighting artwork on a wall, using them for general ambient lighting in a low-ceiling room will create a “spotlight” effect. This can make the room feel fragmented and visually busy.
To ensure your chosen fixtures will perform well in your space, check the manufacturer’s photometric charts or product specifications. Look for the beam spread diameter at a distance of approximately 2.5 meters. This information allows you to calculate exactly how far apart to position your fixtures to achieve seamless coverage without overlapping hotspots.
Calculating Wattage and Lumens for HDB Rooms
A common mistake when planning home lighting is relying solely on wattage to estimate brightness. Wattage measures electrical power consumption, whereas lumens measure the actual amount of visible light emitted by the fixture. With modern energy-efficient LED technology, a downlight can produce high light output while consuming very little power.
To determine the correct brightness for your HDB flat, estimate the required total lumens based on the square footage of each room and its primary activities. For example, a living room or bedroom generally requires a softer ambient light level of about 100 to 150 lumens per square meter. A kitchen or study, where detailed tasks are performed, may require a brighter level of 250 to 300 lumens per square meter.
Once you have calculated the total required lumens for a room, divide that number by the lumen output of a single downlight to determine how many fixtures you need. For a 2.6-meter ceiling, individual downlights emitting 400 to 600 lumens are ideal. This allows you to distribute multiple lower-output light sources across the ceiling, which provides much more balanced illumination than using a few extremely bright fixtures.
Color temperature also significantly influences the perceived size and mood of a compact space. Warm white light (2700K to 3000K) creates a cozy, inviting atmosphere perfect for bedrooms and living areas, but can sometimes make a small room feel slightly enclosed if it is the only light source. Cool white (4000K) offers a clean, crisp daylight effect that can make utility areas feel more spacious and functional, though it should be balanced carefully to avoid a sterile environment.
Installation Clearances and Safety Checks
Safety must always be your top priority when installing or modifying ceiling light fixtures. Even energy-efficient LED downlights generate heat, which must be dissipated safely to prevent premature component failure and reduce fire risks. Always ensure there is an adequate thermal dissipation gap between the top of the downlight housing and the concrete ceiling slab above.
Most standard downlights require a minimum clearance gap of 15mm to 25mm above the fixture to allow air to circulate. If you are using insulation material inside your false ceiling, verify whether your chosen downlights are rated for contact with insulation (often designated as IC-rated). If they are not, you must maintain a clear boundary around each fixture to prevent heat buildup.
Before purchasing, verify that the downlights are compatible with standard residential voltage of 230V at 50Hz. Look for recognized electrical safety marks on the product packaging, which indicate that the fixtures have undergone rigorous testing for electrical safety and electromagnetic compatibility. Avoid unbranded or uncertified fixtures sourced from unregulated online marketplaces, as they may pose safety hazards.
For any installation involving fixed electrical wiring, working at heights, or modifying your home’s consumer unit, always isolate the power supply at the main circuit breaker before starting. If you are unsure about the wiring configuration, load limits, or dimming compatibility of your new setup, halt your DIY efforts immediately. Consult a licensed electrical worker to complete the installation safely and in compliance with local regulations.
Frequently Asked Questions (FAQ)
Can I use smart downlights in a 2.6m HDB ceiling?
Yes, you can use smart downlights in a 2.6-meter ceiling, but you must pay close attention to their physical dimensions. Smart downlights contain integrated wireless modules and dimming drivers, which can make the fixture body deeper than standard, non-smart equivalents. Always measure the total depth of the smart fixture and compare it to your available ceiling cavity clearance. Additionally, ensure that the false ceiling cavity has adequate ventilation, as the wireless components and internal drivers can be sensitive to heat buildup in tightly enclosed spaces.
How far apart should I space the downlights?
For a standard 2.6-meter ceiling, a reliable baseline is to space your downlights approximately 1.0 to 1.2 meters apart. This spacing works exceptionally well with wide beam angles of 90 to 120 degrees, ensuring that the light cones overlap at a comfortable height above the floor to eliminate dark gaps. When positioning fixtures near walls, keep them about 0.5 to 0.6 meters away from the wall surface to prevent harsh, direct light cones from washing down the walls, unless you are intentionally creating a decorative wall-washing effect.

Community discussion
Share your experience or ask a question. Comments are reviewed before publication.