
For standard 2.6m HDB ceilings, highly effective skylight ceiling lights are ultra-slim, surface-mounted LED panels with a profile thickness of 2.5 cm or less, and a diameter ranging from 30 cm to 60 cm depending on the room’s square footage. Because HDB flats feature solid concrete ceilings that prevent recessed installations without a false ceiling, low-profile surface-mounted fixtures offer a practical balance of headroom preservation and simulated natural daylight. Selecting the correct size and profile ensures the fixture illuminates the space evenly without creating a cramped, oppressive atmosphere.
Understanding the 2.6m Ceiling Constraint in HDB Flats
Standard HDB flats in Singapore typically feature a ceiling height of approximately 2.6 metres. This height leaves limited vertical clearance, meaning any bulky, hanging, or heavily ornamented light fixture can quickly make a room feel visually compressed and physically restrictive. When a light fixture protrudes too far downward, it lowers the visual horizon of the room, making the living space feel smaller than its actual dimensions.
To achieve the open, airy look of a natural skylight, homeowners must distinguish between true recessed lighting and surface-mounted skylight-style fixtures. True recessed lighting sits flush inside a ceiling cavity, which requires building a dropped false ceiling. However, installing a false ceiling in a 2.6m flat reduces the actual headroom even further, often down to 2.4 metres or less, which may not be desirable for all homeowners.
Products mentioned in this guide
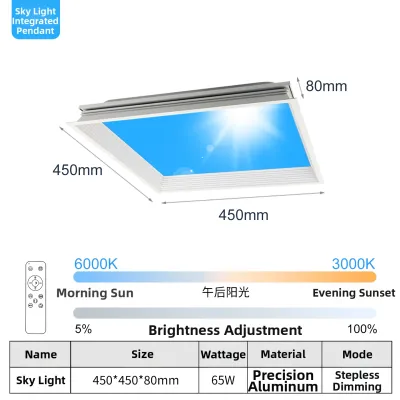
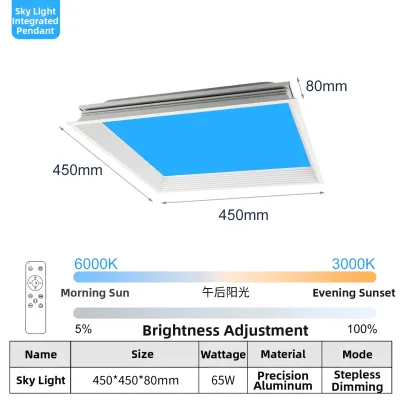
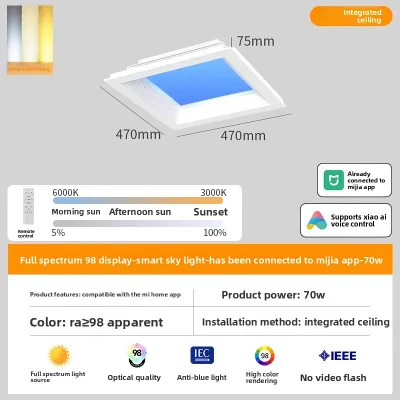
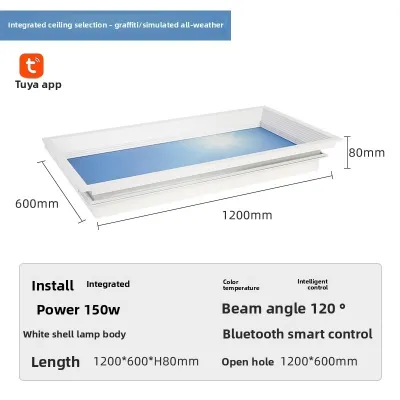
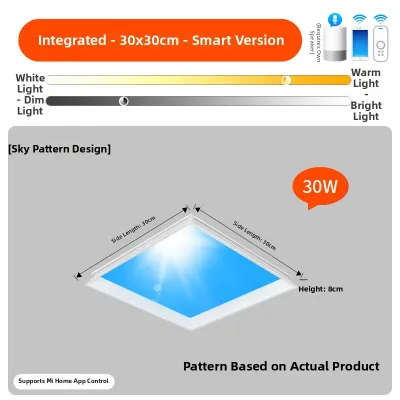
Prices are valid at publication and may change. Please refer to the product page for the latest price.
Furthermore, HDB ceilings are constructed from solid structural concrete slabs. Hacking into these concrete slabs to recess a light fixture is strictly prohibited under local housing regulations to maintain the structural integrity of the building. Therefore, surface-mounted skylight ceiling lights, which attach directly to the concrete surface with minimal protrusion, represent the most practical and compliant solution for standard flats.
Choosing the Right Diameter and Light Spread
Selecting the appropriate diameter for a sky light ceiling fixture requires evaluating the specific dimensions of each room. For compact spaces such as standard HDB bedrooms, study rooms, or kitchens, a fixture diameter of 30 cm to 40 cm is generally sufficient to provide adequate illumination without dominating the ceiling plane. In contrast, larger open-concept living and dining zones can accommodate wider panels, typically ranging from 50 cm to 60 cm, or even multiple smaller panels arranged in a balanced grid.

The light spread and beam angle of the fixture are equally critical in low-ceiling environments. A narrow beam angle can create harsh, conical pools of light and deep shadows in the corners of the room, which visually shrinks the space. To counter this, look for skylight fixtures equipped with high-quality diffusers that offer a wide beam angle, ideally 120 degrees or more, to scatter light evenly across the walls and floor.
When planning the layout, always check the manufacturer’s spacing guidelines and light distribution curves. Evenly distributed light reduces high-contrast zones, making the ceiling appear visually higher and the entire room more expansive. Homeowners should verify the total floor area of their room and compare it against the manufacturer’s recommended coverage specifications before purchasing.
Selecting the Ideal Profile and Thickness
To maximize physical headroom and maintain a clean, modern aesthetic, the profile thickness of the sky light ceiling fixture must be carefully evaluated. Ultra-slim flush-mount designs, which typically protrude less than 2.5 cm from the ceiling, are highly recommended for 2.6m heights. These fixtures blend seamlessly into the concrete ceiling, mimicking the appearance of a real recessed skylight without requiring a false ceiling.
However, choosing an ultra-thin profile involves certain technical trade-offs, particularly regarding heat dissipation. High-lumen LED panels generate heat that must be safely dissipated to ensure the longevity of the internal drivers and light-emitting diodes. Homeowners should check the product specifications to ensure the fixture features a robust aluminum frame or dedicated thermal management pathways that allow heat to escape without requiring a deep housing.
Before purchasing, carefully read the product specification sheets for exact protrusion measurements and mounting bracket clearances. Some fixtures may claim to be ultra-thin but require a bulky external driver or mounting bracket that adds unexpected height during installation. Verifying the total installed depth—including the mounting plate—ensures there are no surprises when the fixture is mounted to the concrete slab.
Key Installation and Electrical Checks for HDB Ceilings
Installing a surface-mounted sky light ceiling fixture on an HDB concrete ceiling requires careful preparation and adherence to safety standards. Before purchasing or installing any fixture, verify that the local voltage matches the fixture’s specifications, and check the electrical certification marks to ensure compliance with local safety regulations. Always isolate the power supply at the main distribution board before commencing any electrical work.
Because HDB ceilings are solid concrete, the existing ceiling junction box must be inspected to ensure it can support the weight of the new fixture. Larger skylight panels, especially those with metal frames, can be heavier than standard dome lights. Ensure the mounting bracket is secured using appropriate concrete wall plugs and heavy-duty screws rather than relying on simple plasterboard anchors.
Any drilling into the structural concrete slab must be done with care, using a rotary hammer drill and masonry bits, while strictly adhering to local renovation guidelines. Avoid drilling too deeply or near visible conduit paths to prevent damaging embedded electrical wiring. If the installation involves complex wiring, high-altitude work, or heavy fixtures, homeowners should engage a qualified professional electrician to complete the installation safely.
Common Sizing and Placement Mistakes to Avoid
One of the most common mistakes in HDB lighting design is installing oversized fixtures in narrow corridors or small utility spaces. A massive 60 cm panel in a narrow hallway creates a disproportionate visual weight, making the passage feel cramped and tunnel-like. For transitional spaces, smaller, elongated, or compact square profiles work much better to guide the eye naturally.
Another frequent error is ignoring glare control when positioning bright, high-lumen panels. Placing an unshielded, highly intense skylight fixture directly above a bed or a living room sofa can cause significant visual discomfort when looking upward. Opt for fixtures with frosted, micro-prismatic, or anti-glare diffusers that soften the light output while maintaining high brightness levels.
Lastly, relying solely on a single central skylight fixture to illuminate a large, open-concept living and dining area often leads to disappointing results. While a central panel provides excellent general ambient light, it may leave functional areas like dining tables or reading corners under-illuminated. Supplementing the central sky light ceiling with targeted task lighting, such as slim track lights or floor lamps, creates a layered lighting scheme that enhances both functionality and spatial depth.
Frequently Asked Questions (FAQ)
Can I install a recessed skylight light directly into an HDB concrete ceiling?
No, you cannot install a true recessed skylight directly into an HDB concrete ceiling. HDB ceilings are solid structural concrete slabs, and cutting or hacking into them to create a recess is strictly prohibited under housing regulations to protect the building’s structural integrity. To achieve a recessed look, you must install a dropped false ceiling to house the fixture, or alternatively, select an ultra-slim surface-mounted sky light ceiling fixture that mimics the recessed aesthetic with minimal protrusion.
What colour temperature works best for low ceilings?
The choice of colour temperature depends on personal preference and the primary function of the room, but certain guidelines help optimize low-ceiling spaces. Cooler colour temperatures, such as cool white (4000K) or daylight (6500K), can make a room feel more open and airy by simulating natural outdoor light, though they can sometimes feel clinical if too bright. Warmer temperatures (3000K or lower) create a cozy, inviting atmosphere but can visually lower the ceiling if the light is not properly diffused; therefore, choosing a fixture with a high-quality diffuser and excellent colour rendering capabilities is essential to maintain a balanced, spacious feel.

Community discussion
Share your experience or ask a question. Comments are reviewed before publication.