
Indoor gardening is highly popular in Singapore, where residents transform HDB flats and condominiums into green sanctuaries. However, high-density urban housing presents a major challenge: limited natural sunlight. While Singapore’s equatorial climate offers abundant sunshine, deep balconies, window grilles, tinted glass, and neighboring blocks block this light from reaching indoor spaces. To overcome this, many plant enthusiasts use artificial lighting, with a growing interest in utilizing a solar light for plants to minimize electricity consumption.
Using solar power to run indoor grow lights requires a clear understanding of solar technology. The most effective setup is a split-system solar grow light. Integrated solar lights, where the panel and LED are a single unit, are ineffective indoors because solar panels require direct, unfiltered sunlight to charge. Effective setups separate the solar panel (mounted outdoors on a balcony railing or ledge) from the LED grow light (positioned indoors over your plants). The most effective brands publish transparent photosynthetic metrics, utilize heat-resistant battery chemistries like Lithium Iron Phosphate (LiFePO4), and offer robust warranties to withstand Singapore’s tropical climate.
The Reality of Using Solar Power for Indoor Plants
To successfully use solar-powered lighting indoors, you must address the physical contradiction of harvesting solar energy inside a home. Solar panels require direct, high-intensity sunlight to generate electricity. Standard indoor ambient light, even in a room that feels bright, typically measures less than 1,000 lux. In contrast, a solar panel requires direct sunlight exceeding 50,000 lux to charge efficiently. Furthermore, modern window glass filters out ultraviolet (UV) and infrared radiation, which reduces the energy transmission required by solar panels. Placing a solar panel behind a closed window can cut its charging efficiency by up to 60%, making indoor charging unviable.
Products mentioned in this guide
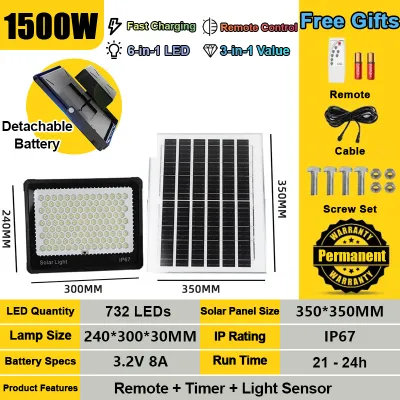
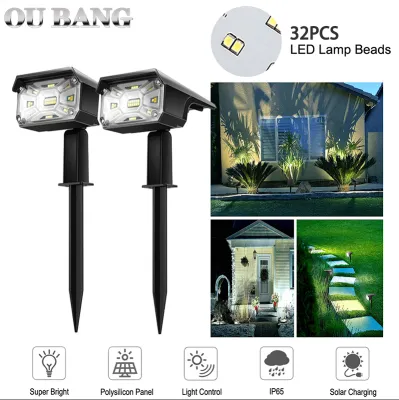
Prices are valid at publication and may change. Please refer to the product page for the latest price.
This limitation makes the distinction between integrated and split-system solar lights critical. Integrated solar lights are designed as a single, self-contained unit. While they work well in open gardens, placing them indoors forces a compromise: either the plant is placed in a dark corner where the solar panel cannot charge, or the entire unit is placed on a windowsill, which still may not provide enough direct light through the glass. A split-system solar light resolves this issue. The solar panel is installed outdoors in direct sunlight, and a weather-resistant cable connects it to the indoor LED grow light fixture. This allows you to position your plants anywhere inside your home while powering the lights with harvested solar energy.
Implementing a split-system in Singapore’s high-rise urban environment comes with unique spatial challenges. HDB flats and private condominiums are often subject to shading from adjacent blocks and overhead balcony structures. Window grilles and privacy screens further diffuse incoming sunlight, creating complex shadows. Before purchasing a solar grow light, conduct a spatial audit of your home. Identify outdoor mounting points, such as balcony railings, external air-conditioner ledges, or outer window sills, that receive at least four to six hours of unobstructed direct sunlight daily. If your home faces a deep central airwell or is permanently blocked by a neighboring tower, a solar-powered system may not be viable, and a grid-tied LED system would be more reliable.
Critical Specifications to Check Before Purchasing
Selecting an effective solar grow light requires analyzing technical specifications rather than generic marketing claims. Because plants interact with light differently than humans, standard lighting metrics like lumens or simple wattages do not indicate whether a light will support photosynthesis.

Light Spectrum and PAR Plants utilize a specific band of light known as Photosynthetically Active Radiation (PAR), spanning wavelengths from 400 to 700 nanometers (nm). Within this band, plants primarily absorb blue light (around 430–450 nm) for vegetative growth and red light (around 640–660 nm) for flowering and stem elongation. When evaluating solar grow lights, prioritize full-spectrum white LEDs. These chips use a phosphor coating to convert blue light into a broad, balanced spectrum that mimics natural sunlight. Full-spectrum lights are recommended for residential areas because they provide a natural, visually comfortable light. Red/blue spectrum lights, which emit a harsh purple glow, are highly efficient but can cause significant visual strain and are best reserved for enclosed grow tents.
Intensity and Output (PPFD) Standard solar garden lights are designed for low-intensity pathway illumination and do not produce the light intensity required to sustain plant growth. To ensure a light is effective, check its Photosynthetic Photon Flux Density (PPFD), which measures the micromoles of photons hitting a one-square-meter area per second (µmol/m²/s). A reliable brand will provide a PPFD map showing the light intensity at various hanging heights (e.g., 15 cm, 30 cm, and 45 cm). Low-light plants like ferns and aroids generally require a PPFD of 50 to 150 µmol/m²/s, while medium-to-high-light plants like herbs and succulents require 200 to 600 µmol/m²/s. If a brand only lists lumens or “wattage equivalents” without providing PPFD data, the light is likely a decorative fixture rather than a functional grow light.
Battery and Panel Ratio The balance between the solar panel’s power generation and the battery’s storage capacity determines how long your grow light can run. This relationship is critical because grow lights must operate consistently for 8 to 12 hours daily to provide plants with an adequate Daily Light Integral (DLI). To evaluate this, convert the battery’s milliampere-hour (mAh) rating to Watt-hours (Wh) using the formula: Wh = (mAh × Voltage) / 1000. For example, a 3.2V Lithium Iron Phosphate battery rated at 10,000 mAh has a capacity of 32 Wh. If your LED grow light draws 4 watts of power, this battery can run the light for 8 hours (32 Wh / 4W = 8 hours). To fully charge this battery in Singapore’s average of 4 to 5 peak sun hours, the solar panel must have a minimum rating of 10 to 15 watts, factoring in standard energy losses during conversion and storage. If the panel wattage is too low, the battery will never fully charge, leading to short run times and accelerated battery degradation.
Weather Resistance and Build Quality Because the solar panel and its external wiring are permanently exposed to Singapore’s tropical climate, they must be built to withstand extreme weather. Check the Ingress Protection (IP) rating of all outdoor components. For outdoor solar panels and battery enclosures, look for a rating of IP65 or higher. An IP65 rating guarantees that the component is completely dust-tight and protected against water jets from any direction, ensuring it can survive sudden, torrential monsoon downpours and high relative humidity without suffering from water ingress, internal corrosion, or short circuits.
How to Evaluate and Select Reliable Brands
The market for solar grow lights is flooded with unbranded, low-cost options that often feature exaggerated performance claims and substandard components. To find a reliable brand that delivers safe, effective, and long-lasting performance, you must establish a rigorous evaluation framework.
Certification and Safety Standards Although solar-powered lighting systems operate on low-voltage direct current (DC), the rechargeable batteries used to store energy pose safety risks if they are poorly manufactured or lack proper protective circuitry. High-quality brands ensure their products comply with international safety and environmental standards, such as CE, FCC, RoHS, and UL certifications. These certifications guarantee that the product has undergone testing for electrical safety, electromagnetic interference, and the absence of hazardous materials. Most importantly, ensure the system features a robust Battery Management System (BMS). A high-quality BMS protects the battery from overcharging, over-discharging, short circuits, and thermal runaway—a critical consideration in Singapore’s warm climate, where ambient temperatures can cause batteries to run hot.
Warranty and Local Support The combination of high ambient temperatures (frequently exceeding 30°C) and high humidity in Singapore places immense stress on electronic components, particularly rechargeable batteries. Battery capacity naturally degrades over time, but this process is significantly accelerated in tropical environments. Reliable brands demonstrate confidence in their product durability by offering a minimum of a 12-month warranty that explicitly covers battery performance and panel degradation. Prioritize brands that have authorized local distributors or dedicated customer support channels in Singapore. If a component fails or requires replacement, dealing with a local representative is far more efficient and cost-effective than shipping heavy lithium batteries back to an overseas manufacturer, which often incurs high shipping fees and complex customs regulations regarding hazardous materials.
Specification Transparency Avoid brands that rely on vague, sensationalist marketing terms like “maximum growth formula” or “super-powered LEDs” without providing detailed technical specifications. A reputable manufacturer will be completely transparent about the components used in their systems. They should clearly state the brand of the LED chips (such as Samsung, Osram, or Sanan), the specific battery chemistry used, and the exact dimensions and material of the solar panel (monocrystalline panels are highly preferred over polycrystalline panels due to their superior efficiency in converting sunlight). In terms of battery chemistry, Lithium Iron Phosphate (LiFePO4) is highly superior to standard Lithium-ion (Li-ion) or Lead-Acid batteries for solar applications. LiFePO4 batteries offer a significantly longer lifespan (often exceeding 2,000 to 3,000 charge cycles compared to 500 cycles for standard Li-ion), superior thermal stability, and a much lower risk of swelling or catching fire when exposed to high heat.
Purchasing Channels To ensure you receive an authentic product with a valid warranty, purchase your solar grow light system through official brand websites, authorized local lighting showrooms, or reputable specialty horticultural suppliers. Be highly cautious when browsing general online marketplaces or e-commerce platforms. While these platforms host many listings for solar lights, they are also saturated with unverified third-party sellers offering drop-shipped products with falsified specifications. Buying from unauthorized channels often leaves you without recourse if the product arrives damaged, fails within a few weeks, or does not deliver the promised light spectrum and intensity required to keep your plants alive.
Installation Strategies for Singapore Homes
Proper installation is key to maximizing the efficiency of your solar grow light system while ensuring safety and compliance with local housing regulations.
Panel Placement and Angle To harvest the maximum amount of solar energy, the solar panel must be positioned to receive direct, unobstructed sunlight for as many hours as possible. Because Singapore is located just 1.3 degrees north of the equator, the sun’s path shifts slightly throughout the year—passing to the south from September to March, and to the north from April to August. To accommodate this shifting path, mount your solar panel flat or at a very shallow angle of 10 to 15 degrees tilting toward the open sky. This slight tilt is crucial: it allows rainwater to run off the panel naturally, washing away accumulated dust and soot, rather than pooling on the surface and blocking sunlight. Never place the solar panel behind tinted window glass, as solar films are specifically engineered to reflect and absorb solar energy, which can cut your panel’s charging capacity by half. Instead, mount the panel on the exterior of your balcony railing, an external aircon ledge, or an outer windowsill where it has a clear view of the sky.
Cable Management and Routing Connecting an outdoor solar panel to an indoor grow light requires routing a cable through your home’s exterior envelope. This must be done carefully to avoid damaging the cable or compromising your home’s weatherproofing. Avoid pinching the cable in sliding balcony doors or window frames. Over time, the repeated friction and pressure from opening and closing doors will crush the cable, damaging the copper conductors and wearing down the protective rubber insulation. This can lead to short circuits, electrical faults, or water tracking along the damaged cable into your home. To route the cable safely, use flat ribbon cable adapters designed to pass through tight window seals without being crushed. Alternatively, feed the cable through existing utility openings, such as air-conditioning pipe sleeves or drainage ports. When routing the cable, always incorporate a “drip loop”—a simple U-shaped bend in the cable just before it enters the window or wall. This ensures that rainwater running down the cable drips off the bottom of the loop outdoors, rather than following the wire inside your home.
Light Positioning and Distance Once the indoor grow light is connected, position the light head at an appropriate distance from your plants’ canopy. Because solar-powered grow lights operate on a limited energy budget, they generally have lower power outputs than grid-tied LED systems. To compensate for this lower intensity, you must position the light source closer to your plants to achieve an adequate PPFD. As a general guideline, place the light head between 15 and 30 cm above the top leaves of your plants. However, you must monitor your plants closely and adjust the height based on their physiological response. If you notice your plants developing long, thin stems with sparse leaves (a condition known as etiolation or stretching), they are not receiving enough light, and you should move the light closer. Conversely, if the leaves begin to show yellowing, dry brown spots, or curled edges, the light may be too close, causing heat stress or light bleaching, and should be moved further away.
Safety Boundaries and High-Rise Regulations In Singapore’s high-rise residential landscape, securing outdoor installations is a critical safety and legal responsibility. Under the Building Maintenance and Strata Management Act, residents are legally responsible for ensuring that no objects fall from their units, as falling objects pose a severe threat to public safety. When mounting a solar panel on a balcony railing, external ledge, or windowsill, never rely on simple suction cups, double-sided tape, or lightweight plastic zip ties, which degrade rapidly under intense tropical UV exposure. Instead, use heavy-duty, corrosion-resistant stainless-steel brackets, U-bolts, or metal clamps specifically rated for outdoor structural use. Always install a secondary stainless-steel safety wire that anchors the solar panel securely to a fixed structural element of your building, ensuring that even if the primary bracket fails during a severe thunderstorm or monsoon gust, the panel cannot fall. Before performing any installation work, isolate the power supply to prevent accidental short circuits, and strictly adhere to the manufacturer’s installation instructions. If the installation requires working at heights, drilling into external building facades, or modifying common property, you must consult your building’s Management Corporation Strata Title (MCST) or a qualified professional installer to ensure compliance with local building codes and estate guidelines.
Maintenance and Battery Care in a Tropical Climate
To maximize the operational lifespan of your solar grow light system and ensure consistent performance, you must perform regular maintenance and implement proper battery care strategies tailored to Singapore’s hot, humid climate.
Solar Panel Cleaning Outdoor solar panels in Singapore accumulate dust, pollen, industrial soot, and haze particles over time. This accumulation forms a thin, dirty film over the photovoltaic cells, which scatters incoming light and can reduce solar charging efficiency by 10% to 20% or more. To maintain optimal energy harvesting, clean your solar panel surface at least once a month. The safest and most effective cleaning method is to wipe the panel gently with a soft, damp microfiber cloth and clean water. Avoid using abrasive scrubbing sponges, steel wool, or harsh chemical detergents, as these can scratch or degrade the protective tempered glass or plastic coating on the panel. Scratches create permanent micro-shadows over the cells, permanently reducing the panel’s ability to capture light. Always clean the panel in the early morning or late evening when the glass is cool; wiping a hot solar panel with cool water can cause thermal shock, leading to micro-cracks in the glass.
Battery Health and Heat Management High ambient temperatures are the single greatest contributor to the premature degradation of rechargeable lithium batteries. When exposed to temperatures consistently exceeding 30°C, the chemical reactions inside the battery accelerate, leading to a rapid loss of capacity and, in severe cases, battery swelling or internal short circuits. While the solar panel must be placed in direct sunlight, the battery pack should be kept as cool as possible. If your split-system design houses the battery inside the solar panel enclosure, try to position the unit so that the battery compartment is shielded from the harsh, direct afternoon sun, or install a simple, non-reflective heat shield over the battery housing. Ensure that the battery unit is installed in a well-ventilated area where air can circulate freely around the casing, helping to dissipate heat. Never seal a battery pack inside a tight, unventilated plastic box or a metal container that can act as an oven under the sun.
Monsoon Adjustments and Power Conservation Singapore experiences two distinct monsoon seasons, with the Northeast Monsoon (typically running from November to January) bringing prolonged overcast skies, heavy daily rainfall, and significantly reduced daylight hours. During these periods, your solar panel’s power generation will drop drastically, often to just a fraction of its normal output. Because the battery will not receive a full charge, running your grow light at maximum brightness for its usual 10 to 12 hours will quickly drain the battery, leading to premature shutdown and potential deep-discharge damage. To keep your plants healthy during the monsoon season, implement power-saving adjustments. If your solar grow light features adjustable intensity levels, dim the light output to a lower setting to extend the battery’s run time. Alternatively, reduce the daily photoperiod from 12 hours to 8 hours. For the ultimate peace of mind, choose a solar grow light system that features dual-charging capabilities. These systems include a USB-C input port, allowing you to detach the battery pack or run an indoor extension cable to charge the system from a standard wall outlet when solar energy is insufficient, ensuring your plants receive consistent light year-round regardless of the weather.
Frequently Asked Questions (FAQ)
Can a standard outdoor solar garden light be used as an indoor grow light?
No, standard outdoor solar garden lights are entirely unsuitable for indoor plant growth. These lights are engineered solely for low-intensity pathway illumination or decorative accent lighting, emitting light in spectrums designed for human visibility rather than plant photosynthesis. They lack the specific blue and red wavelengths required to drive chlorophyll activation and do not produce a sufficient Photosynthetic Photon Flux Density (PPFD) to sustain healthy plant development. Placing a plant under a standard garden solar light will result in leggy, weak growth, leaf loss, and eventual plant death due to light starvation.
How long will the battery last on a cloudy day in Singapore?
On a heavily overcast or rainy day in Singapore, a solar panel’s power output can drop to 10% to 25% of its peak capacity. Consequently, the battery will not receive a full charge, which may reduce the grow light’s run time to just 1 to 3 hours instead of the typical 8 to 12 hours. To mitigate this issue during prolonged cloudy periods, you should select a solar grow light system with adjustable brightness settings to conserve battery power, or opt for a hybrid model that supports supplemental USB charging from a wall outlet.
Community discussion
Share your experience or ask a question. Comments are reviewed before publication.