
Installing the Lidrop H6 spotlight in your home or commercial space requires a methodical approach to physical mounting and electrical wiring. By following a structured step-by-step process, you can achieve a clean, secure, and fully functional lighting setup. This guide outlines the essential preparation, safety protocols, wiring procedures, and mounting steps needed to complete the installation successfully. Because working with electrical systems carries inherent risks, understanding your limits and knowing when to call a professional is vital for a safe outcome.
Pre-Installation Checks and Safety Boundaries
Before handling any electrical components, you must establish a safe working environment. The first and most critical step is to isolate the power supply. Locate your property’s main distribution board or consumer unit and switch off the circuit breaker dedicated to the lighting circuit you will be working on. Do not rely solely on the wall switch to cut the power. Use a reliable, non-contact voltage tester at the existing ceiling or wall wires to verify that no electrical current is active before touching any conductors.
Next, inspect the physical installation site. The ceiling or wall electrical box must be structurally sound and securely anchored to the building frame. A loose or damaged electrical box cannot safely support the weight of the spotlight fixture over time, which could lead to sagging or physical detachment. Check that the mounting surface is flat, dry, and free of structural decay.
Products mentioned in this guide
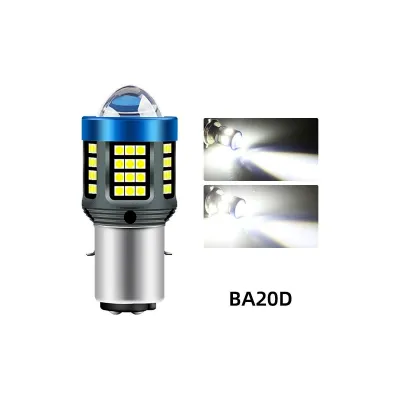
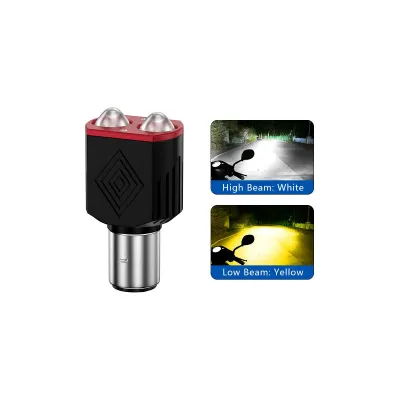
Prices are valid at publication and may change. Please refer to the product page for the latest price.
You must also verify electrical compatibility. Examine the product label on your Lidrop H6 spotlight to confirm its rated input voltage, wattage limits, and electrical certification marks. Ensure your local mains voltage matches the specifications printed on the fixture. In Singapore, standard residential mains voltage is 230V AC at 50Hz, so verifying that your fixture is rated for this supply is essential to prevent electrical hazards or premature driver failure.
Finally, understand the legal and safety boundaries of do-it-yourself electrical work. While mounting a fixture to an existing, pre-wired outlet is often manageable for experienced homeowners, installing new electrical circuits, running fixed wiring behind walls, or modifying the main distribution board requires professional expertise. In Singapore, any fixed electrical wiring work must be performed by a Licensed Electrical Worker (LEW) to comply with local safety regulations and ensure the installation is fully certified.
Tools and Materials Required
Having the correct tools on hand before you begin ensures a smooth, efficient, and safe installation process. You will need a set of insulated hand tools designed specifically for electrical work. This includes insulated screwdrivers (both flathead and Phillips) to secure mounting screws and terminal connections, wire strippers to prepare wire ends, and a dependable non-contact voltage tester to verify power isolation.

In addition to hand tools, gather the specific mounting hardware required for your installation surface. The Lidrop H6 package typically includes a mounting bracket, but you must select appropriate wall anchors or toggle bolts if you are mounting the fixture directly into drywall, plasterboard, or concrete. Using incorrect fasteners can compromise the structural stability of the spotlight.
Do not overlook personal protective equipment. Wear safety glasses to protect your eyes from falling debris, dust, or plaster when drilling holes or working directly beneath the ceiling. A sturdy, stable stepladder is also essential to provide a secure platform while working at heights, reducing the risk of falls or accidental drops of the fixture components.
Step-by-Step Installation Process
Executing the physical installation of your spotlight requires a logical, sequential workflow. By breaking the task down into distinct phases—surface preparation, electrical wiring, and physical mounting—you minimize the risk of errors and ensure each component is installed securely. Always keep the official Lidrop H6 instruction manual nearby, as specific measurements, fastening torque, and component layouts must strictly follow the manufacturer’s guidelines.
Preparing the Mounting Surface and Electrical Box
Begin by preparing the area where the spotlight will be mounted. Carefully inspect the existing electrical box or ceiling opening, clearing away any accumulated dust, plaster debris, or old insulation material. A clean workspace prevents foreign particles from interfering with the electrical connections or settling inside the fixture housing, which could cause overheating or electrical tracking.
Next, position the mounting bracket against the electrical box or ceiling surface. Align the bracket holes with the mounting points of the box, or mark the drilling locations on the ceiling if you are installing anchors. Use a spirit level to ensure the bracket is perfectly aligned, as even a slight tilt will be highly noticeable once the spotlight body is attached. Secure the bracket firmly using the recommended screws, ensuring it does not wobble or shift under light pressure.
Gently pull the existing house wiring through the center of the mounting bracket. Inspect the insulation of these wires for any signs of cracking, fraying, or heat damage. If the wires are damaged, they must be repaired or replaced before proceeding. Ensure there is sufficient wire length—typically about 10 to 15 centimeters of slack—to easily reach the connection terminals on the spotlight without putting tension on the joints.
Wiring the Spotlight Connections
Wiring is the most critical phase of the installation and requires absolute precision. Rather than relying on generalized assumptions about wire colors, which can vary significantly depending on the age of your property and regional standards, you must consult the wiring diagram in the Lidrop H6 instruction manual. Identify the designated terminals for the Live (L), Neutral (N), and Earth/Ground (E or symbol) connections on the fixture’s terminal block.
Strip approximately 8 to 10 millimeters of insulation from the ends of the house wires using your wire strippers, taking care not to nick or damage the copper strands. Insert the wires fully into the corresponding terminals on the fixture’s connector block. Tighten the terminal screws securely, then gently tug each wire to confirm it is held firmly in place. Ensure that no bare copper wire is exposed outside the terminal block, as exposed conductors pose a severe short-circuit and shock hazard.
Establish a clear safety stop condition during this step. If you open the ceiling box and find that the existing wiring is ambiguous, lacks a dedicated ground wire, or does not match the diagrams in the manual, stop work immediately. Do not attempt to guess the wiring configuration. Leave the power isolated at the breaker and contact a Licensed Electrical Worker to inspect and complete the connections safely.
Mounting and Securing the Fixture
Once the electrical connections are secure, you can proceed to mount the spotlight body. Carefully fold and tuck the excess wiring and the terminal block into the electrical box or ceiling cavity. Take your time during this step to ensure that no wires are pinched, crimped, or stretched tightly against sharp metal edges of the bracket or the fixture housing, which could damage the insulation over time.
Align the mounting holes on the spotlight canopy or base with the corresponding screws or tabs on the pre-installed mounting bracket. Push the fixture base flush against the ceiling surface, ensuring there are no visible gaps. Secure the housing to the bracket using the provided fasteners. Tighten the screws until the fixture is snug and stable, but avoid over-tightening, which can strip the threads or warp the decorative housing.
With the main body secured, attach any remaining components as specified in the product guide. This may include inserting the compatible light bulb or LED module, snapping on the decorative trim, or attaching a glare shield or honeycomb louver. Ensure all accessories are locked into place according to the manufacturer’s instructions to prevent them from falling.
Post-Installation Testing and Adjustment
With the physical installation complete, you can safely test the system. Return to your main distribution board and switch the circuit breaker back to the “on” position. Walk back to the room and turn on the wall switch to power up your new spotlight. The light should illuminate immediately and consistently.
Observe the fixture closely for several minutes after turning it on. Listen for any unusual buzzing, humming, or clicking noises coming from the spotlight or its driver. Watch for any signs of flickering or unstable light output. Additionally, stay alert for any unusual burning smells, which could indicate a loose connection or an electrical fault. If you notice any of these warning signs, turn off the wall switch and immediately cut the power at the main circuit breaker before investigating.
If the light operates smoothly, you can proceed to adjust the beam direction. Most spotlights feature adjustable joints or swivels that allow you to aim the light at specific walls, artwork, or work surfaces. Carefully tilt and rotate the spotlight head to achieve your desired lighting effect. Once you have positioned the beam, gently tighten any adjustment screws or locking collars on the joints to ensure the fixture remains securely in place and does not sag over time due to gravity or vibration.
Troubleshooting Common Installation Issues
If your spotlight does not turn on after restoring power, follow a systematic troubleshooting process to identify the cause. First, verify that the main circuit breaker has not tripped back to the “off” position, which would indicate a short circuit. If the breaker remains on, turn off the wall switch and use your voltage tester to confirm that power is reaching the switch itself.
If the light is receiving power but fails to illuminate, the issue may lie within the internal connections. Always isolate the power at the main breaker before opening the fixture. Check that the wire connections inside the terminal block are tight and that the individual wire strands are making solid contact with the terminals. If your model uses a replaceable light source, ensure the bulb is fully seated and locked into its socket.
Flickering or strobing light is another common issue, often related to dimming control. If your Lidrop H6 is connected to a dimmer switch, verify that the dimmer is fully compatible with the specific LED driver used in the spotlight. Non-compatible dimmers can cause unstable power delivery, leading to flickering, buzzing, or reduced lifespan of the LED components. If compatibility issues persist, replacing the dimmer switch with an LED-compatible model or consulting an electrician is recommended.
Frequently Asked Questions (FAQ)
Can I install the Lidrop H6 on a sloped ceiling?
Installing the Lidrop H6 on an angled or vaulted ceiling depends on the mounting mechanism of the specific model variant. You must check the product specifications in the manual to verify the maximum allowable tilt angle and structural limits of the fixture’s swivel joints. If the standard canopy does not support the slope of your ceiling, you may need to purchase a specialized sloped-ceiling adapter or canopy kit designed to allow the fixture to hang vertically and distribute its weight safely.
Is it safe to install this spotlight in a bathroom?
Whether you can install this spotlight in a bathroom depends entirely on its Ingress Protection (IP) rating, which is printed on the product label. Standard indoor spotlights typically have an IP20 rating, meaning they offer no protection against moisture and must not be installed in damp zones, near showers, or in areas prone to high humidity condensation. For bathroom installations, you must verify that the fixture has a suitable IP rating (such as IP44 or higher) for the specific zone of the bathroom where it will be placed, ensuring safety against water splashes and steam.
Community discussion
Share your experience or ask a question. Comments are reviewed before publication.