
The “T8” designation on a light tube refers specifically to its diameter, but upgrading to a smart T8 tube involves more than just matching the physical size. To ensure a safe and functional installation, you must also verify the tube’s length, pin configuration, and how it interacts with your fixture’s existing ballast and wiring. This guide decodes the essential specifications you need to check before purchasing a smart T8 tube for your home or workspace.
Decoding the "T8" Label: Diameter and Physical Fit
When shopping for linear light bulbs, the letter “T” simply stands for “tubular,” indicating the shape of the bulb. The number that follows represents the diameter of the tube in eighths of an inch. Therefore, a T8 tube has a diameter of exactly eight-eighths of an inch, which translates to 1 inch, or approximately 25.4 millimeters.
Understanding this measurement system helps you distinguish T8 tubes from other common sizes on the market. For instance, T5 tubes are much thinner at five-eighths of an inch (about 16 mm), while older T12 tubes are thicker at twelve-eighths of an inch (1.5 inches or about 38 mm). Trying to force a tube of the wrong diameter into your fixture can damage both the bulb and the mounting hardware.
Products mentioned in this guide
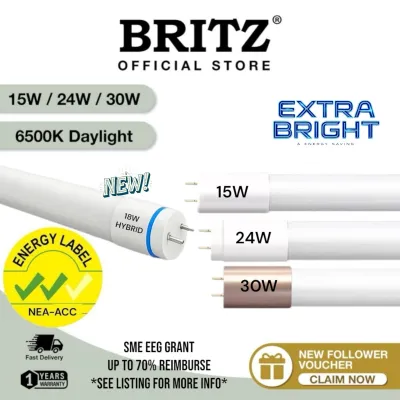
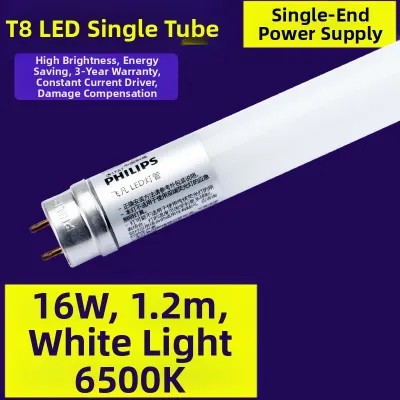
Prices are valid at publication and may change. Please refer to the product page for the latest price.
Confirming the exact diameter is critical because many fixtures use specific retaining clips or tension-based sockets designed for a precise tube thickness. Furthermore, many residential and commercial fixtures feature protective plastic diffusers or metal louvers. If you select a tube with an incorrect diameter, the cover may not close properly, leaving the electrical components exposed or ruining the clean aesthetic of your space.
Navigating T8 Lengths and Physical Clearances
While the T8 label tells you the thickness of the tube, it does not dictate the length. Linear tubes come in several standard lengths, with 2-foot (approximately 60 cm) and 4-foot (approximately 120 cm) options being the most common in residential kitchens, garages, and offices. You cannot assume a T8 tube will fit your fixture based on the diameter alone; you must match the length precisely.

To find the correct size, use a measuring tape to measure your existing tube from end to end, excluding the metal pins. Alternatively, you can measure the distance between the inside faces of the lamp holders on your fixture. Recording these measurements in millimeters or inches ensures you do not accidentally purchase a variation that is slightly too long or too short for your housing.
Smart T8 tubes introduce an extra physical consideration: the end-caps. Because these tubes contain integrated wireless receivers, Bluetooth antennas, or internal heat sinks, their end-caps are sometimes bulkier than those of traditional fluorescent tubes. Always check the manufacturer’s detailed product dimensions to ensure the smart tube will clear any physical obstructions inside your specific fixture housing.
Fixture Compatibility: Pin Types, Ballasts, and Wiring
Most T8 tubes utilize a standard G13 bi-pin base, which features two metal pins spaced 13 millimeters apart at each end. While this pin configuration is highly standardized, you must visually inspect your existing sockets to confirm they are designed for G13 pins. If your fixture uses a single-pin setup or a different spacing, a standard T8 smart tube will not fit.
The most critical step in upgrading to smart T8 lighting is understanding how the tube interacts with your fixture’s ballast. Traditional fluorescent fixtures rely on an electrical ballast to regulate current. Smart T8 LED tubes generally fall into two categories: plug-and-play (ballast-compatible) and direct-wire (ballast-bypass). Plug-and-play tubes slide directly into an existing fluorescent fixture, but they rely on the old ballast functioning correctly.
In contrast, direct-wire smart tubes bypass the ballast entirely, connecting directly to the mains voltage. Many smart LED tubes require this ballast-bypass configuration because old magnetic or electronic ballasts can restrict power, cause severe flickering, or even damage the delicate smart modules inside the tube. Bypassing the ballast also eliminates a common point of electrical failure and reduces standby energy consumption.
Working with electrical wiring carries inherent risks. Before inspecting your fixture’s internal wiring or attempting to bypass a ballast, always turn off the main power supply at your home’s circuit breaker. If you are uncomfortable modifying fixed wiring, or if you cannot identify whether your fixture has a magnetic or electronic ballast, always hire a qualified electrician to perform the installation safely.
Smart Features and Electrical Requirements to Verify
Before purchasing a smart T8 tube, you must verify that its electrical specifications match your local power grid. For instance, in Singapore, the standard mains voltage is 230V at 50Hz. Check the product specification label to ensure the tube is rated for this voltage range, as importing a tube designed solely for 110V markets will destroy the driver and create a serious safety hazard.
Dimming is another area where smart tubes differ significantly from traditional lighting. Smart T8 tubes are designed to receive constant, unfluctuating power; they dim internally using software commands sent via an app or smart assistant. Consequently, you must never install a smart T8 tube in a fixture controlled by a traditional wall-mounted dimmer switch, as lowering the voltage at the switch will starve the smart driver and cause flickering or permanent damage.
Your home’s wireless network infrastructure also plays a vital role in smart tube performance. Most smart tubes connect directly to 2.4 GHz Wi-Fi networks, while others require a dedicated smart home hub utilizing protocols like Zigbee or Thread. Ensure your router or hub is within range of the fixture, especially if you are installing the tubes in a garage, basement, or outdoor utility area where wireless signals may be weak.
Finally, always look for recognized electrical safety certification marks on the product packaging. In Singapore, look for the Safety Mark, which indicates the product has been tested and approved for safe domestic use. Avoid unbranded or uncertified smart tubes sold on generic online marketplaces, as they may lack essential thermal protection and overload safeguards.
Your Pre-Purchase Verification Checklist
To ensure a seamless upgrade, go through this checklist before finalizing your smart T8 tube purchase:
- Measure the physical dimensions: Verify both the 1-inch (T8) diameter and the exact length (such as 2-foot or 4-foot) of your current tube.
- Check the pin base: Confirm your fixture uses standard G13 bi-pin sockets and has enough physical clearance for potentially bulkier smart end-caps.
- Identify the ballast setup: Determine if you need a plug-and-play tube or if you are prepared to bypass the ballast for a direct-wire model.
- Inspect the wall switch: Ensure the fixture is controlled by a standard on/off toggle switch, not a physical dimmer dial or slider.
- Confirm network compatibility: Verify whether the tube requires a 2.4 GHz Wi-Fi connection or a specific smart hub that matches your existing smart home ecosystem.
- Look for safety marks: Ensure the product carries the appropriate local electrical safety certifications.
Frequently Asked Questions (FAQ)
Can I use a smart T8 tube in a fixture controlled by a wall dimmer?
No, you should not use a smart T8 tube with a traditional wall dimmer switch. Smart tubes require a constant, uninterrupted flow of electricity to power their internal wireless chips and control modules. Using a physical wall dimmer to lower the voltage will cause the tube to flicker, drop offline, or suffer permanent driver damage, which typically voids the manufacturer’s warranty.
Do smart T8 tubes require a specific type of switch or neutral wire?
The smart T8 tube itself connects directly to the live and neutral wires inside the light fixture, so it does not require special wiring at the wall switch. However, you must keep the physical wall switch turned on at all times for the smart features to work. If you want a smart wall switch, it must be configured to act as a simple relay that maintains constant power to the fixture while sending digital commands to control the light.
What happens if I install a ballast-bypass smart tube without removing the old ballast?
Installing a ballast-bypass (direct-wire) smart T8 tube into a fixture with an active ballast can cause immediate electrical failure. The ballast will restrict or alter the electrical current, which can cause the smart tube to flicker violently, fail to turn on, or overheat. In worst-case scenarios, this mismatch can ruin the smart tube’s internal circuitry or cause the old ballast to overheat, creating a fire hazard. Always ensure the ballast is fully bypassed or removed according to the manufacturer’s wiring diagram.
Community discussion
Share your experience or ask a question. Comments are reviewed before publication.