
Selecting the right frame to display your cherished memories involves more than just picking a design that catches your eye. A thoughtful wall display requires balancing dimensions, materials, and environmental factors so that your artwork or digital screen complements your living space. Whether you are arranging a collection of traditional printed photographs or setting up a modern digital display, choosing a Kodak frame that matches your room’s scale and aesthetic is key to creating a polished, intentional look.
In Singapore’s diverse residential spaces, from cozy HDB flats to spacious condominiums, wall displays must be planned with precision. Factors such as high ambient humidity, solid concrete walls, and varying lighting conditions all influence which framing option will perform best over time. By evaluating your available wall space, understanding material behaviors, and following proper installation steps, you can create a secure and visually striking gallery that elevates your home decor.
How to Match Kodak Frame Sizes to Your Wall Layout
Before purchasing any frame, you must measure your available wall space to ensure the final arrangement looks balanced. A common mistake is choosing frames that are too small, which can make your photos look lost on a large wall, or selecting frames that are too large, which can overwhelm the room. To avoid these issues, calculate the usable wall area by measuring the width and height of the clear space, then subtract a generous margin for negative space. Maintaining a buffer of empty wall around your display prevents the arrangement from looking cramped and helps draw the eye directly to the images.
Products mentioned in this guide

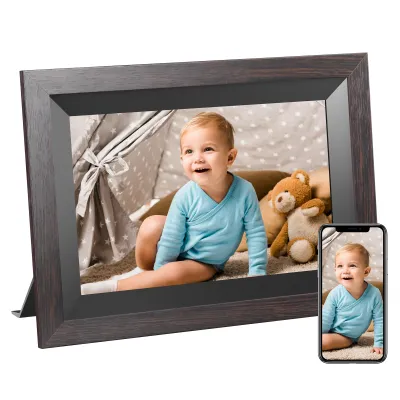






Prices are valid at publication and may change. Please refer to the product page for the latest price.
When decorating a large wall, such as the space above a living room sofa, a bed headboard, or a dining room console, large-format frames work best as single focal points. A single, substantial frame anchors the furniture below it and establishes a clear center of interest in the room. For these prominent areas, follow the two-thirds rule: the total width of your frame or frame grouping should span approximately two-thirds to three-quarters of the width of the furniture beneath it. This proportion ensures that the wall decor visually anchors the furniture, creating a harmonious and balanced composition.
If you prefer to showcase multiple memories, grouping smaller and medium-sized frames is an excellent way to build a cohesive gallery wall. This approach allows you to combine various photo sizes without cluttering the room. When planning a grouped layout, it is helpful to understand standard photo print sizes and how they translate to the outer dimensions of a frame. Standard prints typically come in sizes such as 4×6 inches (10×15 cm), 5×7 inches (13×18 cm), 8×10 inches (20×25 cm), or standard A4 paper size.
Crucially, the outer dimensions of a frame are always larger than the print size it holds, especially when a mat board is used. A mat board is a decorative cardboard border that surrounds the photo inside the frame, providing visual breathing room and preventing the print from touching the glass. For example, a Kodak frame designed to display an 8×10 inch photo with a mat board will have a much larger outer footprint, often closer to 11×14 inches. If you plan to use mat boards, always use the outer dimensions of the frames rather than the photo print sizes when calculating how much wall space your layout will require.
For digital displays, the sizing considerations are slightly different but equally important. Digital frames are typically measured by their diagonal screen size, such as 7 inches, 10 inches, or 15 inches. However, the physical frame bezel surrounding the screen adds several centimeters to the overall width and height. When planning your layout, ensure you check the exact physical dimensions of the digital unit to guarantee it fits comfortably within your designated wall space, leaving enough room for power cables to be routed neatly.
Material and Style Options to Match Your Interior Theme
The material and finish of your frame play a significant role in establishing the mood of your room. Kodak frames are available in a variety of materials, each suited to different interior design themes. Selecting the right material ensures that your wall display integrates seamlessly with your existing furniture, flooring, and wall colors.

Wooden Frames Wooden frames offer natural warmth, organic texture, and a timeless appeal. They are highly suited for traditional, rustic, Scandinavian, or Japandi-style spaces, where natural materials and soft textures predominate. Wood finishes can range from light oak and warm walnut to deep mahogany, allowing you to match or contrast with your home’s wooden furniture. Because wood is an organic material, it adds a sense of comfort and character to family portraits and landscape photography.
Metal and Aluminum Frames For modern, industrial, or minimalist interiors, metal and aluminum frames provide a sleek, low-profile aesthetic. These frames typically feature very thin borders and clean lines, keeping the visual focus entirely on the photograph. Aluminum frames are exceptionally durable and lightweight, making them an excellent choice for larger wall displays. Their metallic finishes, such as matte black, brushed silver, or subtle gold, add a sophisticated, contemporary touch to urban living spaces.
Frameless, Acrylic, or Glass Options If you want a highly contemporary look, frameless, acrylic, or glass floating frames are ideal. These designs allow the photo to appear as if it is suspended on the wall, with edge-to-edge visibility and no solid border. This style is particularly effective for vibrant, modern photography, abstract art, or high-definition digital screens. Frameless options minimize visual weight, making them perfect for small rooms or narrow corridors where heavy frames might feel restrictive.
Color and Finish Considerations Choosing the right frame color is essential for coordinating with your wall paint and lighting. A matte black frame offers sharp contrast and bold definition, making it excellent for black-and-white photography on light-colored walls. A crisp white frame blends gently into light walls, creating a clean, airy look where the photo itself stands out. Natural wood grains add texture and warmth, softening the look of cold or neutral paint colors. Keep in mind that decorative style, perceived color temperature, and spatial effects are highly subjective preferences rather than universal performance facts; choose the combination that best matches your personal taste and home environment.
Verification and Technical Safety Before finalizing your purchase, always verify the specific material finishes, exact dimensions, and texture details on the product label or retailer listing, as visual appearance and weight can vary between production batches. If you are choosing a digital frame, you must also verify key electrical specifications. Ensure the device is compatible with Singapore’s standard voltage (230V, 50Hz) and comes with a certified UK 3-pin Type G plug or a safe, compatible adapter. Check the wattage limit and look for recognized electrical safety certifications, such as the Safety Mark, to ensure the device is safe for continuous operation in your home environment.
Managing Frame Depth, Glare, and Wall Lighting
How a frame looks on your wall depends heavily on environmental factors such as lighting, wall texture, and physical space. Managing these variables during the planning stage prevents issues like distracting reflections, shadow casting, or unsafe installations.
One often-overlooked factor is frame depth, which refers to how far the frame projects outward from the wall. Deeper frames, such as shadow boxes or thick wooden profiles, create dramatic, intentional shadows on textured walls, adding depth and dimension to your display. However, in narrow hallways, tight entryways, or high-traffic areas, deep frames can become physical hazards that are easily bumped or damaged. For these confined spaces, flat, shallow-profile frames are a much safer and more practical choice.
Managing glare is crucial for maintaining the visibility of your photographs. Direct sunlight from windows or harsh overhead spotlights can create distracting reflections on glass or acrylic covers, obscuring the image. To minimize glare, position your frames away from direct light paths. If you are installing a digital frame, check if the screen features an anti-reflective coating and look for models with adjustable dimming methods, such as built-in auto-brightness sensors. These sensors automatically adjust the screen’s light output to match the room’s ambient lighting, preventing the screen from looking overly bright in a dark room or washed out in a sunny space.
When choosing between glass and acrylic covers, consider both weight and optical clarity. Glass offers excellent scratch resistance and classic clarity, but it is heavy and fragile. Acrylic is lightweight and shatterproof, making it a safer option for homes with children or pets, though it can scratch more easily. Because of the weight difference, heavier glass-covered frames require much more robust wall anchors than lightweight acrylic ones. Always ensure your mounting hardware is rated to support the total weight of the frame and cover combined.
Wall surface compatibility is another critical consideration, particularly in Singapore, where residential walls differ significantly from Western drywall construction. Most HDB flats and condominiums feature solid concrete or reinforced structural walls. Standard nails or light adhesive hooks, which work well on drywall, will often fail on concrete or damage the paint due to high tropical humidity. Mounting frames securely on concrete walls typically requires drilling holes with a masonry drill bit, inserting plastic wall plugs (anchors), and securing the frame with screws.
For any installation involving fixed electrical wiring, mounting in damp areas like bathrooms, working at heights, or hanging heavy suspended loads, safety must be your top priority. Always isolate the power supply before working near electrical lines, and carefully follow all manufacturer installation instructions. If your layout requires drilling into load-bearing or reinforced concrete walls, or if you are unsure of the location of hidden utility pipes and electrical conduits, stop and consult a qualified professional to ensure a safe and secure installation.
Step-by-Step Guide to Planning Your Gallery Wall
Creating a gallery wall requires careful preparation to avoid turning your wall into a patchwork of unnecessary drill holes. Following a structured planning process ensures a clean, professional result on your first attempt.
1. Create Paper Templates Begin by tracing the outer dimensions of each Kodak frame onto kraft paper, newspaper, or wrapping paper. Cut out these templates and label each one with the corresponding photo or frame description. Using low-tack painter’s tape, stick the paper templates onto your wall in your desired arrangement. This step allows you to experiment with different layouts, heights, and groupings without damaging your wall surface.
2. Establish Consistent Spacing To make your gallery wall look cohesive rather than cluttered, maintain a consistent spacing rule between all frames. A gap of 2 to 3 inches (5 to 8 cm) is generally ideal for residential walls. Use a ruler or a pre-cut spacer block to ensure the distance remains identical between every adjacent frame, whether they are arranged horizontally, vertically, or diagonally.
3. Balance the Visual Weight An eye-catching gallery wall distributes visual weight evenly across the entire arrangement. Avoid placing all your large, dark, or heavily framed pieces on one side, which can make the layout feel lopsided. Instead, place your largest or darkest frames near the center or bottom of the grouping to act as a visual anchor, and arrange smaller, lighter frames around them to balance the composition.
4. Select a Unifying Element To keep a diverse collection of photos looking organized, incorporate at least one unifying design element. You can achieve this by using identical frames, such as all black metal frames, or by mixing different frame materials while keeping the mat board colors and widths consistent. Alternatively, displaying only black-and-white photographs inside different frames can tie a eclectic collection together beautifully.
5. Plan for Future Additions If you plan to expand your photo collection over time, choose an asymmetrical or organic layout rather than a rigid grid. Asymmetrical designs allow you to add new frames to the outer edges of the arrangement without disrupting the balance or requiring you to re-hang the existing frames. This flexibility makes it easy for your gallery wall to grow alongside your family memories.
Essential Checks Before Buying Frames Online
Ordering photo frames from online e-commerce platforms is highly convenient, but it requires careful attention to product specifications to avoid common sizing and compatibility mistakes.
First, always confirm the difference between the frame’s “sight size” and its “outer dimensions.” The sight size refers to the actual visible area of the photograph once it is placed inside the frame, while the outer dimensions represent the total physical space the frame will occupy on your wall. Checking these measurements ensures your existing photo prints will fit perfectly inside the frame opening without important details being cut off by the border.
Next, calculate how a mat board will affect your photo size requirements. Many frames are sold with included mat boards, which enhance the presentation but reduce the size of the photo you can display. For example, a frame with outer dimensions suitable for an 8×10 inch display might include a mat board with a 5×7 inch opening. If you want to display a full 8×10 inch print, you must verify if the mat board is removable, or purchase a larger frame size that accommodates an 8×10 inch opening with the mat in place.
Before finalizing your purchase, carefully review the mounting hardware provided on the back of the frame. Look for sturdy hardware such as sawtooth hangers, D-rings, or hanging wire, and verify that its rated weight capacity matches or exceeds the frame’s total weight. Avoid frames that rely solely on flimsy cardboard tabs for wall hanging, especially if the frame features a heavy glass front.
Finally, check the retailer’s shipping and return policies regarding fragile items. Glass and acrylic frame fronts are highly susceptible to damage during transit. Verify that the seller uses protective packaging, such as thick bubble wrap or custom foam corner protectors, and ensure they offer a clear, hassle-free replacement policy in the event of transit breakage. If you are purchasing a digital frame, double-check that the package includes the correct power adapter and that the warranty terms are valid in your region.
Frequently Asked Questions (FAQ)
Can I use Kodak tabletop frames for wall mounting?
Tabletop frames are specifically engineered for flat surfaces and typically rely on an easel back for support. Because of this design, they often lack the flat backing, reinforced structural frames, or integrated D-ring and sawtooth hardware required for secure wall mounting. Hanging a frame that is only designed for tabletop use can result in an unstable installation that is prone to falling.
Before attempting to hang any frame, always check the manufacturer’s specifications to confirm if it is rated for wall mounting. If you wish to hang a very small, lightweight tabletop frame, you should only do so if it features built-in hanging loops. While adhesive picture-hanging strips are popular, they should only be used for exceptionally lightweight frames on smooth, clean surfaces; never use them to hang heavy frames, glass-fronted designs, or on delicate, textured, or humid wall surfaces where the adhesive could fail.
How do I clean the glass or acrylic cover without damaging the photo?
To clean your frame safely, always begin by removing the frame from the wall and laying it completely flat on a soft, clean surface, such as a microfiber towel or blanket. Cleaning a frame while it is still hanging on the wall increases the risk of dropping it, and it allows liquid cleaning solutions to run down the glass and seep behind the frame borders, which can permanently ruin your printed photograph.
Use a clean, dry microfiber cloth to gently wipe away dust. For stubborn smudges, apply a small amount of gentle, ammonia-free glass cleaner or mild soapy water directly onto the microfiber cloth—never spray any liquid directly onto the frame or cover. Gently wipe the surface in a circular motion, and immediately dry it with a separate clean cloth. Avoid using abrasive sponges, paper towels, or harsh chemical solvents, as these can permanently scratch acrylic covers, degrade wooden finishes, or strip away protective coatings on digital screens.
Community discussion
Share your experience or ask a question. Comments are reviewed before publication.