
A flickering ceiling light is more than just a minor annoyance; it can disrupt your focus, strain your eyes, and signal an underlying electrical issue. In most modern LED fixtures, the primary culprit behind this instability is a failing or incompatible ceiling light driver. The driver acts as the heart of the light fixture, regulating the flow of electricity. However, external factors such as loose wiring connections, incompatible dimmer switches, or voltage fluctuations on your home’s electrical circuit can mimic driver failure. To resolve the issue safely and cost-effectively, you must systematically diagnose whether you need to replace the driver, update your switches, or call in a professional.
Quick Diagnosis: Understanding the Role of the Ceiling Light Driver
Modern LED ceiling lights do not run directly on the alternating current (AC) supplied by your home’s main power grid. Instead, they require a steady, low-voltage direct current (DC) to illuminate the light-emitting diodes (LEDs) safely and efficiently. This is where the ceiling light driver comes in. It is an independent power supply that converts the high-voltage AC mains power (typically 230V in Singapore) into the precise low-voltage DC required by the LED panel. Additionally, the driver manages fluctuations in current and voltage to protect the sensitive semiconductor chips from overheating and burning out.
When a driver begins to degrade, its internal components—most notably the electrolytic capacitors—lose their ability to store and smooth out the electrical charge. This leads to an unstable current output, which manifests as visible flickering or strobing. Because the driver is exposed to constant thermal stress, especially within enclosed ceiling fixtures, it is almost always the first component to fail in an LED system, long before the LEDs themselves reach the end of their rated lifespan.
Products mentioned in this guide
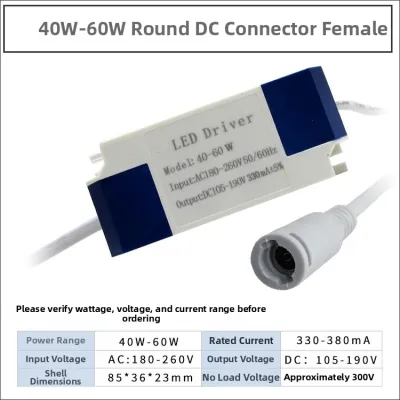
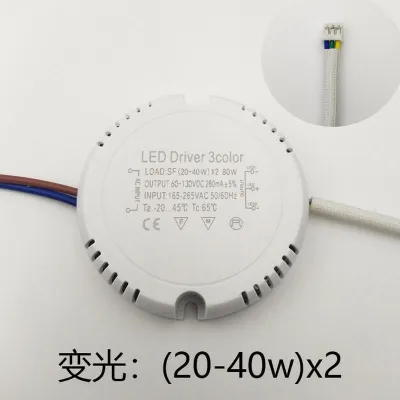
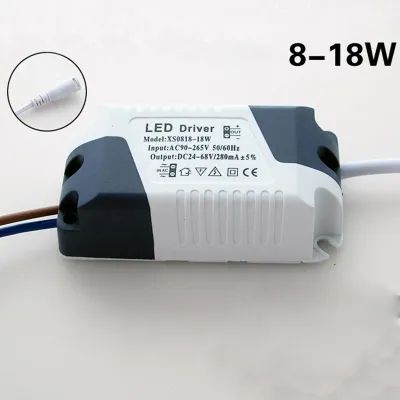
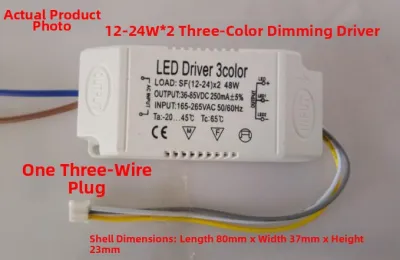
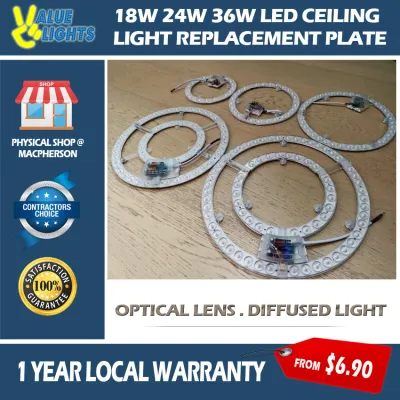
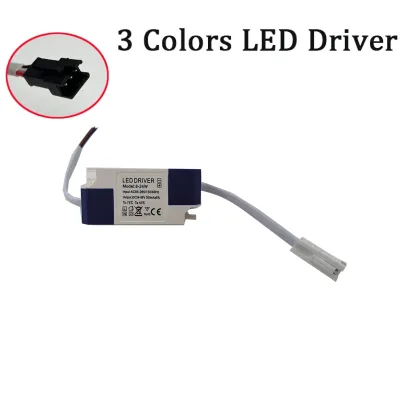
Prices are valid at publication and may change. Please refer to the product page for the latest price.
However, before you purchase a replacement driver, you must rule out external factors. Incompatible wall dimmers, loose wire splices, or voltage drops caused by high-power household appliances can all cause an LED to flicker in ways that look identical to a failing driver. A systematic diagnostic approach ensures you do not waste money replacing functional components.
Symptom Checklist: Match Your Flickering Pattern to the Root Cause
Identifying the exact pattern of your ceiling light’s flickering is the fastest way to narrow down the root cause. Before dismantling any hardware, observe how and when the flickering occurs to determine if the issue lies in the driver, the switch, or the building’s wiring.

Flickering Only When Dimming or Using Smart Switches
If your ceiling light only flickers when you adjust the brightness levels, or when it is connected to a smart switch, you are likely dealing with a compatibility conflict. Many standard LED drivers are non-dimmable; if they are placed on a circuit controlled by a dimmer switch, they will rapidly cycle on and off as they struggle to interpret the chopped voltage signal.
Even if you have a dimmable driver, older leading-edge (triac) dimmers designed for high-wattage incandescent bulbs often fail to operate correctly with low-wattage LED loads. This mismatch causes the light to flicker, drop out, or flash wildly at lower dimming thresholds. To verify this, check the label on your driver for “dimmable” specifications and ensure your dimmer switch is specifically rated for LED compatibility.
Random, Intermittent, or Delayed Flickering
When a light flickers randomly throughout the day, turns on only after a noticeable delay, or starts flickering after being illuminated for a while, the issue is often mechanical or thermal. Delayed starts or random bursts of flickering are classic signs of loose wire connections. These gaps can occur at the wall switch, inside the ceiling rose, or at the driver’s input and output terminal blocks.
If the flickering begins consistently after the light has been turned on for 20 to 30 minutes, thermal stress is the probable cause. In Singapore’s warm, humid climate, heat can quickly build up inside enclosed ceiling fixtures. If the driver lacks proper ventilation or uses low-grade internal components, it will overheat, causing its internal thermal protection to kick in or its capacitors to fail temporarily until the unit cools down.
Constant Strobe, Buzzing, or Rapid Flickering
A constant, rapid strobe effect—which can sometimes be so fast that it is only fully visible when viewed through a smartphone camera—strongly points to a failing ceiling light driver. This continuous oscillation means the driver’s internal filtering capacitors have dried out or degraded completely, leaving them unable to smooth out the AC ripple current.
This electrical instability is often accompanied by an audible buzzing or humming noise coming directly from the ceiling fixture. The noise is caused by vibrating electromagnetic coils inside a struggling driver transformer. If left unaddressed, this erratic power delivery can cause localized dark spots on the LED panel, indicating that individual LED chips have been permanently damaged by voltage spikes.
Step-by-Step Troubleshooting: Safe Checks You Can Do at Home
To diagnose the issue without causing damage or exposing yourself to electrical hazards, follow a structured troubleshooting process. Always prioritize low-risk, non-invasive steps before inspecting the internal components of the fixture.
Phase 1: Switch and Dimmer Verification (No Tools Required)
Begin by isolating the light fixture from complex control circuits. If the light is connected to a dimmer switch or a smart home controller, temporarily bypass these features if your home setup allows, or test the fixture using a standard, mechanical on/off wall switch. If the flickering stops immediately, the issue lies entirely with the switch compatibility rather than the ceiling light driver.
Next, check for circuit-level voltage drops. Pay attention to whether the flickering coincides with the activation of high-load appliances on the same electrical circuit, such as air conditioners, instant water heaters, or microwave ovens. If the ceiling light flickers only when these appliances kick in, your home’s electrical circuits may be overloaded, or the driver may have poor voltage regulation capabilities, making it sensitive to minor voltage sags.
Phase 2: Visual Inspection of the Driver and LED Panel (Power Off)
If the flickering is constant and unrelated to switches or other appliances, you will need to inspect the fixture’s internal components. Before proceeding, review the manufacturer’s instructions for your specific fixture.
Critical Safety Warning: You must turn off the main power supply at your home’s distribution board (DB box) by switching off the specific circuit breaker for that lighting zone. Do not rely solely on the wall switch, as it may only cut the neutral wire, leaving live, dangerous voltage at the ceiling fixture. Verify the power is off using a non-contact voltage tester before touching any wires.
Once the power is fully isolated, follow these steps:
- Remove the diffuser: Carefully twist or unclip the outer plastic or glass cover of the ceiling light to expose the internal chassis.
- Locate the driver: The driver is typically a small rectangular plastic or metal box secured next to the circular LED panel.
- Inspect for physical damage: Look closely at the driver's exterior. Check for bulging, swollen, or leaking cylindrical capacitors, dark burn marks on the casing, melted wire connectors, or a distinct, acrid smell of burnt plastic.
- Check the connections: Gently wiggle the wires entering the push-in connectors or terminal blocks to ensure they are clamped tightly and have not slipped out due to thermal expansion.
- Check the LED chips: Inspect the yellow LED diodes on the panel. If you see tiny black dots in the center of any diodes, those chips have burned out, which can disrupt the electrical circuit and cause the remaining chips to flicker.
Strict Safety Boundary: Never attempt to open the sealed plastic or metal casing of the ceiling light driver itself. The internal capacitors can retain a dangerous, high-voltage electrical charge long after the main power supply has been disconnected.
Troubleshooting Matrix: Symptoms, Likely Causes, and Action Plans
Use this matrix to quickly match your observations with the appropriate resolution path.
| Observed Symptom | Most Likely Cause | Safe DIY Action | When to Call a Professional |
|---|---|---|---|
| Flickering only at low brightness levels | Incompatible dimmer switch or non-dimmable driver | Verify driver label specifications; ensure the wall dimmer is rated for LED loads. | If you need to modify or replace fixed in-wall wiring behind the switch plate. |
| Constant rapid strobing with audible buzzing | Failing ceiling light driver (degraded internal capacitors) | Isolate power, remove the light cover, and inspect the driver casing for burn marks or swelling. | To replace the driver or install a new integrated LED ceiling fixture. |
| Intermittent flickering when high-load appliances turn on | Voltage drop on a shared or overloaded circuit | Identify which appliances share the circuit; limit simultaneous use of high-draw devices. | To install a dedicated circuit or resolve distribution board balance issues. |
| Flickering accompanied by dark spots on the LED panel | Damaged LED chips due to previous current spikes | Wipe down the panel to confirm spots are internal; check if the warranty covers replacement. | To replace the entire integrated LED fixture if individual parts are non-serviceable. |
When to Replace the Driver or Call a Licensed Electrician
If your diagnosis points to a failed ceiling light driver, you must decide whether to replace the driver or replace the entire light fixture. To select a compatible replacement driver, you must read and match the electrical output specifications printed on the existing driver’s label.
- Output Current: This is measured in milliamperes (mA) and must match the original driver exactly (e.g., 300mA, 350mA, or 700mA). Using a driver with a higher current rating will overdrive the LEDs, leading to rapid burnout or fire hazards.
- Output Voltage: This is usually written as a range (e.g., 24–42V DC). The replacement driver's range must span the voltage requirement of your LED panel.
- Wattage: The wattage rating (W) of the new driver must meet or exceed the power consumption of the LED panel, while staying within the driver's maximum rated limit.
- Physical Dimensions: Ensure the replacement unit fits within the physical confines of the light fixture's chassis and matches the mounting screw locations.
Safety and Compliance Boundary: In Singapore, strict electrical safety laws apply to home maintenance. Any electrical work involving fixed wiring—such as connecting a new driver to the mains wiring at the ceiling rose, replacing a junction box, or modifying the distribution board—must be performed by an Energy Market Authority (EMA) licensed electrical worker. DIY electrical work on fixed installations is illegal and can void your home insurance or pose severe safety risks. Additionally, ensure any replacement driver you or your electrician purchases carries the local Safety Mark logo, indicating it has been tested and certified safe for use.
If a newly installed, certified driver does not resolve the flickering, the issue likely stems from degraded building wiring or structural faults within the LED panel itself. At this stage, stop troubleshooting and consult a licensed professional to inspect your home’s electrical system.
Frequently Asked Questions (FAQ)
Can a flickering ceiling light cause a fire?
While the flickering light itself is not a direct fire hazard, the underlying issues causing the flicker can be dangerous. Loose electrical connections, short circuits, or an overheating driver with melted internal components can generate localized heat, posing a serious fire risk. If you detect a burning plastic smell, see visible scorch marks on the fixture, or hear loud buzzing sounds, turn off the circuit breaker immediately and contact a licensed electrician.
How long do LED ceiling light drivers typically last?
Although LED chips are often rated to last up to 50,000 hours, the ceiling light driver is usually the first component to fail. In tropical environments with high ambient temperatures, heat buildup inside enclosed ceiling fixtures can degrade a driver’s internal capacitors within 2 to 5 years. Opting for high-quality drivers with proper thermal management and checking manufacturer warranties can help ensure a longer operational lifespan.
Community discussion
Share your experience or ask a question. Comments are reviewed before publication.