
An LED light that flickers can be highly distracting and frustrating. In most cases, this issue points directly to an incompatibility between your dimmer switch and the LED driver, a failing or overheating driver, or loose physical wiring connections. Resolving it requires a systematic approach of diagnosing the symptom, verifying the electrical specifications of your components, and replacing or upgrading the mismatched parts safely.
Recognizing the Symptoms of LED Flickering
To solve the problem, you must first observe exactly how the light behaves. Different patterns of flickering point to distinct underlying issues within your electrical circuit.
Rapid strobing is a highly visible, high-frequency flashing that usually occurs the moment you turn on the light. This symptom often signals a severe mismatch between your dimmer and the LED driver, or a driver that is completely failing to regulate its output current.
Products mentioned in this guide
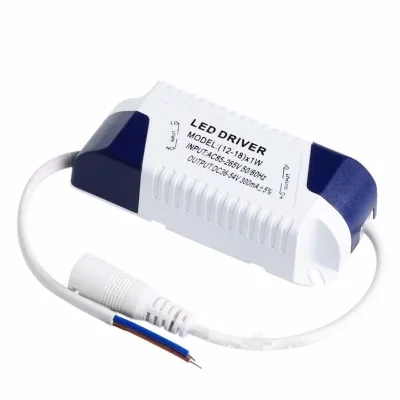
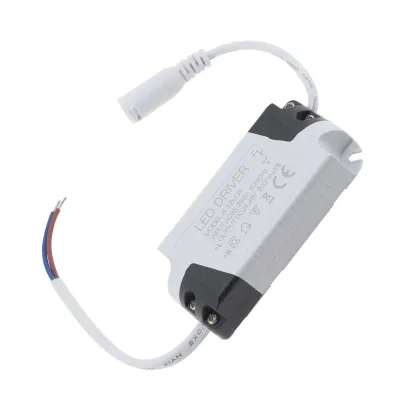
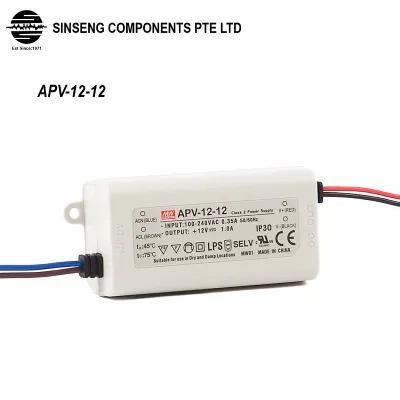
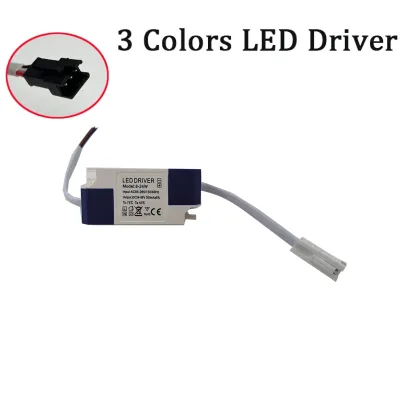
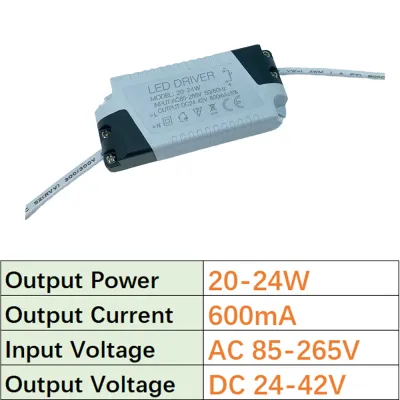
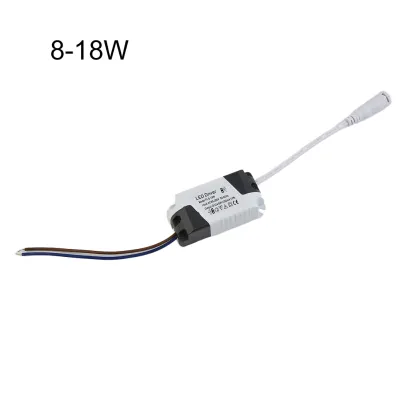
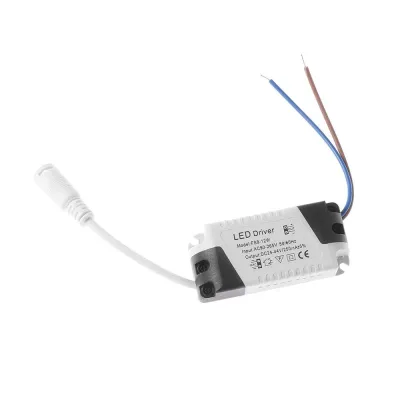
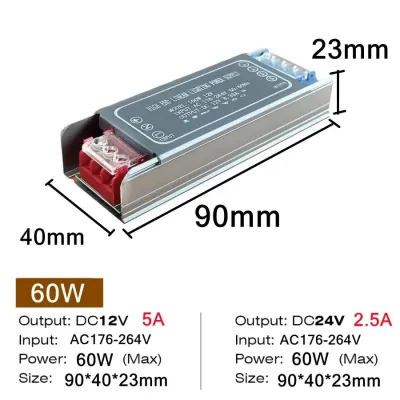
Prices are valid at publication and may change. Please refer to the product page for the latest price.
Subtle pulsing is a slower, rhythmic rise and fall in light intensity. This often happens when the electrical load on the circuit is too low for the dimmer switch to operate stably, causing the light to fluctuate.
Flickering at specific dimming levels—such as only when the light is dimmed below 30%—typically indicates that the dimmer’s minimum load threshold is not being met, or that the driver cannot interpret the sliced voltage signal at low ranges.
Pay close attention to when the flickering occurs. If it happens immediately upon startup and persists, the issue is likely a component mismatch. If the flickering only begins after the fixture has been on for several minutes, heat buildup within the fixture is likely causing the driver to struggle.
Conversely, if the flickering occurs sporadically—such as when your air conditioning compressor or refrigerator cycles on—the root cause is likely a temporary voltage drop along your household circuit rather than a fault in the light fixture itself.
By carefully isolating these symptoms, you can avoid unnecessary purchases and target your troubleshooting directly at the component most likely to be causing the failure: the LED driver, the wall dimmer, or the underlying wiring.
Common Causes of LED Flickering: Drivers, Dimmers, and Wiring
Understanding the technical relationship between your electrical infrastructure and your lighting is essential for a permanent fix. LEDs operate on low-voltage direct current (DC), whereas household mains supply high-voltage alternating current (AC). The components bridging this gap are highly sensitive to electrical mismatches.

Driver and Dimmer Incompatibility
The primary reason for LED flickering is the legacy technology found in older wall dimmers. Traditional dimmers, known as leading-edge or triac dimmers, were designed for high-wattage incandescent bulbs. They work by chopping out a portion of the AC voltage wave to reduce power, which works well for resistive filament bulbs but causes severe issues for electronic LED circuits.
Modern LEDs require trailing-edge (electronic low voltage, or ELV) dimmers. These dimmers cut off the trailing edge of the voltage wave, creating a much smoother dimming signal that electronic drivers can interpret without malfunctioning.
Another critical factor is the minimum load requirement. A legacy dimmer might require a minimum load of 40 watts to operate stably. Because a highly efficient LED bulb or fixture might draw only 8 to 15 watts, the total load on the circuit falls far below the dimmer’s operating threshold. This causes the dimmer to repeatedly turn off and on as it struggles to register the load, resulting in rapid, visible pulsing.
When an incompatible dimmer sends chopped, irregular voltage signals to an LED driver, the driver’s internal control loop becomes confused. The driver repeatedly attempts to compensate for the fluctuating input, leading to an unstable current output that manifests as a constant, irritating flicker.
Failing or Overheating LED Drivers
The led driver is the heart of any LED lighting system, responsible for converting AC mains electricity into the precise DC current the LEDs need. Like any electronic power supply, drivers degrade over time, particularly when subjected to heat or electrical stress.
Common physical signs of driver failure include bulging or leaking electrolytic capacitors, noticeable discoloration of the driver housing, or an audible buzzing sound coming from the ceiling cavity or fixture. Capacitors are responsible for smoothing out the electrical current; when they degrade, the output current becomes unstable, causing the light to flicker.
In Singapore’s warm and humid tropical climate, heat dissipation is a major challenge for electronic components. If an LED driver is installed inside a tightly enclosed ceiling space, a small downlight canister, or a decorative fixture without adequate ventilation, heat builds up rapidly.
To protect itself from permanent damage, a high-quality driver will initiate thermal throttling. This safety mechanism reduces or interrupts the power output to cool the internal circuitry down. As the driver cycles between overheating and cooling, the light output fluctuates, causing a distinct, delayed flickering pattern that only begins after the light has been running for a while.
Furthermore, natural wear and tear on the driver’s internal components is accelerated by voltage surges on the grid. Over several years of continuous operation, even premium drivers will eventually reach the end of their operational lifespan, requiring a direct replacement to restore stable, flicker-free illumination.
Loose Wiring and Voltage Fluctuations
Not all flickering is caused by electronic components; physical connection issues within your home’s electrical system can also disrupt the steady flow of electricity.
A loose neutral wire or a poorly secured terminal connection at the light fixture, the wall switch, or an intermediate junction box creates high electrical resistance. This resistance can cause minor arcing or intermittent contact, leading to sudden, random drops in voltage that make the LED flicker or cut out entirely.
Additionally, household circuits are shared among multiple appliances. When a high-draw appliance—such as a multi-split air conditioner, an electric water heater, or a microwave—switches on, it draws a massive initial current.
This sudden demand can cause a temporary voltage sag across the entire circuit. While traditional incandescent bulbs might only dim imperceptibly during a voltage sag, sensitive LED drivers can react sharply to the drop, resulting in a brief but highly noticeable flicker.
Step-by-Step Solutions: Replacing Your LED Driver and Dimmer
Resolving LED flickering requires systematic troubleshooting. Always prioritize safety: before inspecting any electrical components or opening switch plates, turn off the mains power at your home’s main distribution board (DB box) and verify that the circuit is dead.
Upgrading to an LED-Compatible Dimmer
If your diagnosis points to a dimmer mismatch, upgrading to a modern trailing-edge or dedicated LED dimmer is the most effective solution.
First, verify the total wattage of the LED lights connected to the single dimmer switch. For example, if you have six downlights rated at 9 watts each, your total load is 54 watts. Ensure your new dimmer’s rated capacity covers this total wattage while also satisfying its minimum load threshold, which is typically much lower (often around 5 to 10 watts) on LED-specific dimmers.
When purchasing a replacement, look for products explicitly labeled as trailing-edge, ELV (electronic low voltage), or “LED compatible.” Smart dimmers that utilize digital control protocols are also excellent choices, as they often allow you to program the minimum and maximum dimming limits to eliminate low-end flicker.
To safely replace the dimmer:
- Isolate Power: Turn off the main circuit breaker for the lighting loop at your DB box.
- Verify Zero Voltage: Remove the wall switch faceplate and use a certified non-contact voltage tester to confirm there is absolutely no active voltage at the switch terminals.
- Document Wiring: Take a clear photograph of the existing wiring configuration for reference.
- Install the Dimmer: Disconnect the wires from the old switch and connect them to the corresponding terminals on the new LED-compatible dimmer, ensuring all terminal screws are tightened securely.
- Test the System: Mount the switch back into the wall box, restore the mains power, and test the dimming range to ensure smooth, flicker-free operation.
Replacing a Faulty LED Driver
When the driver itself is failing or overheating, swapping it out for a compatible replacement is necessary. LED drivers can be external (a separate plastic or metal box tucked into the ceiling) or internal (built directly into the bulb or fixture). For downlights and track lights, external drivers are highly common and easy to replace.
Before buying a new led driver, you must read the technical specifications printed on the label of the existing unit. Pay close attention to these critical electrical parameters:
- Input Voltage: Typically 220V to 240V AC for Singapore's electrical grid.
- Output Type: Determine if your fixture requires a Constant Current (measured in milliamperes, e.g., 350mA, 700mA) or a Constant Voltage (measured in volts, e.g., 12V DC, 24V DC) driver. Mixing these up will destroy your LED light.
- Wattage and Current Limits: The replacement driver must match the exact output current of the original and have a wattage rating equal to or slightly higher than the maximum load of the fixture.
- Dimming Protocol: If your light is dimmable, the driver must be marked as "Dimmable" and specify the control method (such as Triac, 0-10V, or DALI).
Additionally, measure the physical dimensions of the old driver to ensure the new one will fit through the ceiling cutout and rest safely in the ceiling cavity. If the fixture is located in a high-humidity environment like a bathroom or under outdoor eaves, ensure the replacement driver carries an appropriate IP (Ingress Protection) rating, such as IP44 or IP66, to resist moisture.
To replace the driver, isolate the power at the DB box, pull the fixture out of the ceiling, unplug or unscrew the input (AC) and output (DC) wiring connections, and wire the new driver in place. Ensure the AC mains side is connected to the “PRI” (Primary) input and the LED fixture is connected to the “SEC” (Secondary) output, respecting correct polarity (+ and -) on the DC side.
Securing Connections and Managing Circuit Loads
If the flickering is intermittent or occurs when other appliances turn on, you must address physical connections and circuit distribution.
With the power completely isolated at the distribution board, carefully remove the light fixture from its mounting. Inspect the wire connectors—whether they are screw-type terminal blocks, spring-loaded connectors, or wire nuts. Loose copper strands or loose screws can cause minor contact gaps; tighten all screws firmly and ensure that the wire insulation is not caught inside the terminal clamp.
If you suspect voltage sags from heavy appliances are causing your lights to flicker, look at how your home’s circuits are distributed. High-wattage appliances like air conditioners, washing machines, and kitchen ovens should always be on dedicated, independent circuits separate from your lighting loops.
If your lighting loop is overloaded or shares a circuit with a high-draw appliance, consult a professional to discuss redistributing the loads. Note that while tightening a simple terminal block behind a light fixture is a straightforward task, any inspection inside the main DB box, running new electrical conduits, or altering fixed household wiring must be left to a licensed professional.
Preventing Future Flickering and Knowing When to Call a Professional
To avoid recurring lighting issues, focus on quality and proper installation practices from the start.
Investing in high-quality LED fixtures from reputable manufacturers is the best preventative measure. Premium fixtures utilize high-grade LED drivers with robust thermal management and superior capacitors that can withstand minor voltage fluctuations and operate reliably for tens of thousands of hours. Cheap, unbranded LED lights often use low-grade internal drivers that fail within months.
Avoid mixing different brands, models, or wattages of LED bulbs on the same dimmer circuit. Different manufacturers use different driver designs; mixing them can cause electrical interference on the circuit, leading to erratic dimming behavior and localized flickering.
It is vital to know when DIY troubleshooting must stop. If you encounter persistent flickering that is accompanied by a burning smell, audible buzzing or crackling from the walls, scorched plastic around switches, or frequently tripped circuit breakers, do not attempt to fix it yourself. These are warning signs of serious electrical faults, such as severe arcing or overloaded circuits, which pose immediate fire hazards.
In Singapore, strict electrical safety regulations apply. Any work involving fixed electrical wiring alterations, installing new electrical outlets, replacing a distribution board, or ensuring compliance in wet areas like bathrooms must be performed by a Licensed Electrical Worker (LEW). Attempting unauthorized fixed wiring work not only endangers your household but can also void your home insurance and violate local building codes. Always prioritize safety and engage a qualified professional when dealing with your home’s permanent electrical infrastructure.
Frequently Asked Questions (FAQ)
Can a flickering LED light cause a fire?
While the flickering of an LED bulb itself—which is usually just an electronic mismatch between the driver and dimmer—does not directly cause a fire, the underlying issues behind it can be highly hazardous. If the flickering is caused by a loose electrical connection, a degraded wire terminal, or an overheating driver with failing internal components, these faults can generate localized heat and electrical arcing. Over time, this heat can ignite nearby insulation or plastic housings. If you notice any warmth, discoloration, or a burning odor near your switches or fixtures, isolate the power immediately and contact a professional.
Do I need a special transformer for dimmable LED strips?
Yes, low-voltage LED strips (typically operating at 12V DC or 24V DC) require a compatible power supply, which is often referred to as an LED driver or transformer. If you plan to dim your LED strips using a standard wall-mounted mains dimmer (such as a trailing-edge dimmer), you must purchase a specific mains-dimmable LED driver. This driver is designed to interpret the dimmed AC signal from the wall switch and scale down the DC output accordingly. If you use a standard, non-dimmable driver, you cannot use a wall dimmer; instead, you must dim the strips on the low-voltage side using a separate inline PWM (Pulse Width Modulation) controller, which is often operated via a remote control or a smart home application.
Community discussion
Share your experience or ask a question. Comments are reviewed before publication.