
Selecting the right Philips Apex downlights for your home requires matching the technical specifications of each fixture to the specific functional demands of your living spaces. A successful whole-home lighting plan does not rely on a single, uniform light source; instead, it balances ambient, task, and accent lighting by adjusting variables like color temperature, brightness, beam angle, and moisture resistance. By evaluating these factors room by room, you can create a cohesive environment that enhances daily activities while maintaining visual comfort and electrical safety.
In Singapore’s residential landscape, where housing types range from high-rise apartments with concrete ceilings to landed properties with complex false ceiling structures, physical and electrical compatibility must be your starting point. Choosing the correct downlight involves analyzing your ceiling depth, existing wiring, and local environmental conditions. This guide outlines how to systematically evaluate your spaces and verify the product specifications of the Philips Apex range to achieve an optimal installation.
Core Specifications to Check Before Planning Your Layout
Before purchasing any lighting fixtures, you must verify that the physical and electrical specifications of the Philips Apex downlights align with your home’s infrastructure. Start by checking the local voltage compatibility, which typically requires a standard 220V to 240V AC supply. Next, measure the physical cut-out dimensions of your ceiling. Recessed downlights require a precise hole diameter and a minimum ceiling void depth to accommodate the fixture’s height and integrated driver. If your ceiling void is shallow, you must verify the exact recess depth on the product packaging to ensure the unit fits without pressing against structural beams or concrete slabs.
Products mentioned in this guide
![[Climate Voucher] PHILIPS Apex 25W / 40W / 45W LED Ceiling Light 5700K Rectangle Long Slim Rectangular EyeComfort](https://img.lazcdn.com/g/p/028aeffe205f2e87c0b4e84645bb79dd.jpg_400x400q80.jpg_.webp)
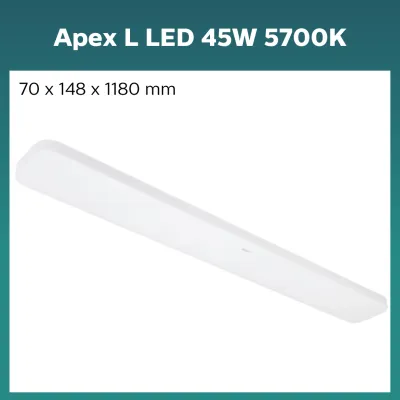
Prices are valid at publication and may change. Please refer to the product page for the latest price.
Thermal management is another critical safety factor to address during the planning phase. LED downlights generate heat at the rear of the fixture, which must dissipate safely to prevent premature component failure or fire hazards. Check the manufacturer’s documentation for the required minimum clearance distances from thermal insulation and structural materials. Additionally, verify that the fixtures carry the appropriate local electrical safety certifications, which confirm they have undergone rigorous testing for flame resistance and electrical insulation.
Dimming compatibility is a common source of post-installation frustration and must be verified before finalizing your layout. If you plan to install dimmable Philips Apex models, check the manufacturer’s approved dimmer compatibility list. This documentation identifies specific wall dimmer brands and model numbers that have been tested to work seamlessly with the downlight’s driver. Failing to match the downlight with a compatible dimmer can result in persistent flickering, audible buzzing, or a severely restricted dimming range.
Living Room and Bedroom: Prioritizing Comfort and Ambiance
Living rooms and bedrooms are primary relaxation zones where the lighting design should focus on minimizing eye strain and creating a warm, inviting atmosphere. When selecting Philips Apex downlights for these areas, pay close attention to the color temperature, measured in Kelvin (K). For spaces dedicated to winding down, look for fixtures with a warm white rating, typically between 2700K and 3000K. This lower color temperature mimics the soft glow of traditional incandescent bulbs, which helps promote relaxation and supports natural sleep cycles.

To prevent visual discomfort, prioritize downlights designed with anti-glare features. Deep-recessed designs, where the light source is positioned further back within the housing, shield the direct glare of the LED from your line of sight. You can also check the product specifications for specialized reflector finishes or diffusing lenses that soften the light output. These design elements are particularly important in bedrooms, where you are frequently looking upward from a reclining position, and in living rooms, where harsh glare can interfere with television viewing or conversation.
If you intend to use these spaces for multiple activities, such as reading or hosting guests, dimmable downlights offer the necessary flexibility. Ensure that your planned wall switches support the specific dimming protocol utilized by the downlight, whether it is standard phase-cut dimming or a smart digital protocol. Planning these control zones early allows you to group fixtures onto separate switches, giving you the ability to dim the central seating area while keeping peripheral accent lights at a higher intensity.
Kitchen and Bathrooms: Focusing on Task Lighting and Safety
Kitchens and bathrooms demand a different approach to lighting, prioritizing high visibility, accurate color representation, and strict safety standards. In the kitchen, food preparation and cooking require precise visual clarity. Look for Philips Apex downlights with a high Color Rendering Index (CRI) rating, ideally CRI 90 or above, as indicated on the product label. A high CRI ensures that colors appear natural and vibrant, which is essential for judging the freshness of ingredients and monitoring cooking progress.
Safety is the primary concern in bathrooms and wet areas, where electrical fixtures are exposed to moisture and water splashes. You must check the Ingress Protection (IP) rating of the downlights before installation. For general bathroom areas, fixtures should carry at least an IP44 rating, which certifies protection against water splashes from any direction. If you are installing downlights directly over a shower stall or bathtub, consult local electrical codes to determine if a higher IP rating or low-voltage fixtures are required for those specific wet zones.
To maximize efficiency in these task-oriented spaces, plan your downlight placement and beam angles to eliminate shadows. In the kitchen, positioning downlights directly over the edge of the countertops, rather than behind the standing area, prevents your body from casting shadows over your workspace. In the bathroom, position fixtures to provide even illumination across the vanity mirror, reducing harsh shadows under the eyes and chin during grooming routines.
Hallways and Utility Areas: Balancing Efficiency and Navigation
Transition spaces like hallways, corridors, and utility rooms require practical, uniform illumination that facilitates safe navigation and efficient task completion. For narrow hallways, select downlights with wider beam angles, typically 60 degrees or broader. A wider beam angle allows the light cones to overlap closer to the ceiling, creating a continuous path of light and eliminating dark spots between fixtures. This approach reduces the total number of downlights needed to illuminate a long corridor safely.
Utility areas, such as laundry rooms, store rooms, or home workshops, require higher light levels to support specific visual tasks. In these spaces, focus on the lumen output of the downlights rather than just the wattage. Check the product packaging for the lumen rating to ensure the fixtures deliver sufficient brightness for activities like sorting laundry, reading product labels, or organizing household items. A neutral color temperature, such as 4000K, is often preferred in utility zones as it provides a clean, energizing light that enhances focus.
If you plan to automate the lighting in these secondary spaces, verify the compatibility of the downlights with motion sensors or smart home integration systems. Some LED drivers are not compatible with standard motion sensors, which can cause the lights to flicker or fail to turn off completely. Review the compatibility conditions on the packaging or consult the manufacturer’s technical support to ensure the downlights will operate reliably when paired with automated control devices.
Installation Boundaries and When to Call a Professional
While planning your lighting layout and selecting fixtures can be done independently, the physical installation of downlights involves strict safety boundaries. Before performing any inspection, maintenance, or replacement of existing fixtures, you must isolate the main power supply at the consumer unit or circuit breaker. Never rely solely on the wall switch to turn off the power, as current may still be present in the wiring. Use a reliable voltage tester to confirm the circuit is completely dead before touching any electrical connections.
The structural characteristics of your ceiling will dictate the complexity of the installation process. Suspended plasterboard or false ceilings allow for relatively straightforward cutting and recessing of downlights, provided you avoid cutting through structural metal studs or wooden joists. Conversely, concrete ceilings—which are common in many Singapore residential developments—do not allow for recessed fixtures without a false ceiling structure. In these cases, you must use surface-mounted downlight housings or track lighting systems designed for solid surfaces.
For any tasks beyond a simple like-for-like replacement of an existing fixture, you must engage a licensed electrical professional. This includes running new electrical wiring, cutting new holes in structural ceilings, installing fixtures in damp bathroom zones, or modifying your home’s distribution board. A licensed electrician ensures that all work complies with local electrical standards and building regulations, protecting your home from electrical faults, short circuits, and potential fire hazards.
Frequently Asked Questions (FAQ)
Can I mix different color temperatures in an open-plan layout?
Mixing different color temperatures in an open-plan layout is generally not recommended for general ambient lighting, as the visual contrast where warm and cool light zones intersect can feel jarring and uncoordinated. To maintain visual cohesion across an open living and dining area, use a consistent color temperature—such as 3000K—for your primary ambient downlights. You can then reserve distinct color temperatures for localized task zones, such as a cooler 4000K light focused strictly over kitchen worktops, ensuring the transition is deliberate and physically separated by functional zones.
How do I verify if my existing dimmer switches are compatible?
To verify compatibility, you must first locate the manufacturer and model number of your existing wall dimmer, which is often printed on the back of the switch plate or inside the wall box. Cross-reference this model number with the official dimmer compatibility list provided by Philips for the specific Apex downlight model you plan to purchase. If your existing dimmer is not listed, or if you observe symptoms such as flickering, buzzing, or a sudden drop in light output when dimming, you should replace the switch with a compatible trailing-edge or digital dimmer recommended by the manufacturer.

Community discussion
Share your experience or ask a question. Comments are reviewed before publication.