
Selecting the right Thor-Lux downlights for your Singapore home requires matching the brand’s technical engineering with the distinct functional needs of each living space. Whether you are renovating a newly TOP-ed HDB flat, upgrading a condominium, or retrofitting a landed property, downlights form the backbone of modern architectural lighting. Because Thor-Lux fixtures are engineered to professional-grade standards, understanding how to navigate their technical specifications ensures you achieve both visual comfort and long-term electrical safety.
Understanding Thor-Lux Downlight Specifications for Local Homes
To integrate these fixtures seamlessly into a Singaporean residential electrical grid, your first step is verifying voltage compatibility. Local homes operate on a 230V AC, 50Hz single-phase supply. When browsing the manufacturer’s specification sheets, ensure the selected downlight model or its accompanying external driver is rated for this input range. Additionally, look for recognized safety certification marks on the packaging or documentation, which verify that the electrical components have undergone rigorous testing for insulation, thermal safety, and fault protection.
Physical dimensions are equally critical. Before purchasing, you must measure the existing ceiling cut-out diameter and the available void depth behind the plasterboard. Singaporean false ceilings, particularly in HDB flats, often have limited clearance due to structural beams, air conditioning ducting, or utility pipes. A downlight requires not only enough vertical space to fit its housing but also a designated clearance zone above it to allow heat to dissipate. Insufficient clearance can trap heat, drastically shortening the lifespan of the LED module and its driver.
Products mentioned in this guide
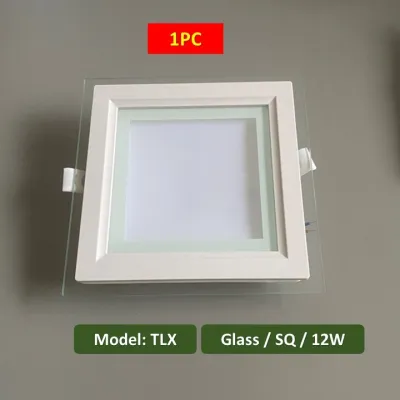
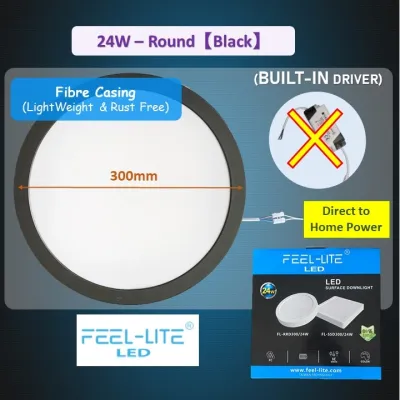
Prices are valid at publication and may change. Please refer to the product page for the latest price.
You must also decide between integrated LED modules and retrofit lamp holders. Integrated LED downlights feature a built-in light source and a dedicated driver optimized for that specific light engine. This design generally offers effective thermal management, optimized lumen efficiency, and a long operational lifespan. Retrofit fixtures, on the other hand, utilize standard lamp holders (such as GU10 bases) that allow you to swap out individual bulbs. While retrofits offer easier bulb replacement, they often lack the precise optical control and thermal efficiency of fully integrated systems.
Living Room: Layering Ambient and Accent Lighting
The living room is the multi-functional hub of the home, serving as a space for relaxation, family gatherings, entertainment, and occasional work. Achieving the right balance here requires a layered lighting approach that combines ambient illumination with focused accent lighting. To achieve this flexibility, prioritize dimmable downlights. You must verify that the dimming protocol of the downlight driver (such as phase-cut, 1-10V, or DALI) is fully compatible with your wall dimmer switches. Mismatched components are the primary cause of flickering, buzzing, and premature driver failure.

Color temperature plays a decisive role in establishing the room’s atmosphere and complementing your interior design. For a cozy, inviting feel that enhances warm wood tones and earthy palettes, opt for a warm white color temperature of 2700K or 3000K. If your living room features a minimalist, modern aesthetic with cool grays, whites, and polished stone, a neutral white of 4000K can make the space feel clean and expansive. Avoid mixing different color temperatures within the same switching zone, as this creates a disjointed visual effect.
To prevent harsh shadows and ensure even light distribution, plan your beam angles and fixture spacing carefully. Wide beam angles (60 degrees or more) are ideal for general ambient lighting, as they spread light broadly across the floor plane. Narrower beam angles (24 to 36 degrees) should be reserved for accent lighting, allowing you to highlight artwork, feature walls, or shelving. As a general rule of thumb for standard 2.8-meter ceilings, space your ambient downlights approximately 1.2 to 1.5 meters apart, keeping them at least 0.5 meters away from the walls to avoid creating intense, unwanted light cones on the vertical surfaces.
Kitchen: Prioritizing Task Illumination and Clear Visibility
In the kitchen, lighting must prioritize safety, clarity, and high visibility. This is a high-activity zone where sharp tools, hot surfaces, and precise measurements demand clear task illumination. When selecting downlights for this space, look for fixtures with a higher lumen output and a high Color Rendering Index (CRI) of 90 or above. A high CRI ensures that food colors appear natural and vibrant, which is essential for judging the freshness of ingredients and monitoring cooking progress.
Strategic fixture placement is crucial to avoid casting shadows over your primary workspaces. If downlights are positioned directly behind where you stand at the countertop, your body will block the light, casting a shadow over your cutting board or sink. To prevent this, align the downlights directly above the front edge of the countertops or kitchen island. This positioning ensures that clean, direct light falls directly onto the working surface without obstruction.
Thermal management is another critical factor in kitchen environments. Kitchens generate significant ambient heat and airborne grease from cooking. Ensure that the downlights installed near upper cabinetry, cooker hoods, or high-heat appliances are rated for higher ambient operating temperatures. The fixtures should feature robust aluminum heat sinks that efficiently draw heat away from the LED chips, maintaining performance even during prolonged cooking sessions.
Bedroom: Minimizing Glare for Restful Environments
The bedroom is a sanctuary dedicated to rest and recovery, meaning the lighting design must focus on minimizing visual fatigue and promoting relaxation. Direct glare is the most common issue in bedroom lighting, especially when you are lying in bed looking upward. To combat this, select downlights designed with deep-recessed light sources or baffled trims. These physical barriers shield the light source from direct line of sight, directing the light downward and significantly reducing glare (often measured by a low Unified Glare Rating, or UGR).
To support your body’s natural circadian rhythm, choose warm color temperatures for the bedroom. A very warm white of 2700K mimics the soft glow of sunset, helping to signal to your brain that it is time to wind down. Avoid cool white or blue-enriched light sources in the evening, as these can interfere with melatonin production and disrupt sleep quality. If you require brighter light for reading or dressing, consider using a multi-circuit switch layout that allows you to turn off the main overhead lights and rely on softer, dimmable accent zones.
Layout planning in the bedroom should be highly deliberate. Avoid placing downlights directly over the head of the bed, as this creates uncomfortable glare when you are reclining. Instead, position fixtures over walkways, in front of wardrobes, or along the perimeter of the room. Utilizing a “wall-washing” technique—where downlights are placed close to a wall to bathe it in a soft, indirect glow—creates a gentle, ambient light that makes the room feel spacious and serene without exposing your eyes to direct light sources.
Bathroom: Navigating Moisture Resistance and Safety Zones
Bathroom lighting requires a careful balance of functional clarity and strict adherence to electrical safety standards due to the constant presence of moisture and splashing water. When selecting downlights for wet areas, you must read the product specifications to verify their Ingress Protection (IP) rating. The IP rating consists of two digits: the first indicates protection against solid particles, and the second indicates protection against liquids.
For safety planning, bathrooms are divided into distinct electrical zones. Zone 0 refers to the interior of the bathtub or shower basin, where any fixture must be low-voltage and rated at least IP67. Zone 1 is the area directly above the bath or shower up to a height of 2.25 meters from the floor; fixtures here must carry at least an IP44 rating, though IP65 is highly recommended if water jets or high-pressure sprays are used. Zone 2 extends 0.6 meters horizontally outside Zone 1, also requiring a minimum of IP44 protection.
Even in the general ceiling areas outside these zones, Singapore’s tropical climate and high indoor humidity mean that steam can accumulate rapidly. Installing IP44-rated downlights throughout the entire bathroom ceiling is a prudent choice to prevent moisture from penetrating the fixture housing, protecting the internal electronics from corrosion and electrical faults. Because of the high risks associated with water and electricity, always consult a licensed electrical worker (LEW) to verify zoning compliance and execute the installation.
Pre-Purchase and Installation Safety Checklist
Before finalizing your purchase of Thor-Lux downlights, perform a thorough compatibility check of your home’s electrical infrastructure. Verify whether the selected fixtures require external drivers or transformers, and ensure that these components can physically fit through the ceiling cut-out for future maintenance access. Mismatched drivers can lead to flickering, reduced lifespan, or immediate failure of the LED module.
Safety must be your primary priority during any installation or maintenance work. Before inspecting, removing, or installing any light fixture, isolate the power completely at your home’s main distribution board (DB box). Do not rely solely on the wall switch to cut the power, as some wiring configurations may leave live current running to the fixture. Use a reliable, non-contact voltage tester to confirm that the wires are completely dead before touching them.
While replacing a simple retrofit bulb is a straightforward task, fixed wiring modifications, cutting new holes in plasterboard, or installing complex driver networks carry significant safety and structural risks. In Singapore, any modification to fixed electrical wiring must be carried out by a licensed electrician. Engaging a qualified professional ensures that the installation complies with local electrical standards, prevents fire hazards, and guarantees that your fixtures perform safely and efficiently for years to come.
Frequently Asked Questions (FAQ)
Are Thor-Lux downlights compatible with standard HDB false ceilings?
Yes, but compatibility depends entirely on verifying the physical dimensions of your specific ceiling void. Standard HDB false ceilings typically feature a drop of 100mm to 150mm from the concrete slab. You must measure this void depth and compare it against the height of the downlight fixture and its driver. Additionally, check the manufacturer’s specification sheet for the minimum clearance required above and around the fixture. Maintaining this air gap is essential for proper heat dissipation, preventing heat buildup that could damage the LED or pose a safety hazard.
Do I need to replace the existing transformer when upgrading to LED downlights?
Yes, in most cases, older halogen downlight setups utilize 12V AC electronic transformers that are incompatible with modern LED technology. If you are upgrading to integrated LED downlights, these fixtures require dedicated direct current (DC) drivers, which are typically supplied with the new fixture and must replace the old transformer. If you are using retrofit LED bulbs (such as GU10 lamps), these often run directly on 230V mains power, meaning the old transformer must be bypassed and removed entirely. Always consult a licensed electrician to safely modify the wiring and ensure driver compatibility.

Community discussion
Share your experience or ask a question. Comments are reviewed before publication.