
Creating a cohesive and visually striking wall display in a Singapore home requires balancing aesthetic preferences with local structural and environmental realities. Whether you are decorating a newly renovated Housing & Development Board (HDB) flat, a private condominium, or a landed property, selecting the right photo frame 4r brands is a critical first step. The standard 4R size (4 by 6 inches) is exceptionally popular for family photos, travel snapshots, and art prints, making it the ideal building block for a personalized gallery wall.
However, a successful wall display is not just about aesthetics. Singapore’s unique tropical climate, characterized by high relative humidity, presents specific challenges for preserving printed media and maintaining frame structural integrity. Additionally, the construction of local walls—ranging from solid reinforced concrete to lightweight drywall partition panels—dictates how frames must be mounted to ensure safety and prevent property damage. Understanding these factors before purchasing your frames will save time, money, and effort.
Key Criteria for Evaluating 4R Photo Frame Brands
When evaluating different brands for your gallery wall project, you must look beyond the design of the frame border. A high-quality frame must balance weight, material durability, and protective glazing to ensure it remains securely on your wall while keeping your photos pristine over the years.
Products mentioned in this guide
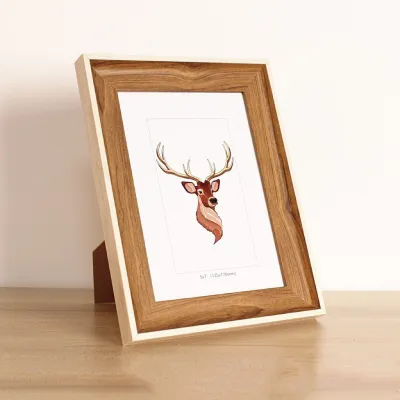
![[SG Stock] Wooden Picture Frame Wooden Photo Frame- Wall Art Poster Painting Hanging Stand Table Decor A3 A4 4R 5R](https://img.lazcdn.com/g/p/7e82d3ea8ef383b11bfd2b9f17d6a169.jpg_400x400q80.jpg_.webp)
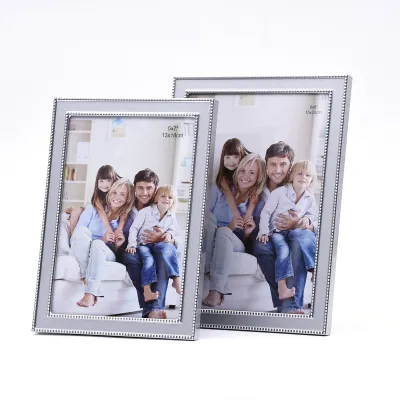
![[Local Stock] 10R 8R 5R 4R Bronze Designer Stainless Steel Photo frame](https://img.lazcdn.com/g/p/6aeb04f064a714fc7b4a8a28a7f07815.jpg_400x400q80.jpg_.webp)
![[NEW] Rose Gold Aluminium Frame | Minimalistic Duo Size Design | Local Stock | Available in 4R/5R/6R/8R](https://img.lazcdn.com/g/p/05f292f773181409ea9cdd8ef4b2b5b4.jpg_400x400q80.jpg_.webp)

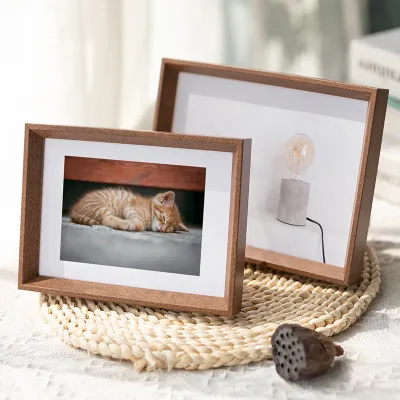
![[SG Stock]Simple classic Wooden photo frame 3R/4R/5R/8R/A4 For Table Display Decorations Picture Frame Gift Christmas gift](https://img.lazcdn.com/g/p/9161cc234a6af3d66393f5124dc21143.jpg_400x400q80.jpg_.webp)
Prices are valid at publication and may change. Please refer to the product page for the latest price.
Weight and Mounting Compatibility
Weight is one of the most critical factors when planning a multi-frame wall display in Singapore. Most structural walls in HDB flats and condominiums are made of solid, precast concrete. Drilling into these walls requires a heavy-duty rotary hammer drill, masonry wall plugs, and screws, which can be noisy, dusty, and permanent. For renters or those who prefer to avoid drilling, damage-free adhesive hanging systems are the preferred alternative.
Adhesive strips rely on a strong chemical bond with the wall paint, but their weight capacity is strictly limited. Lightweight frames are essential if you plan to use adhesive mounting. Heavy frames place continuous downward shear stress on the adhesive. In Singapore’s warm and humid climate, this bond can weaken over time, leading to sudden failures where frames fall and break. Choosing brands that offer lightweight frame options ensures your display remains securely attached to the wall without requiring structural drilling.
Glazing Materials
Glazing refers to the protective clear panel that covers your photo. The two primary choices are traditional glass and acrylic (often referred to as plexiglass). Each material has distinct advantages and trade-offs that you must weigh based on your specific installation environment.
- Glass Glazing: Glass is highly scratch-resistant, easy to clean, and offers excellent optical clarity without warping. It provides a premium, classic feel to the frame. However, glass is heavy and highly fragile. If a frame falls, shattered glass poses a significant safety hazard, especially in active households with children or pets. Furthermore, in high-humidity environments, moisture can easily condense on the inner surface of the glass if the frame lacks proper ventilation or matting.
- Acrylic Glazing: Acrylic is virtually shatterproof and exceptionally lightweight, making it the safest option for high-traffic areas, children's bedrooms, or large gallery walls relying on adhesive strips. However, acrylic is highly susceptible to scratching during cleaning and can attract static dust. Low-quality acrylic may also have a slight blue or yellow tint, which can distort the colors of your photos.
Frame Material and Depth
The material of the frame profile affects not only the look of your gallery wall but also how well the frames withstand Singapore’s humid climate over time. The three most common materials are solid wood, metal, and medium-density fibreboard (MDF).
- Solid Wood: Solid wood frames offer a timeless, organic warmth and high structural rigidity. However, wood is a natural, porous material that absorbs moisture from the air. If the wood is not properly sealed or treated, Singapore's high humidity can cause it to warp, expand, or develop mold. Solid wood is also heavier than synthetic alternatives.
- Metal (Aluminum): Aluminum frames are incredibly durable, lightweight, and completely impervious to moisture and humidity. They offer a sleek, modern, minimalist profile with thin borders, allowing the focus to remain entirely on the photo. Aluminum frames do not warp, swell, or rust, making them an outstanding long-term choice for local homes.
- MDF (Medium-Density Fibreboard): MDF is a highly popular, budget-friendly engineered wood product used by many mass-market brands. It is lightweight and can be finished in a wide variety of colors and textures. However, MDF is highly vulnerable to water damage. If the protective laminate or paint layer is chipped or poorly sealed, moisture from the air can penetrate the core, causing the MDF to swell, crumble, and grow mold.
Sourcing Reliable photo frame 4r Brands in Singapore
Finding the right brands involves navigating different retail channels, each catering to different budgets, design preferences, and quality requirements. Understanding what each source offers helps you make an informed decision based on your project’s scale and value.

Mass-Market Home Furnishing Retailers
For most homeowners, large global and local home decor chains are the first stop when searching for 4R frames. These retailers offer highly accessible, standardized framing solutions that are ideal for creating clean, uniform layouts.
- Pros: The primary benefit is consistency. If you purchase a set of frames today and decide to expand your gallery wall next year, you can easily buy the exact same model with matching dimensions, colors, and profiles. These retailers often sell frames in multi-packs or cohesive collections, which significantly lowers the cost per frame. They are widely available across Singapore, allowing you to inspect the build quality in person before buying.
- Cons: Mass-market frames are typically constructed from lower-cost materials, such as MDF and thin plastic glazing. The designs tend to be generic, meaning your display may look similar to many other households. There is also very little room for customization regarding matboard colors or non-standard frame depths.
Local Custom Framing Studios
If you are framing highly valuable prints, original artwork, or irreplaceable family heirlooms, local professional framing studios located in creative hubs like Bras Basah Complex or specialized industrial estates offer a premium, bespoke alternative.
- Pros: Custom framers use archival-quality, acid-free materials that protect your photos from chemical yellowing and degradation over time. They offer precise joinery, custom-cut matboards, and high-grade glazing options, such as museum glass that blocks harmful UV rays and eliminates reflections. You also receive expert advice on color coordination, frame scaling, and safe mounting methods tailored to your specific wall type.
- Cons: The main trade-off is cost. Custom framing is a handcrafted service, and a single custom 4R frame can cost significantly more than a mass-market multi-pack. There are also longer lead times, often taking anywhere from several days to a couple of weeks to complete your order. This option is best reserved for focal wall displays where quality and preservation are paramount.
Online Home Decor Marketplaces
E-commerce platforms and online marketplaces offer an incredibly vast selection of global and regional framing brands, ranging from ultra-minimalist Scandinavian designs to rustic, distressed wood styles.
- Pros: Online shopping allows you to compare hundreds of brands and styles from the comfort of your home, often at highly competitive prices. You can easily find unique finishes, specialized multi-frame collage layouts, and lightweight acrylic options that are difficult to find in local brick-and-mortar stores.
- Cons: Sourcing online requires a high level of vigilance. Listings can sometimes be misleading; a seller might list a frame as "4R" when those are actually the outer dimensions of the frame rather than the inner photo insert size. Always read the detailed product specifications to confirm the "window size" or "insert size" matches your 4×6 inch prints. Additionally, check customer reviews to see how well the seller packages their items. Glass-fronted frames are highly susceptible to breakage during shipping, so look for reviews that mention robust bubble wrapping or foam packaging.
Planning Your 4R Gallery Wall Layout
Before you drive a single nail or peel the backing off an adhesive strip, taking the time to plan your layout is essential for achieving a balanced, professional-looking gallery wall.
Understanding 4R Dimensions
A standard 4R photo print measures exactly 4 by 6 inches, which translates to approximately 10.2 by 15.2 centimeters. However, the physical footprint of the frame on your wall will be larger. A frame with a thick 2-centimeter border and a 3-centimeter matboard (passe-partout) will occupy significantly more space than a borderless clip frame.
When calculating the total wall area required for your display, always refer to the outer dimensions of the frame provided by the manufacturer, rather than the 4R photo size. If you plan to use matting—which adds a clean white or off-white border around the photo—the outer frame size will typically expand to a 5R or 6R equivalent footprint. Factor these expanded dimensions into your spatial calculations to avoid overcrowding your wall.
Layout Planning Techniques
To visualize your display without making unnecessary holes or damaging your wall paint, use the paper template method. This simple, highly effective technique ensures perfect alignment and spacing.
- Trace and Cut: Place each of your physical frames onto sheets of scrap paper, newspaper, or kraft paper. Trace around the outer edges of the frames with a pencil and cut out the templates.
- Label Orientations: Mark whether each template represents a portrait (vertical) or landscape (horizontal) photo, and write down which specific image goes with which template.
- Arrange with Painter's Tape: Use low-tack painter's tape to stick the paper templates to your wall. This tape is designed to hold lightweight paper securely without peeling off the wall paint when removed.
- Experiment with Styles: Rearrange the templates to test different layouts. For a formal, modern look, choose a strict geometric grid with identical spacing (e.g., 5 centimeters between all frames). For a more relaxed, eclectic feel, try an organic salon-style arrangement where frames of different sizes and orientations cluster around a central focal point.
- Step Back and Evaluate: Walk to the other side of the room to view the arrangement from a distance. Check how the layout interacts with your furniture, light switches, and room lighting before proceeding to installation.
Cohesion Factors
A common mistake when building a gallery wall is mixing too many competing visual elements, which can make the display look cluttered and chaotic. To create a unified look, establish at least one consistent design element across all your frames.
- Consistent Frame Profiles: Use the exact same frame model and color for every photo in the display. For example, a grid of nine identical slim black aluminum frames looks incredibly clean and sophisticated.
- Uniform Matting: If you are mixing frames of different colors or materials, use identical white or off-white matboards inside every frame. The consistent border color acts as a visual buffer, tying the diverse frames together.
- Coordinated Color Palettes: Ensure the photos themselves share a cohesive color story. A highly effective technique is converting all your images to black and white, which instantly unifies photos taken in different lighting conditions, locations, and time periods.
Safe Installation and Wall Care for Singapore Homes
Proper installation is crucial to ensure your gallery wall remains secure over time while protecting your home’s walls from unnecessary damage. This requires understanding your wall type and selecting the appropriate hardware.
Identifying Wall Types
Singapore homes feature different wall construction materials, and identifying them is the first step in choosing the correct mounting hardware. Knock gently on the wall surface to determine its composition.
- Concrete Walls: If the wall feels solid, cold to the touch, and produces a dull, high-pitched thud when tapped, it is reinforced concrete or solid brick. These are typical for structural external walls and main partition walls in HDB flats and condos. Mounting heavy items on these walls requires drilling with a masonry bit and inserting plastic wall plugs.
- Drywall Partitions: If the wall sounds hollow when tapped, it is a drywall partition, commonly used for internal room dividers in newer developments. Drywall is made of a gypsum core sandwiched between heavy paper sheets. Standard screws will easily strip the gypsum and pull out under load. Drywall requires specialized hollow-wall anchors, self-drilling anchors, or toggle bolts that expand behind the board to distribute the weight.
Choosing the Right Hardware
Always match your mounting hardware to both the wall type and the total weight of your fully assembled frame (including the photo, glazing, backing, and any hanging hardware). Weigh your frame on a kitchen scale to get an accurate measurement.
- Adhesive Strips: Best for lightweight frames (typically under 1.5 kg) on painted concrete or drywall. Ensure you clean the wall surface with isopropyl rubbing alcohol first to remove dust and oils. Press the strips firmly onto the frame and the wall according to the manufacturer's instructions, and allow the adhesive to cure for the recommended time (usually 1 hour) before hanging the frame. Never exceed the weight limits printed on the packaging.
- Picture Hooks and Masonry Nails: For medium-weight frames on concrete walls where drilling is not preferred, specialized hard-wall picture hooks featuring small, hardened steel pins can be tapped directly into the concrete using a hammer. These leave only tiny pinholes when removed, making them highly popular for rental properties.
- Wall Plugs and Screws: Mandatory for heavy, solid wood or large glass-fronted multi-frame setups. Drill a hole of the exact diameter specified by the wall plug manufacturer, insert the plug flush with the wall surface, and drive the screw in, leaving a small portion protruding to catch the frame's hanging bracket.
Damage Prevention and Safety Boundaries
While hanging lightweight 4R frames is generally a safe, straightforward DIY project, there are clear boundaries where you should stop and consult a qualified professional handyman.
If your installation involves drilling into walls near electrical switches, power sockets, or water lines (especially near bathrooms and kitchens), you run the risk of puncturing hidden utility conduits. In Singapore, electrical wiring typically runs vertically or horizontally from outlets. Never drill directly in line with a switch or socket. If you do not own a reliable stud finder with live-wire detection, or if you are planning a massive, heavy gallery wall display that requires extensive drilling, hiring a professional handyman is the safest course of action to prevent costly damage and ensure personal safety.
Frequently Asked Questions (FAQ)
What are the exact outer dimensions of a standard 4R photo frame?
A standard 4R photo print measures 4 by 6 inches, which is approximately 10.2 by 15.2 centimeters. However, the outer dimensions of a 4R frame depend entirely on the specific brand’s design, including the border width and whether the frame includes a matboard (passe-partout). A slim, minimalist frame might only add 1 to 2 centimeters to each side, resulting in an outer dimension of roughly 12 by 17 centimeters. Conversely, a wide, rustic wood frame with a built-in matboard can easily double the footprint, measuring 20 by 25 centimeters or more. Always check the manufacturer’s product specifications for the exact outer dimensions before planning your wall spacing.
Can I use double-sided tape for all 4R photo frames?
No, you should never use generic double-sided tape or mounting tape to hang photo frames. Standard double-sided tape is not formulated to support vertical weight over long periods, and the adhesive can dry out or degrade rapidly in Singapore’s humid climate, causing your frames to fall unexpectedly. Furthermore, generic permanent tapes use aggressive adhesives that will tear the paint and drywall paper when you attempt to remove them, leading to costly wall repairs. Instead, always use specialized, removable picture-hanging strips designed specifically for damage-free mounting, and strictly verify that the combined weight of your frame, glazing, and photo does not exceed the manufacturer’s rated weight capacity.
How do I prevent moisture damage to photos inside the frames?
Singapore’s high relative humidity can cause photos to warp, develop mold, or stick to the glazing panel over time. To prevent this, always use an acid-free matboard (passe-partout) inside your frames. The matboard creates a physical gap between the photo print and the glass or acrylic panel, preventing the photo emulsion from sticking to the glazing. Ensure the frame’s backing board is tightly sealed, and avoid hanging your displays in high-humidity zones like bathrooms, directly opposite kitchen cooking areas, or in spots that receive direct, prolonged sunlight, which can cause rapid fading and moisture build-up.

Community discussion
Share your experience or ask a question. Comments are reviewed before publication.