
Selecting the right Kodak photo frame for a wall display requires balancing visual appeal with structural safety. While many frames are designed primarily for tabletop use, choosing models with robust, built-in hanging hardware ensures your cherished memories remain securely mounted. Whether you are opting for a classic wooden frame, a modern metal design, or a high-tech digital display, understanding how weight, material, and mounting systems interact is crucial for creating a lasting wall gallery. By focusing on key structural features and matching them to your room’s layout, you can transform empty walls into a personalized, safe, and visually striking exhibition.
Key Features to Look for in Wall-Mounted Kodak Frames
The foundation of a successful wall display lies in the physical mounting hardware integrated into the back of the frame. High-quality wall frames typically feature built-in sawtooth hangers, D-rings, or keyhole slots, which dictate how flush the frame will sit against your wall. Tabletop stands, while convenient for desks, can sometimes push the frame away from the wall, causing an awkward outward tilt. For a clean, professional look, prioritize frames with removable easel backs or recessed hanging hardware that allows the frame to rest flat against the wall surface.
Frame weight and depth are equally critical factors that influence both safety and visual proportion. Heavier frames exert more shear force on wall anchors, which is a vital consideration when mounting on different wall materials. Additionally, the depth of the frame profile affects how it interacts with ambient room lighting. Deeper frames cast distinct shadows that can either enhance the artwork by adding dimension or obscure it if the room’s light sources are positioned at sharp angles.
Products mentioned in this guide

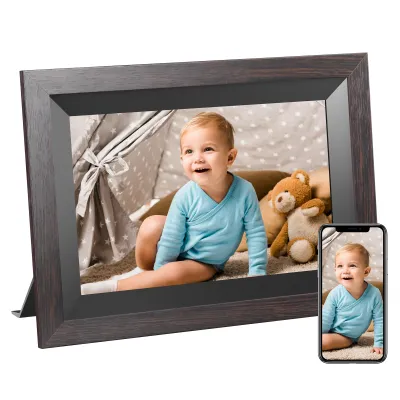





Prices are valid at publication and may change. Please refer to the product page for the latest price.
Before making a purchase, always check the product specifications for the maximum supported photo thickness and backing support. Some frames are designed strictly for thin paper prints, whereas others can accommodate thicker cardstock, double-matted prints, or textured fine art paper. Verify whether the frame includes a dedicated wall-mounting kit or if you will need to source your own specialized anchors, ensuring you have all the necessary components before beginning the installation.
Best Kodak Frame Styles for Different Wall Layouts
Achieving a balanced wall display involves matching the structural style of your Kodak frames to the specific layout of your room. Different layout strategies—such as single statement pieces, multi-photo collages, or expansive gallery walls—require distinct frame characteristics to look their best and remain securely mounted over time.

Large Single Frames for Statement Pieces
Large-format single frames serve as excellent focal points in spacious areas like living rooms, dining areas, or entryways. A wide frame border or a generous mat board naturally draws the viewer’s eye inward, elevating a single photograph into a gallery-worthy statement piece. When choosing these larger formats, look for finishes that complement your existing furniture, such as classic matte black, clean white, or natural wood tones.
With larger dimensions, structural rigidity becomes paramount to prevent the frame from bowing or warping over time. Frames made from softer or lower-density materials can distort under their own weight or due to environmental changes like temperature and humidity. Ensuring the frame features a sturdy backing board and a rigid outer profile will keep your large prints looking crisp and flat for years to come.
Before purchasing an oversized frame, measure your available wall space carefully and consider the optimal viewing distance. A massive frame installed in a narrow hallway can feel overwhelming and restrict the viewer’s ability to appreciate the image as a whole. Conversely, a well-proportioned frame placed at eye level in a wider room creates a balanced, inviting atmosphere that encourages closer inspection.
Multi-Photo Collage Frames for Storytelling
Collage frames offer a seamless way to display a chronological narrative or a collection of related memories, such as family holidays or milestone events. They eliminate the complex task of aligning multiple individual frames, providing a pre-designed, cohesive layout out of a single unit. This style is particularly effective for creating a storytelling element on accent walls or along staircases.
When selecting a collage frame, it is essential to verify the exact dimensions of each photo slot within the layout. Standard sizes like 4×6 inches or 5×7 inches are common, but some artistic layouts feature non-traditional square or circular slots. Checking these specifications beforehand ensures your existing photo collection will fit perfectly without the need for awkward cropping or reprinting.
Because collage frames house multiple photos and often feature large sheets of glass or acrylic glazing, they can be significantly heavier than single-photo frames. This increased weight requires robust mounting hardware and careful anchoring, especially when hung on hollow partition walls. Always check the total weight of the loaded collage frame to ensure your wall anchors can support the load safely.
Matching Sets for Gallery Walls
Creating a gallery wall with a matching set of Kodak frames ensures a highly professional, curated aesthetic. Uniform border widths, matching colors, and consistent frame depths tie disparate images together, making the entire display feel like a single, intentional installation rather than a random collection of pictures. This cohesive look works exceptionally well in modern, minimalist, or transitional interiors.
To introduce visual interest without creating chaos, you can mix different frame sizes within the same design collection. Keeping the frame material and color palette identical allows you to display a variety of portrait and landscape photos while maintaining a unified theme. This approach gives you the flexibility to showcase different aspects of your life while keeping the overall design clean and organized.
To avoid making unnecessary holes in your walls, always plan your gallery layout on the floor first. Alternatively, you can cut out paper templates matching the dimensions of each frame, tape them to the wall using low-tack painter’s tape, and adjust the spacing until you achieve the perfect balance. Once you are satisfied with the arrangement, you can mark the drilling points directly through the templates for precise installation.
Choosing the Right Material and Finish for Your Space
The material and finish of your photo frames play a double role, defining both the visual character of your room and the practical requirements for wall mounting. Different materials carry different weights, durability levels, and maintenance needs, making it essential to match them to your environment.
Wood and MDF Wood and Medium-Density Fibreboard (MDF) frames offer a classic, warm aesthetic that fits traditional, rustic, or Scandinavian interior styles. While solid wood frames provide unmatched durability and a premium texture, they are inherently heavier and require robust wall anchors to support their weight safely. MDF frames offer a lighter, more budget-friendly alternative with a highly uniform appearance, though they must be kept away from high-moisture areas to prevent swelling.
Metal Metal frames, often constructed from lightweight aluminum, deliver a sleek, minimalist look perfect for modern or industrial spaces. Their thin profiles maximize the visible area of the photograph, drawing all attention to the image itself. Because metal frames are typically lighter than their solid wood counterparts, they are much easier to mount securely on drywall or hollow partition walls without requiring heavy-duty anchors.
Glazing Options The choice of glazing—the clear protective sheet covering the photo—greatly influences both the frame’s weight and its safety. Traditional glass offers excellent clarity and scratch resistance, but it adds substantial weight to the frame and poses a safety risk if dropped. Lightweight acrylic or shatter-resistant plastic glazing is an excellent alternative for high-traffic areas, children’s rooms, or homes with pets, as it significantly reduces the overall weight and eliminates the risk of sharp glass shards.
Before finalizing your purchase, always verify the exact material composition on the product label or retailer listing. Visual finishes, such as a wood-grain veneer over an MDF core, can look identical to solid wood but differ significantly in weight, moisture resistance, and long-term durability. Knowing exactly what your frame is made of allows you to choose the correct mounting hardware and care for the frame properly over time.
How to Safely Mount and Arrange Your Photo Frames
Proper installation is the key to ensuring your wall display remains secure and beautiful without causing damage to your home. Different wall types require specific tools and techniques, and understanding these requirements is essential for a safe, long-lasting setup.
Before beginning any installation, check the product label of your mounting hardware and the manufacturer instructions for both the frame and the wall anchors. If the instructions conflict, if your wall material is unidentified, or if your specific mounting scenario is not covered, stop immediately and consult a qualified professional or local handyman.
Identifying your wall type is the first and most critical step in the mounting process. In Singapore, residential properties like Housing & Development Board (HDB) flats and private condominiums typically feature solid concrete or brick walls. Mounting frames on these surfaces requires a rotary hammer drill, masonry drill bits, and plastic wall plugs to secure screws. Conversely, partition walls or drywall common in renovated spaces require specialized hollow-wall anchors, such as toggle bolts or self-drilling plasterboard anchors, to distribute the frame’s weight safely.
Before hanging any frame, verify its total weight—including the print, matting, and glazing—using a simple scale. Compare this weight against the manufacturer’s rated load capacity for your chosen hooks, anchors, or adhesive strips. Never exceed these limits, as overloading a wall fixture can lead to sudden structural failure, damaging both your frame and your wall surface.
Achieving a level, professional alignment requires the right tools and techniques. Avoid relying on visual estimation; instead, use a high-quality spirit level and a steel measuring tape to mark your drilling points precisely. For wider frames, installing two separate hanging points instead of a single central hook distributes the weight more evenly and prevents the frame from tilting or shifting when doors slam or wind blows through the room.
When working with electrical components, such as mounting a digital photo frame that requires a continuous power supply, ensure you comply with local safety guidelines. Check that the power adapter bears the appropriate safety certifications, such as the Singapore Safety Mark, to guarantee electrical safety and voltage compatibility. Run the power cable neatly along the wall using paintable cable trunking to prevent tripping hazards and maintain a clean aesthetic.
Always prioritize safety and know when to seek professional assistance. If you suspect the presence of hidden electrical wiring or water pipes behind your marked drilling spots, use a reliable stud finder with live-wire detection before proceeding. If you encounter unexpected resistance while drilling, are working at significant heights, or if your statement piece is exceptionally heavy, stop immediately and consult a qualified local handyman or professional installer to complete the job safely.
Frequently Asked Questions (FAQ)
Can I use Kodak digital frames for wall mounting?
Yes, several Kodak digital photo frame models are designed with wall-mounting capabilities, featuring built-in keyhole slots or standard VESA mounting patterns on the back. However, because digital frames contain electronic components, screens, and internal storage, they are generally heavier than traditional empty frames of the same size, requiring more robust wall anchors.
Unlike traditional frames, digital models require a continuous power source to function. You must plan your layout near an electrical outlet and consider how to manage the power cable safely and aesthetically, such as using low-profile cable covers or routing the wire discretely along the frame’s edge to avoid a cluttered look.
How do I prevent my photo frames from tilting on the wall?
Frame tilting is a common issue caused by vibrations from closing doors, foot traffic, or uneven weight distribution within the frame itself. To prevent this, avoid hanging wide frames from a single central hook; instead, install two separate hanging points, such as D-rings or sawtooth hangers, spaced evenly on the left and right sides of the frame’s backing.
For additional stability, you can apply small adhesive silicone bumpers, museum putty, or a small piece of double-sided mounting tape to the bottom corners of the frame’s back. This not only keeps the frame perfectly level by gripping the wall surface gently but also creates a tiny air gap that prevents dust accumulation and protects your paint from scuff marks.
Are Kodak frames suitable for humid environments like bathrooms?
High-humidity environments pose significant risks to both photo frames and the prints housed inside them. Prolonged exposure to moisture can cause solid wood or MDF frames to warp, metal components to rust, and paper prints to buckle, degrade, or adhere permanently to the glass glazing.
If you wish to display photos in a bathroom or high-humidity area, check the manufacturer’s care instructions to verify if the frame is rated for moisture resistance. For valuable, irreplaceable, or original photographs, it is highly recommended to display them only in dry, climate-controlled rooms, opting for high-quality digital copies in moisture-prone spaces instead.

Community discussion
Share your experience or ask a question. Comments are reviewed before publication.