
Creating a modern, dynamic wall display with magnetic photo frames offers an elegant way to showcase memories, art, and prints without the hassle of traditional framing. In Singapore’s typical residential environments—ranging from high-density HDB flats with concrete walls to modern condominiums with drywall partitions—selecting the right magnetic frame requires balancing aesthetic appeal with structural safety. A reliable magnetic frame must secure your photos firmly while remaining safely anchored to the wall surface, preventing accidental falls that could damage your home decor or flooring. By understanding the key specifications, material properties, and installation methods, you can design a stunning gallery wall that is both visually striking and structurally secure.
Key Specifications to Check Before Buying
When shopping for magnetic photo frames, it is easy to get caught up in the visual design and overlook the technical specifications that ensure long-term durability and safety. The first and most critical specification to evaluate is the magnet type and its holding power. High-quality frames typically utilize neodymium (rare-earth) magnets, which provide a significantly stronger magnetic pull relative to their size compared to standard ferrite magnets. This strength is essential for keeping the frame components flush against each other and preventing the front cover or the photo itself from slipping over time.
The backing material of the frame also plays a vital role in structural integrity. Look for frames that feature a rigid backing plate, such as powder-coated steel or high-density composite materials. A rigid backing prevents the frame from warping under tension or environmental changes, ensuring that the magnetic contact points remain perfectly aligned. If the backing material is too flexible, the magnetic seal may compromise, leading to gaps where dust can enter or causing the frame to detach from its wall mount.
Products mentioned in this guide


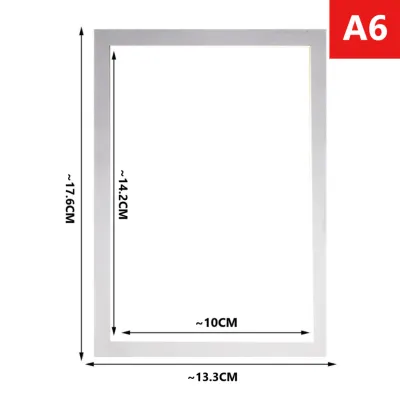
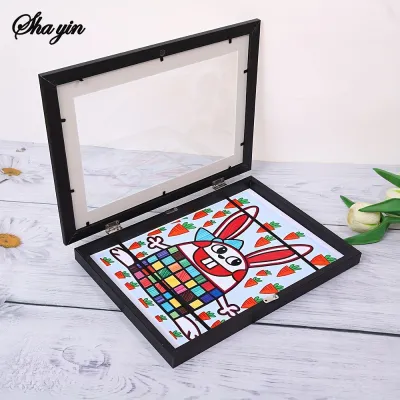
Prices are valid at publication and may change. Please refer to the product page for the latest price.
Another crucial factor is the wall mounting mechanism. Magnetic frames generally fall into two categories: those designed for adhesive-strip mounting and those that require hardware anchors. Adhesive-mounted frames are highly popular in rental properties or on hard concrete walls where drilling is restricted, but they require high-quality, flat backing surfaces to ensure a secure bond. Hardware-anchored frames, which use screws and wall plugs, offer the most secure installation for heavier frames or on drywall partitions, but they require precise drilling and alignment.
Before making a purchase, always compare the manufacturer’s stated weight capacity against the actual weight of the frame and the photo paper you plan to use. The weight capacity should ideally exceed the total weight of the assembly by at least twenty percent to provide a safe margin of error. Additionally, pay close attention to the frame’s material durability and edge finishing. If you choose acrylic frames, ensure they are made from high-grade, UV-stabilized polymethyl methacrylate to prevent yellowing under Singapore’s bright tropical sunlight, and check that the edges are polished and free of sharp burrs.
Types of Magnetic Photo Frames for Wall Arrangements
Different magnetic frame designs serve distinct aesthetic and functional purposes, making it important to match the frame type to your specific display goals. Whether you want to frequently rotate family photos, hang large art prints, or create a minimalist floating gallery, understanding the mechanics of each frame type will help you make an informed decision.

Front-Loading Magnetic Frames for Frequent Updates
Front-loading magnetic frames are designed specifically for individuals who enjoy regularly updating their wall displays. These frames consist of a permanent backplate that remains mounted to the wall and a matching magnetic front border or clear cover that lifts off easily. This design allows you to swap out photos, drawings, or documents in seconds without having to remove the entire frame from the wall or disturb the mounting adhesive.
When evaluating front-loading frames, pay close attention to the magnet alignment and holding power along the perimeter. The magnets should be strategically placed at the corners and along the edges to ensure an even, airtight seal that keeps the photo flat. A common risk with lower-quality front-loading frames is photo slippage; if the magnets do not provide sufficient clamping force, or if the photo paper is slightly smaller than the designated frame area, the print may slide downward. To prevent this, look for frames that feature a slightly recessed photo pocket or a high-friction backing surface.
Magnetic Hanging Systems for Gallery Walls
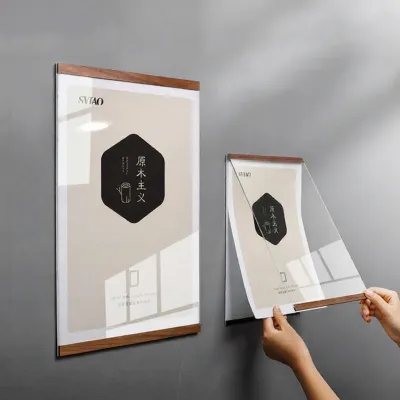
Magnetic hanging systems, often referred to as magnetic poster hangers or hanger frames, offer a minimalist and rustic aesthetic that works beautifully for larger prints, posters, and canvas art. These systems typically consist of two pairs of wooden or metal rails embedded with powerful magnets. One pair clamps onto the top edge of the print, while the other pair clamps onto the bottom edge, acting as a weight to keep the paper taut and prevent curling.
Installing a magnetic hanging system requires careful consideration of wall anchoring and weight distribution. The top rail is suspended from a cord or directly mounted to the wall using screws, meaning that the entire weight of the rails and the print is concentrated on a single mounting point. It is essential to ensure that this point is securely anchored, especially when hanging heavier or larger prints. The primary advantage of this system is its exceptional adjustability; you can swap prints of varying lengths instantly without changing the wall mount, making it a highly flexible option for dynamic gallery walls.
Magnetic Acrylic or Glass Blocks
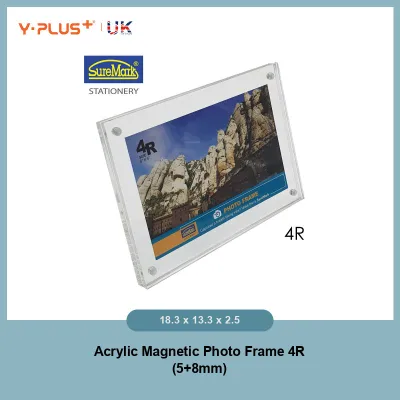
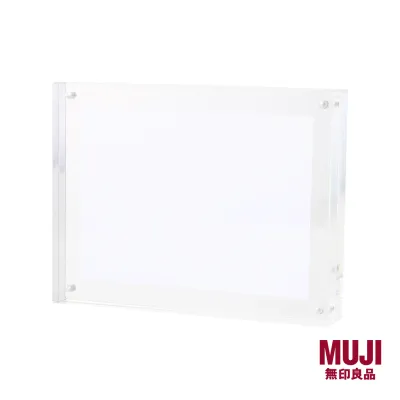
For a sleek, contemporary look, magnetic acrylic or glass blocks provide a stunning frameless presentation that makes your photos appear to float in mid-air. These blocks consist of two thick, solid panels of clear acrylic or tempered glass that sandwich the photo between them, held together by small, discreet magnets embedded in the four corners. The thick edges of the panels are highly polished, catching the light and creating a beautiful three-dimensional depth.
Because solid acrylic and glass blocks are significantly heavier than thin plastic or wooden frames, they require robust mounting solutions. Standard adhesive strips may not provide sufficient shear strength to hold these heavy blocks securely on a vertical wall over time. If you opt for wall-mounted magnetic blocks, look for systems that include dedicated metal wall brackets or heavy-duty, wall-safe adhesive systems specifically rated for the block’s weight. Additionally, keep in mind that clear surfaces require regular maintenance; dust, fingerprints, and smudges are highly visible on acrylic and glass, requiring gentle cleaning with a microfiber cloth to preserve their optical clarity.
How to Evaluate Brand Reliability and Product Quality
Navigating the vast array of magnetic photo frames available on online marketplaces and in local home decor stores can be challenging, as many products look identical in photos but differ significantly in quality. To ensure you are purchasing a reliable product that will stand the test of time, you must look beyond marketing claims and perform a systematic evaluation of the brand and product specifications.
Start by verifying the manufacturer’s stated weight ratings. A reliable brand will clearly specify the maximum weight capacity of the frame and detail the exact conditions under which that rating applies. Be skeptical of brands that make vague claims of “ultra-strong hold” without providing concrete weight limits or material specifications. If possible, calculate the weight of your photo paper and compare it to the frame’s capacity, keeping in mind that thicker fine-art papers require stronger magnetic force to clamp securely.
Customer reviews are an invaluable resource for identifying potential long-term issues, particularly regarding magnet degradation. Over time, low-quality magnets can lose their magnetic field strength, especially when exposed to the high humidity and warm temperatures typical of Singapore’s climate. Search verified reviews for keywords like “slipping,” “falling,” “weak magnets,” or “warping.” If multiple customers report that the frames began to slide or separate after a few months, it is a clear indication of substandard magnet quality or poor adhesive backing.
Another critical area to investigate is the quality of the bundled adhesive. Many generic magnetic frames come with cheap double-sided foam tape that can dry out, degrade, or fail under humid conditions, leading to the frame falling and potentially damaging your wall or floor. Reliable brands will either bundle high-quality, branded mounting strips (such as those from reputable adhesive manufacturers) or provide clear instructions on which third-party adhesives are compatible with their frames. Always verify if the adhesive is rated for your specific wall surface, whether it is painted plaster, concrete, or wallpaper.
Finally, review the seller’s return and warranty policies before finalizing your purchase. Because magnetic frames rely on precise manufacturing tolerances, even minor defects like misaligned magnets, chipped acrylic edges, or warped backplates can render the frame unusable. A reputable brand or seller should offer a straightforward return or replacement policy for defective goods, giving you peace of mind that you can exchange any items that do not meet quality standards upon arrival.
Planning and Executing Your Wall Display Layout
A successful gallery wall requires careful planning and execution to ensure that the final display is visually balanced, level, and securely mounted. Before you begin drilling holes or applying adhesives, take the time to measure your wall space accurately. Use a measuring tape to determine the total width and height of the display area, keeping in mind the optimal viewing height—typically, the center of the gallery wall should sit around 145cm to 150cm from the floor, which aligns with average eye level.
To avoid making mistakes on the wall, it is highly recommended to test your layout on the floor first. Lay out your magnetic frames in the desired arrangement, experimenting with different spacings and orientations until you achieve a cohesive look. A standard rule of thumb is to maintain a consistent gap of 5cm to 10cm between each frame to create a sense of order and balance. Once you are satisfied with the floor layout, take a photo of it with your phone to use as a reference, and use painter’s tape to map out the outer boundaries of each frame on the wall.
Identifying your wall type is a crucial step that dictates the mounting hardware and techniques you must use. In Singapore, residential walls are commonly constructed from either solid concrete (typical of HDB structural walls) or drywall partitions (often found in newer condominiums or room extensions). Concrete walls provide excellent load-bearing capacity but require a hammer drill, masonry drill bits, and plastic wall plugs to install hardware anchors. Drywalls, on the other hand, are much softer and require specialized hollow-wall anchors or toggle bolts to distribute the weight safely and prevent the screws from pulling out.
If you are using adhesive strips to mount your magnetic frames, ensure that the wall surface is in good condition. Adhesives rely on a strong bond with the paint layer; if the paint is old, chalky, or peeling, the adhesive will eventually pull the paint off the wall, causing the frame to fall. Additionally, consider the lighting conditions of the room. Avoid placing your display in direct sunlight, as UV rays can fade your photos and accelerate the degradation of plastic frame components. Position the frames relative to your room’s lighting fixtures to minimize distracting glare on glossy acrylic or glass surfaces, opting for matte or semi-gloss photo prints if glare is a persistent issue.
Installation and Routine Maintenance
Proper installation and ongoing maintenance are essential to keeping your magnetic photo frame display secure, clean, and visually appealing over the years. When installing adhesive-mounted frames, thorough surface preparation is the key to a long-lasting bond. Begin by cleaning the wall area with isopropyl alcohol to remove any dust, grease, or oil residue. Avoid using household glass cleaners or detergent sprays, as they can leave behind a thin film that compromises the adhesive’s effectiveness. Allow the wall to dry completely before applying the adhesive strips.
When applying the adhesive to the back of the frame, follow the manufacturer’s instructions precisely regarding placement and pressure. Press the frame firmly against the wall for at least thirty seconds to activate the pressure-sensitive adhesive, and allow it to cure—typically for twenty-four hours—before inserting the photo and attaching the front magnetic cover. This curing period is critical for ensuring that the adhesive reaches its maximum holding strength before bearing any weight.
To maintain the visual clarity of your display, establish a gentle cleaning routine. Dust can accumulate quickly on the top edges of the frames, so wipe them down weekly with a dry, soft microfiber cloth. If your frames are made of acrylic, never use glass cleaners containing ammonia, alcohol, or abrasive substances, as these chemicals can cause the acrylic to develop tiny cracks (known as crazing) or become cloudy. Instead, use a specialized acrylic cleaner or a slightly damp cloth with a drop of mild dish soap, wiping gently without applying heavy pressure to avoid scratching the surface.
Finally, make it a habit to periodically inspect your wall display. Every few months, gently check that the frames remain firmly attached to the wall and that the magnetic components are perfectly aligned. In Singapore’s humid climate, adhesives can slowly degrade over several years, so look for any signs of peeling, lifting, or sagging. If you notice any movement or a weakening bond, remove the frame immediately, clean the surface, and apply fresh, high-quality adhesive strips to prevent an accidental fall.
Frequently Asked Questions (FAQ)
Can magnetic photo frames damage painted walls?
Magnetic photo frames themselves do not damage walls, but the adhesives or hardware used to mount them can. If you use adhesive strips, damage typically occurs during improper removal or if the paint bond to the plaster is weak. To prevent damage, always use high-quality, damage-free hanging strips and follow the removal instructions carefully—usually by pulling the tab straight down parallel to the wall rather than pulling it outward. For hardware mounts, drilling will leave small holes that must be patched with wall putty and touched up with paint if you decide to remove the display.
How do I prevent photos from slipping inside the frame?
Photo slippage in front-loading magnetic frames is usually caused by insufficient friction or using a photo that is smaller than the frame’s designated display area. To prevent this, ensure your prints are cut to the exact dimensions recommended by the manufacturer. If you are displaying a smaller photo with a border, place a thin sheet of textured backing paper or cardstock behind the photo to increase friction and fill any gaps. Alternatively, you can use a tiny piece of acid-free, double-sided photo tape on the backplate to secure the print in place without damaging it.
Are magnetic frames safe for heavy or thick photo paper?
The safety of using heavy or thick photo paper depends entirely on the strength of the frame’s magnets. Thick fine-art papers, heavy cardstock, or textured canvases (typically above 300 gsm) can create a physical barrier that prevents the magnets from making full, flush contact. This gap significantly reduces the magnetic holding power, increasing the risk of the front cover detaching or the photo slipping. Always check the manufacturer’s specifications for maximum paper thickness, and test the hold with a small sample of your chosen paper before hanging the fully assembled frame on the wall.

Community discussion
Share your experience or ask a question. Comments are reviewed before publication.