
Selecting the right lighting for a standard Housing & Development Board (HDB) flat requires a careful balance of spatial awareness and technical specifications. With a typical ceiling height of 2.6 meters, the physical distance between the light source and your eyes is significantly shorter than in commercial properties or high-ceiling private estates. This low-clearance environment means that choosing the wrong fixtures can easily lead to harsh glare, uneven dark spots, or an uncomfortably bright living space.
To achieve a balanced, comfortable, and visually appealing home, you must look beyond aesthetic designs and focus on technical specifications. The ideal setup for a 2.6m ceiling relies on wide beam angles, moderate lumen outputs, shallow fixture depths, and proper anti-glare housing. By understanding how these metrics interact with your flat’s layout, you can create a seamless lighting plan that enhances your interior without compromising on comfort.
Understanding the 2.6m Ceiling Constraint
A ceiling height of 2.6 meters imposes distinct physical limits on how light travels and distributes across a room. When a downlight is mounted close to the floor, the cone of light it projects has less vertical distance to spread outward. If the light spread is too narrow, you will end up with intense pools of light directly beneath the fixtures and harsh shadows in the spaces between them, creating a disjointed visual effect.
Products mentioned in this guide
![[Buy 3 Free 1] LED PRO LED LIGHT Recessed Light/LED Downlight Light LED Downlight Square/ Round Downlight Tri-Tone/3000k/4000k/6000k 6W/8W/15W/20W](https://img.lazcdn.com/g/p/7c53b390a776d5c966b89af519a4ccae.jpg_400x400q80.jpg_.webp)
![[BUY 3 FREE 1] DFS Led SG Stock Recessed Downlight 6W 8W 15W 20W Adjustable/Tri-Tone/3000k/4000k/6000k](https://img.lazcdn.com/g/p/0565cc1d81e1c9b9cc74c0979b8fe4d6.jpg_400x400q80.jpg_.webp)
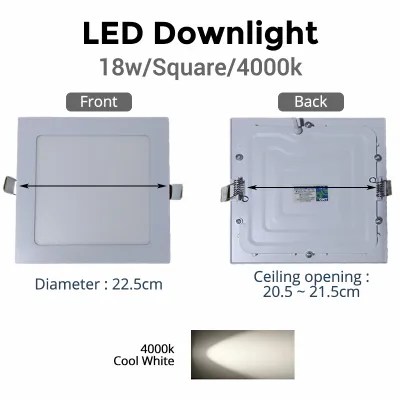
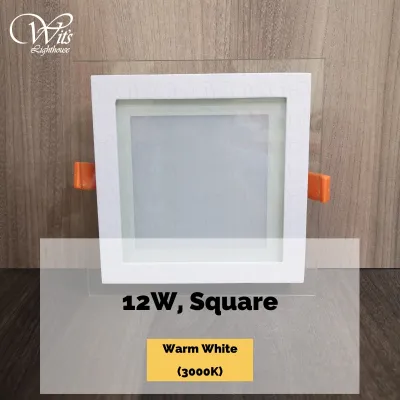
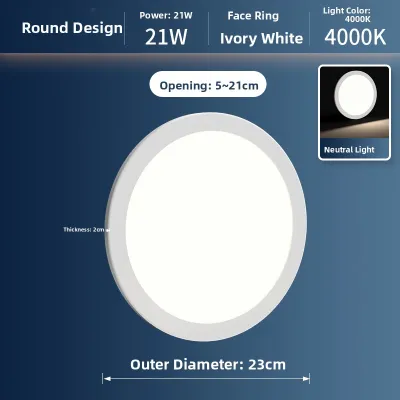
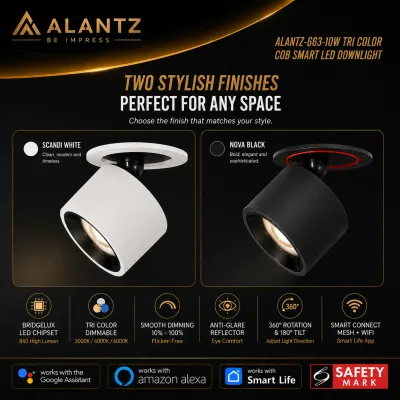
![[Climate Voucher] PHILIPS 3 Color Meson LED Downlight 5.5W 9W 13W 17W Tri Tone Scene Switch for False Ceiling Local Warranty](https://img.lazcdn.com/g/p/4f25f6fa6bf4fcf754b08b97b4102da3.jpg_400x400q80.jpg_.webp)
Prices are valid at publication and may change. Please refer to the product page for the latest price.
Furthermore, low ceilings bring the light source closer to your natural line of sight. Standard commercial downlights, which are often designed for ceilings of 3 meters or higher, typically feature high-intensity outputs and narrow beams to push light down to the floor. Installing these high-output commercial fixtures in a standard HDB flat often results in severe visual discomfort and direct glare whenever you look up.
Balancing ambient illumination with visual comfort in a compact HDB layout requires a decentralized lighting strategy. Instead of relying on a few high-wattage fixtures to light up an entire room, it is far more effective to use multiple lower-output downlights spaced evenly across the ceiling. This approach ensures uniform light coverage while keeping individual light sources soft and comfortable for the eyes.
Calculating the Right Lumen Output
Determining the appropriate brightness for your rooms starts with understanding lumens rather than wattage. Lumens measure the total amount of visible light emitted by a source, whereas wattage simply measures electrical power consumption. To calculate the required light output for any room, you can use a basic formula based on the area of the space and the target illuminance, which is measured in lux (lumens per square meter).

The formula is: Total Lumens Required = Room Area (in square meters) x Target Lux Level. For example, a standard HDB living room might require an ambient light level of 100 to 150 lux, while task-oriented areas like kitchens or study rooms benefit from 250 to 300 lux. If you have a kitchen measuring 10 square meters and aim for 250 lux, you will need a total of 2,500 lumens distributed across your fixtures.
When planning your layout, you must also account for the reflective properties of your interior surfaces. Rooms with dark accent walls, matte finishes, or heavy, dark-colored furniture will absorb more light, requiring a slightly higher total lumen count to achieve the same perceived brightness. Conversely, spaces with white walls, polished floor tiles, and light-colored cabinetry reflect light efficiently, meaning you can opt for lower-lumen fixtures to avoid over-illumination.
Always verify the total luminous flux on the product packaging or technical datasheet before making a purchase. Do not assume that two 7-watt LED downlights will produce the same brightness, as luminous efficacy varies significantly between different LED chips and driver designs. Checking the actual lumen rating ensures you buy fixtures that deliver the exact amount of light your space requires.
Choosing the Beam Angle for Even Illumination
The beam angle of a downlight determines how wide the light spreads from the fixture. For a 2.6m ceiling, selecting the correct beam angle is crucial to achieving even illumination without harsh transitions. Narrow beam angles, typically under 40 degrees, act as spotlights and are best reserved for highlighting specific features like artwork, dining tables, or decorative niches.
For general ambient lighting in low-clearance residential spaces, wider beam angles ranging from 60 degrees to 120 degrees are highly recommended. A wider beam allows the light cones from adjacent fixtures to overlap at a higher point from the floor, minimizing dark zones and creating a smooth, continuous wash of light across the room. This wide distribution helps make compact HDB rooms feel more spacious and open.
To ensure you are getting the correct spread, always verify the beam angle specification on the downlight label or the manufacturer’s technical datasheet. Many generic fixtures sold on online marketplaces do not clearly state their beam angles, which can lead to mismatched lighting patterns once installed. Look for reputable brands that provide clear polar curves or beam angle diagrams to help you plan your fixture spacing accurately.
Verifying Fixture Depth and False Ceiling Clearance
Before purchasing recessed LED downlights, you must verify the physical dimensions of the fixtures against the available space in your ceiling. If you plan to install a false ceiling to conceal wiring and recess your lights, the depth of the ceiling void is a critical limiting factor. Standard HDB false ceilings are typically dropped by 75mm to 150mm to preserve as much headroom as possible in a 2.6m space.
Measure the exact vertical clearance of your planned or existing false ceiling void before finalizing your downlight selection. Recessed downlights require a certain amount of clearance above the fixture to allow heat to dissipate safely from the aluminum heat sink. If a fixture is crammed tightly against the concrete slab without adequate air space, heat will build up rapidly, drastically shortening the lifespan of the LED chip and driver.
As a general safety guideline, ensure there is at least 10mm to 20mm of free air space above the highest point of the downlight’s heat sink. If your false ceiling void is extremely shallow—such as 50mm or less—standard recessed downlights will not fit safely. In these scenarios, look for ultra-thin integrated LED panel downlights or shallow-recess models specifically designed for tight spaces, or consider surface-mounted alternatives.
Evaluating Anti-Glare and Color Temperature Specs
Visual comfort in a 2.6m HDB flat is heavily influenced by the optical design of your downlights. To minimize direct glare, look for deep-recessed or baffled downlight designs. In these fixtures, the LED light source is set back deep within the housing, and the inner rim is often stepped or finished in a matte black or dark color to absorb stray light rays, keeping the source hidden from direct view at normal standing angles.
Color temperature, measured in Kelvin (K), is another essential specification that defines the mood and functionality of your home. Warm white (2700K to 3000K) creates a cozy, relaxing atmosphere suitable for bedrooms and living areas, while cool white (4000K) offers a clean, balanced light ideal for kitchens, bathrooms, and study areas. Daylight (6000K to 6500K) provides high contrast and visibility but can feel clinical if overused in a low-ceiling residential setting.
Additionally, pay close attention to the Color Rendering Index (CRI) on the specification sheet. The CRI indicates how accurately a light source reveals the true colors of objects compared to natural sunlight. For residential living spaces, select downlights with a CRI of Ra 80 or higher, and ideally Ra 90 or higher for dining areas and vanity mirrors, to ensure food, skin tones, and interior decor look vibrant and natural.
Common Specification Mistakes to Avoid
One of the most common mistakes homeowners make is relying solely on wattage to judge the brightness of an LED downlight. Because modern LED technology is highly efficient, a high-quality 6-watt downlight can easily produce the same lumen output as a poorly designed 9-watt fixture while consuming less energy. Always compare the actual lumen output and luminous efficacy (lumens per watt) to make an accurate comparison.
Another frequent error is ignoring the cut-out hole size when purchasing replacement downlights for an existing false ceiling. Downlight specifications list both the outer diameter of the trim and the required ceiling cut-out diameter. If you buy a fixture with a cut-out requirement that is even slightly larger or smaller than your existing ceiling holes, you will face difficult installation gaps or require costly plastering work to rectify the ceiling.
Lastly, do not overlook the compatibility of your LED drivers with your dimming switches. If you want the flexibility to adjust your lighting levels for different times of day, you must purchase downlights specified as dimmable and pair them with compatible trailing-edge or leading-edge dimmers. Using non-dimmable LED drivers with a dimmer switch will lead to annoying flickering, buzzing noises, and premature driver failure. Always verify the voltage (typically 220V-240V AC, 50Hz for Singapore) and look for local safety certifications like the Safety Mark on the driver and fixture to ensure safe operation.
Frequently Asked Questions (FAQ)
Can I use surface-mounted lights instead of recessed downlights in my HDB flat?
If your HDB flat does not have a false ceiling and you want to maximize the full 2.6m height, surface-mounted downlights are an excellent alternative. These fixtures mount directly to the concrete ceiling slab, eliminating the need for a recessed void while still providing directional downlighting. Alternatively, track lighting systems offer high flexibility, allowing you to aim individual spotlights where needed. When opting for surface-mounted fixtures, you must plan how to conceal the electrical wiring, which typically requires running neat PVC casing or industrial-style metal conduits along the ceiling surface.
Do I need a licensed electrician to install LED downlights in Singapore?
Yes, any electrical work involving fixed wiring modifications, installing new lighting points, or mounting heavy fixtures in Singapore must be carried out by an Energy Market Authority (EMA) licensed electrical worker. While simple, direct replacements of existing plug-and-play bulbs can sometimes be handled by homeowners, installing recessed downlights into a false ceiling requires cutting into structural areas, connecting drivers to fixed mains wiring, and ensuring proper grounding. Always isolate the power at the main distribution board (DB box) before any electrical inspection or installation, and hire a qualified professional to ensure compliance with local safety standards.

Community discussion
Share your experience or ask a question. Comments are reviewed before publication.