
Selecting a digital photo frame for a wall-mounted display in a Singapore home involves more than simply picking an attractive screen. Because a wall installation turns a digital device into a permanent piece of home decor, the decision requires careful evaluation of physical mounting hardware, power delivery, software reliability, and visual integration. Unlike tabletop frames that sit within arm’s reach near an outlet, a wall-mounted frame must blend seamlessly with your interior architecture while remaining safe, accessible, and easy to update.
To make an informed choice, homeowners must look beyond brand marketing and evaluate how different products handle the practical realities of wall mounting. This includes assessing the physical depth of the frame, the routing of the power cable, the quality of the screen under local lighting conditions, and the long-term viability of the brand’s cloud ecosystem. By focusing on these core technical and aesthetic dimensions, you can select a display that enhances your living space without introducing unsightly wires or frustrating software limitations.
Essential Hardware Features for Wall-Mounted Digital Frames
The physical design of a digital photo frame determines how securely and neatly it can be mounted to your wall. When evaluating different brands, the first hardware specification to check is the mounting interface. Many standard frames rely on proprietary brackets or simple keyhole slots, which can limit your installation options and may not hold the frame completely flush against the wall. For a more secure and standardized installation, look for frames that feature VESA compatibility, typically in 75mm x 75mm or 100mm x 100mm configurations. This standard allows you to use a wide variety of third-party wall mounts, including ultra-slim low-profile brackets or articulating arms if you need to adjust the viewing angle.
Products mentioned in this guide





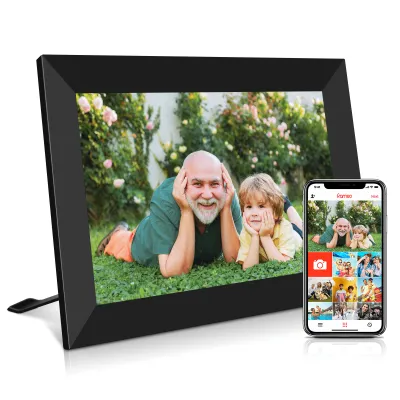


Prices are valid at publication and may change. Please refer to the product page for the latest price.
Cable management is another critical hardware consideration that separates high-quality wall-mounted frames from standard models. A frame designed specifically for wall mounting should feature recessed input ports on the back panel. This design allows the power connector to plug in parallel to the screen rather than protruding straight out, which would force the frame away from the wall. Additionally, look for built-in cable routing channels molded into the back of the frame. These channels guide the wire safely to the edge of the chassis, preventing the frame from tilting or sitting unevenly against the wall surface.
Screen orientation and sensor technology also play a vital role in how you display your photos. A versatile wall-mounted frame should feature an integrated auto-rotation sensor, such as an accelerometer, which automatically detects whether the frame is mounted in portrait or landscape orientation and adjusts the image display accordingly. Furthermore, the screen itself must be evaluated for its viewing angles and surface finish. Singapore homes often feature bright, open-concept living spaces with large windows that let in abundant natural light. To prevent harsh reflections and glare from washing out your images, prioritize frames with matte or anti-glare screen coatings. These finishes diffuse reflected light, ensuring that your family photos remain clearly visible from various angles around the room.
Evaluating Brand Ecosystems and Software Reliability
A digital photo frame is only as reliable as the software platform that powers it. Because wall-mounted frames are often positioned out of easy reach, you will rely almost entirely on wireless connectivity and mobile applications to manage your photo library. When comparing brand ecosystems, start by investigating the cloud storage policies and potential subscription fees. Some brands offer free, unlimited cloud storage for photos uploaded through their proprietary app, while others limit free storage to a specific capacity or require a monthly subscription to unlock advanced features like video playback or larger storage tiers. It is essential to verify these ongoing costs before purchasing, as a subscription model can significantly increase the total cost of ownership over several years.

For families, the multi-user sharing workflow is a key feature to evaluate. The companion app should offer an intuitive invitation system, allowing multiple family members to send photos directly to the frame from their own smartphones, regardless of their location. This feature is particularly valuable for keeping elderly relatives connected, as they can enjoy a constantly updated stream of family photos without needing to navigate complex menus or manage the device themselves.
Local storage and offline functionality are equally important to prevent your wall display from becoming a blank screen during network disruptions. Verify whether the frame includes built-in flash memory or supports external media, such as SD cards or USB flash drives. A robust software system should cache a substantial number of cloud-synced photos locally on the device, allowing the frame to continue displaying your slideshow seamlessly even if your home Wi-Fi connection drops. Additionally, research the brand’s track record for software maintenance. You can gauge this by checking the release history and user ratings of their companion app on major mobile app stores; frequent updates and responsive developer support are strong indicators of a reliable, long-term software ecosystem.
Matching Frame Aesthetics to Your Interior Style
To ensure your digital photo frame looks like a curated piece of art rather than a misplaced computer monitor, you must carefully match its physical aesthetics to your home’s interior design. Digital frames are available in a wide range of materials, including natural woodgrain, matte anodized metal, and sleek acrylic. If your home features a warm, Scandinavian or traditional aesthetic, a frame with a real wood bezel can help the device blend in with existing wooden furniture and shelving. For modern, minimalist, or industrial interiors, a slim metal or matte black acrylic finish offers a clean, contemporary look that complements neutral wall colors and sharp architectural lines.
The proportions of the frame, specifically the bezel thickness and the screen-to-body ratio, greatly influence its visual impact. A wider bezel can mimic the traditional matting used in physical photo framing, which helps create the illusion of a printed photograph rather than a digital screen. Conversely, an ultra-thin bezel provides a sleek, modern look but may make the device look more like a tablet or smart home controller. You should also consider the depth of the frame profile. When mounting on standard drywall or flat concrete walls, a shallow frame depth is preferable to keep the display from protruding awkwardly into walkways or narrow corridors.
Finally, evaluate how the frame behaves when it is not actively displaying photos. A high-quality digital frame should not look like a dark, glossy void when turned off. Look for brands that offer advanced power-saving modes, such as integrated motion sensors that automatically turn the screen off when no one is in the room and wake it up when movement is detected. Some frames also feature ambient light sensors that adjust the screen’s brightness to match the room’s lighting, preventing the display from glowing too brightly in a dim room.
Installation Safety and Power Cable Management
Mounting a digital photo frame safely requires a clear understanding of your wall structure and the weight of the device. In Singapore, residential walls are typically constructed of solid concrete, brick, or hollow drywall partitions. Before drilling any holes, you must identify the wall material and select the appropriate mounting hardware. For concrete or brick walls, you will need a rotary hammer drill, a masonry drill bit, and high-quality plastic wall plugs (anchors) paired with compatible screws. If you are mounting on a drywall partition, you must locate the vertical timber or metal studs using a stud finder to secure the mount. Avoid relying solely on adhesive strips for wall-mounted frames, as the heat generated by the device’s internal components can degrade the adhesive over time, leading to a fall hazard.
Managing the power cable is one of the biggest challenges of a clean wall installation. Running a loose cable down the wall can disrupt the clean aesthetic of your decor. To hide the power cord safely, you can install paintable plastic cable trunking (casing) that runs from the bottom of the frame to the nearest electrical outlet. This trunking can be painted to match your wall color, making it virtually invisible. If you prefer a completely hidden wire look, you may consider routing the cable inside a hollow drywall partition. However, you must never run standard flexible power cords inside walls, as this violates electrical safety codes and poses a fire hazard. For in-wall routing, you must use in-wall rated cables or consult a licensed electrician to install a recessed electrical outlet directly behind the frame.
Electrical safety is paramount when installing any continuously powered device. Always check the frame’s power adapter for local electrical safety certification marks to ensure it has been tested and approved for use with the local 230V electrical grid. Avoid overloading electrical sockets by using multi-way adapters or daisy-chaining extension cords, which can overheat and create fire risks. If your installation requires fixed wiring modifications, drilling near hidden utility lines, or working at significant heights, stop immediately and consult a qualified professional. A certified electrician or professional handyman can ensure the installation is structurally secure and complies with all local safety regulations.
Pre-Purchase Verification Checklist
Before finalizing your purchase on an online marketplace or at a physical retail store, use this checklist to verify that the digital photo frame meets all your installation and operational requirements:
- Physical Dimensions and Weight: Confirm the exact outer dimensions of the frame and its total weight. Ensure your chosen wall location has sufficient space and that your mounting hardware is rated to support the frame's weight.
- Mounting Compatibility: Verify whether the frame includes a wall-mounting bracket in the box or if it features standard VESA mounting holes. If it uses a proprietary system, ensure the bracket allows for both portrait and landscape mounting.
- Power Specifications: Check the length of the included power cable. If it is too short to reach your nearest outlet safely, verify if the manufacturer sells compatible extension cables or if the power adapter uses a standard USB interface that allows for longer third-party cables. Ensure the plug type matches local sockets (Type G) without requiring unsafe adapters.
- Return and Warranty Policies: Review the seller's return policy on the ecommerce platform, specifically regarding screen defects such as dead pixels, severe backlight bleed, or wireless connectivity issues. Ensure the product is covered by a local warranty for reliable customer support.
- User Feedback on Heat Dissipation: Read customer reviews with a specific focus on how the frame performs when mounted flush against a wall. Look for any mentions of excessive heat buildup, which can damage the screen or shorten the lifespan of the internal electronics.
Frequently Asked Questions (FAQ)
Can I use a standard tablet as a wall-mounted digital photo frame?
While it is technically possible to repurpose an old tablet as a digital frame, it is generally not recommended for permanent wall mounting. Standard consumer tablets are not designed to be plugged into a power source continuously. Keeping a tablet plugged in at 100% charge indefinitely can lead to battery degradation, swelling, and in severe cases, a fire hazard. Additionally, tablets lack native VESA mounting holes, requiring bulky third-party brackets that prevent a flush fit. Dedicated digital frames are engineered for continuous operation, feature safer power management systems, and often include specialized mounting hardware.
Do wall-mounted digital frames require a dedicated power outlet?
Yes, most high-performance digital photo frames require a continuous connection to a standard electrical outlet. Running loose extension cords across walkways to power a frame is a serious tripping hazard and can violate local safety codes. If you do not have an outlet near your desired mounting location, you must either install paintable cable trunking to route the wire safely along the baseboards or hire a licensed electrician to install a new outlet. Alternatively, you can look for low-power e-ink digital frames, which can operate on rechargeable batteries for several months, though they only display images in grayscale or limited color palettes.
How do I prevent screen burn-in on a digital frame left on all day?
Screen burn-in, or permanent image retention, can occur on both LCD and OLED displays if a static, high-contrast image is left on the screen for extended periods. To prevent this, utilize the frame’s built-in software features to set up an automatic sleep schedule, turning the screen off during the night or when you are away from home. If the frame features an integrated motion sensor, enable it so the screen only activates when someone is in the room. Additionally, configure your slideshow settings to rotate images frequently—ideally every few minutes— and avoid displaying static user interface overlays, borders, or high-contrast text for long periods.

Community discussion
Share your experience or ask a question. Comments are reviewed before publication.