
Achieving a cohesive gallery wall with aluminium frames requires a systematic approach of planning the layout on the floor, selecting the right mounting hardware for your wall type, maintaining consistent spacing, and balancing the visual weight of your artwork. The sleek, modern profile of an aluminium frame offers a clean border that can unify diverse images, provided you align them along a clear visual axis.
By taking the time to measure accurately and prepare your wall surface, you can create a professional-grade display that remains secure and visually striking for years. Whether you prefer a perfectly symmetrical grid or an eclectic, organic arrangement, the key lies in careful preparation and precise execution.
Planning Your Gallery Wall Layout
Before making any holes in your wall, you must decide on a layout style that complements both your room’s architecture and the sizes of your aluminium frames. A symmetrical grid layout is ideal for a clean, minimalist aesthetic, relying on identical frame sizes arranged in precise rows and columns. This structured approach works exceptionally well with black or silver aluminium frames, creating an orderly, gallery-like feel.
Products mentioned in this guide
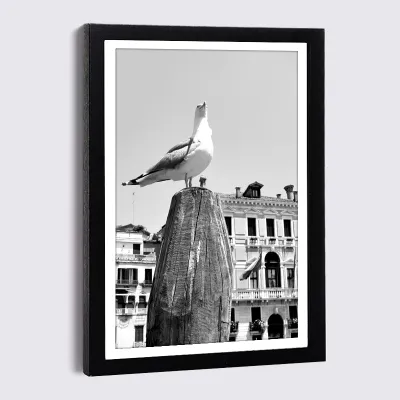
Prices are valid at publication and may change. Please refer to the product page for the latest price.
For a more relaxed and curated look, a salon-style or asymmetrical layout allows you to mix different frame sizes and orientations. The secret to keeping an asymmetrical arrangement cohesive is establishing a central focal point or aligning the frames along a shared horizontal or vertical axis. This visual anchor prevents the display from looking cluttered or disorganized.
To test your layout without committing to wall placement, lay all your aluminium frames out on a clean floor or a large table. Experiment with different configurations, swapping positions until you achieve a balanced distribution of sizes and colors. Once you are satisfied with the arrangement, trace each frame onto kraft paper or newspaper, cut out the shapes, and label them to create individual templates.
When determining the height of your display, aim for the center of the gallery wall to sit at eye level, which is typically between 140 and 150 centimeters from the floor. If you are hanging the frames above a piece of furniture, such as a sofa or a console table, leave a clearance of 15 to 20 centimeters between the bottom of the lowest frame and the top of the furniture to ensure the arrangement does not feel crowded.
Gathering the Right Tools and Hardware
Securing your aluminium frames safely requires matching your mounting hardware to the specific material of your walls. In Singapore, residential properties like HDB flats and private condominiums predominantly feature solid concrete or brick walls, which require a hammer drill, masonry drill bits, and plastic wall plugs to secure screws. Internal partition walls, on the other hand, are often made of gypsum drywall, which requires specialized hollow-wall anchors or toggle bolts to distribute weight safely.

Although aluminium frames are prized for their lightweight strength, the combined weight of the metal, glass glazing, matting, and backing board can add up. Check the weight capacity of both your frames and your chosen wall anchors before installation. Never exceed the rated capacity of your hardware, and always opt for heavy-duty anchors if you are hanging large-format frames.
To ensure a smooth installation process, gather all your essential tools before you begin. You will need a reliable spirit level to keep your lines perfectly straight, a measuring tape for precise spacing, a pencil for marking drill points, and low-tack painter’s tape to secure your paper templates. A hammer, a drill with the correct bits, and a stable step ladder are also necessary for working safely at height.
Step-by-Step Guide to Hanging Aluminium Frames
Transitioning from a paper plan to a physical installation requires patience and precision. Taking your time during this phase ensures your gallery wall is safe, stable, and visually perfect. Always check for hidden utility lines behind the wall using a reliable stud finder with wire-detection capabilities before you begin drilling or hammering.
Creating a Template and Marking the Wall
Begin by taping your paper templates to the wall using low-tack painter’s tape, mimicking the exact layout you finalized on the floor. Step back several paces to evaluate the overall balance, spacing, and height of the templates from different angles in the room, making any necessary adjustments to the paper sheets.
Once the templates are perfectly positioned, you must mark the exact hanging points rather than just the top edges of the frames. Turn each aluminium frame over to inspect its hanging mechanism, whether it uses D-rings, a sawtooth hanger, or a hanging wire. Measure the distance from the top edge of the frame to the actual point where the hook or screw will catch the hardware, pulling hanging wires taut upward to get an accurate measurement.
Transfer these measurements directly onto your paper templates on the wall, marking the drill points clearly with a pencil. Place your spirit level across the top of adjacent templates to verify that your marks are perfectly horizontal, ensuring your final frames will align flawlessly without any unwanted tilting.
Installing Hardware and Hanging the Frames
For concrete or brick walls, use your hammer drill to create pilot holes at your marked pencil points, ensuring the drill bit matches the diameter of your plastic wall plugs. Insert the wall plugs into the holes, tapping them gently with a hammer until they sit flush with the wall surface, then drive the screws in while leaving about 5 millimeters of the screw head exposed.
If you are working with drywall, screw your hollow-wall anchors directly into the marked spots before inserting the mounting screws. Once your hardware is firmly in place, carefully lift your first aluminium frame and guide its hanging bracket onto the exposed screw head, lowering it slowly until the hardware fully supports the weight of the frame.
After hanging each frame, place your spirit level on top of the aluminium border to check for straightness. To keep your frames perfectly flush against the wall and prevent them from shifting when doors close or during routine cleaning, apply small adhesive rubber bumpers to the bottom corners of the frame backs.
Styling Tips for a Balanced Aluminium Frame Display
Achieving visual balance across your gallery wall involves distributing the visual weight of your images evenly. Large, dark, or high-contrast photographs carry more visual weight than smaller, lighter, or pastel-toned prints. Position your visually heavier pieces toward the center or bottom-center of your layout, or balance a single large frame on one side with two smaller frames on the opposite side.
Take advantage of the slim, crisp profile of aluminium frames to establish consistent negative space throughout your display. Maintaining a uniform gap of 5 to 8 centimeters between smaller frames creates a tight, cohesive look, while larger frames (A3 size and above) benefit from 10 to 12 centimeters of breathing room to let each piece stand out.
Using wide, acid-free mats (passe-partout) inside your frames adds a professional, gallery-grade touch while providing a clean visual transition between your artwork and the metallic frame. To unify a diverse collection of prints, use the same mat color—such as a crisp white or soft cream—across all your frames. Coordinating your image styles, such as displaying exclusively black-and-white photography or sticking to a unified color palette, will further enhance the cohesive aesthetic of your metallic frames.
Maintaining and Adjusting Your Gallery Wall
Aluminium frames are highly durable, but their metallic surfaces can easily show dust, smudges, and fingerprints over time. Dust your frames regularly using a clean, dry microfiber cloth to maintain their sleek appearance. For stubborn smudges, slightly dampen the cloth with water or a mild, non-ammonia glass cleaner, making sure to spray the cloth rather than the frame directly to prevent moisture from seeping behind the glass.
Periodically inspect your gallery wall to ensure all mounting hardware remains tight and secure, especially in high-traffic areas like hallways or in humid environments near kitchens and bathrooms. Vibrations from daily household activity can cause screws to loosen slightly over time, so a quick check every few months helps maintain structural safety.
One of the greatest advantages of modern aluminium frames is their user-friendly backing design, which often utilizes spring clips or turn buttons. This feature allows you to swap out your artwork or photographs easily without removing the hanging hardware from the wall. Simply take the frame down, release the backing clips, insert your new print, and hang it back on the existing screw for an instant seasonal update.
Frequently Asked Questions (FAQ)
How do I clean aluminium frames without damaging them?
To clean aluminium frames safely, use a soft, dry microfiber cloth for regular dusting. For deeper cleaning, wipe the metal surfaces with a cloth lightly dampened with water or a mild, pH-neutral soap solution. Avoid using abrasive sponges, steel wool, or harsh chemical solvents like ammonia or bleach, as these can scratch the metallic finish or strip away the protective anodized coating. Always dry the frames thoroughly with a clean cloth to prevent water spots.
Can I mix aluminium frames with other materials in a gallery wall?
Yes, mixing aluminium frames with wood or acrylic frames can add rich texture and depth to your gallery wall. To keep the mixed-media display cohesive, maintain a unifying element such as identical matting colors, consistent spacing, or a unified photo color scheme. Distribute your aluminium frames evenly throughout the layout rather than clustering them in one section, ensuring the metallic accents feel integrated and intentional.

Community discussion
Share your experience or ask a question. Comments are reviewed before publication.