
Creating a cohesive gallery wall with Kodak photo frames transforms a blank wall into a curated visual narrative. Achieving a balanced, professional look requires a thoughtful combination of spatial planning, precise measurement, and the right mounting hardware. By coordinating frame styles, balancing visual weight, and mapping out your layout before making any holes, you can design a display that feels intentional and harmonizes with your room’s existing decor.
The key to a successful gallery display lies in treating the entire arrangement as a single, unified design element rather than a collection of individual pictures. Whether you are showcasing family portraits, travel photography, or art prints, the frames serve as the structural border that ties the collection together. Planning this layout carefully ensures that the final display enhances your living space without overwhelming it.
Plan the Layout and Visual Style
Before driving any nails or drilling into your walls, you must assess the physical environment where your gallery will live. Take note of the available wall space, the height of nearby furniture, and the ambient lighting in the room. In many homes, a gallery wall is positioned above a sofa, a sideboard, or along a staircase, meaning the arrangement must relate proportionally to these features. For instance, a gallery placed above a console table should ideally span roughly two-thirds to three-quarters of the furniture’s width to maintain a balanced relationship.
Products mentioned in this guide
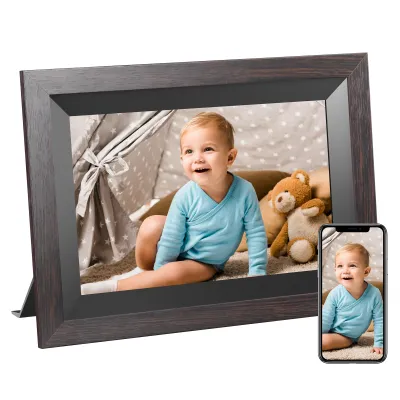






Prices are valid at publication and may change. Please refer to the product page for the latest price.
Next, select a layout pattern that complements the architectural style of your home and the mood you want to create. A structured grid layout, featuring identical Kodak frames aligned in perfect rows and columns, offers a clean, modern, and formal aesthetic. This pattern works exceptionally well with black-and-white photography or minimalist prints. Alternatively, a relaxed salon style allows you to mix different frame sizes and orientations around a central focal point, creating an organic, eclectic feel that can easily grow over time. For narrow spaces like hallways or entryways, a linear alignment—where frames are arranged along a single horizontal or vertical axis—provides a streamlined path for the eye to follow.
Balancing mixed frame sizes and orientations is crucial for preventing the display from looking lopsided. To achieve visual equilibrium, distribute the visual weight evenly across your planned arrangement. Place larger or darker frames near the center or bottom-left of the layout to anchor the display, then balance them with smaller, lighter frames on the outer edges or the upper-right. If you are using a mix of portrait and landscape orientations, intersperse them throughout the layout rather than grouping all vertical frames on one side and horizontal frames on the other.
Select Tools and Wall Hardware
Executing a flawless installation requires matching your tools and mounting hardware to the specific construction of your walls. In Singapore, residential walls are commonly made of solid concrete or masonry, particularly in HDB flats and older apartments, while newer condominium units may feature drywall partitions. Hanging frames on concrete requires a hammer drill, masonry drill bits, plastic wall plugs (anchors), and screws to ensure a secure hold. For drywall, you can often use specialized drywall anchors, toggle bolts, or heavy-duty picture hangers that distribute weight effectively without needing to locate a wall stud.

Before purchasing hardware, verify the physical weight of your loaded Kodak frames, including the glass and backing. Standard frames are relatively lightweight, but larger formats or those with thick wooden profiles can exert significant downward force. Always select hooks, brackets, or anchors that are rated to support more than the actual weight of the frame to provide a safe margin of security. If you are working at height or hanging heavy frames above seating areas, prioritizing robust, mechanical fasteners over temporary adhesive strips is essential for long-term safety and to prevent accidental falls.
Gather all your essential tools before beginning the installation process to keep the workflow smooth and precise. You will need a reliable measuring tape, a sharp pencil for marking reference points, a spirit level to ensure perfect horizontal alignment, and a hammer or drill depending on your wall type. Having a roll of low-tack painter’s tape on hand is also highly beneficial, as it allows you to mark lines and secure templates without damaging the wall paint or leaving sticky residue behind.
Map, Measure, and Hang the Frames
To avoid turning your wall into a Swiss cheese of mistaken drill holes, map out your entire arrangement using paper templates. Trace the outline of each Kodak frame onto kraft paper, newspaper, or wrapping paper, and cut them out. Label each template with the specific photo or frame it represents, and mark the position of the hanging bracket or wire on the paper. Tape these templates to the wall using low-tack painter’s tape, adjusting their positions until you achieve the exact spacing and layout you desire.
Once your paper templates are arranged to your satisfaction, use your measuring tape to establish consistent spacing between the frames. A standard rule of thumb is to maintain a gap of 5 to 8 centimeters between adjacent frames; narrower gaps create a tight, cohesive unit, while wider gaps allow individual images to stand out. Measure from the edges of the paper templates to ensure the spacing is uniform across the entire grid or salon arrangement.
With the templates still taped to the wall, locate the hanging point you marked on each paper cutout. Place your nail or screw directly through the paper at that marked point, then drive it into the wall or drill the pilot hole for your wall plug. Once the hardware is securely installed, gently tear the paper template away from the wall, leaving the hook or screw perfectly positioned. Hang the frame onto the hardware and slowly release its weight, verifying that the mount is stable and secure before letting go completely.
Level, Secure, and Finalize the Display
Even with precise measurements, minor shifts can occur during the hanging process, making a final alignment check necessary. Place a spirit level across the top edge of each individual frame to verify that it sits perfectly horizontal. For grid layouts, you should also run the level across the tops of adjacent frames to ensure the horizontal lines remain unbroken across the entire display. Take your time adjusting the hooks or wires slightly to correct any minor tilts.
To keep your gallery looking pristine over time, apply small adhesive rubber bumpers or a pea-sized amount of museum putty to the bottom corners of each frame backing. This simple step prevents the frames from shifting or tilting when doors slam, when heavy footsteps vibrate the floor, or during routine dusting. Additionally, these bumpers create a tiny gap between the frame and the wall, which promotes air circulation and prevents moisture from trapping against the wall paint—a particularly useful precaution in humid tropical climates.
Finally, step back several paces to view the entire gallery from a distance and from different angles in the room. Check that the images inside the frames are sitting flush against the glass and have not slipped during installation. If any hanging wires are visible above the top edge of the frames, shorten the wire or adjust the hook position so the hardware remains completely hidden behind the frame profile.
Scale the Arrangement for Your Space
A gallery wall should feel custom-tailored to the proportions of the room it occupies. In narrow hallways or tight stairwells, opt for a higher density of smaller frames with tighter spacing to prevent the display from feeling cramped or obstructing movement. For expansive living room walls, you can scale up by using larger frames or increasing the spacing between them to match the grand scale of the room, ensuring the display does not look lost on a massive blank surface.
If your home features high ceilings, take advantage of the vertical volume by extending your gallery upward. A vertical layout or a salon display that climbs toward the ceiling can draw the eye upward, making the room feel more spacious and airy. When extending a display vertically, place the most detailed or smaller images at eye level so they can be easily appreciated, while larger, high-contrast images can be positioned higher up where they are still legible from a distance.
Always maintain adequate breathing room around the outer perimeter of your gallery wall. Leave a generous margin of empty wall space between the outermost frames and any architectural features, such as door frames, window casings, corners, or light switches. This boundary acts as a visual frame for your gallery, separating the display from the structural elements of the room and allowing the entire arrangement to breathe.
Frequently Asked Questions (FAQ)
How do I clean Kodak photo frames without damaging the finish?
To maintain the finish of your frames, dust them regularly using a clean, dry microfiber cloth. Avoid using harsh chemical cleaners, glass sprays containing ammonia, or excessive moisture, as these can seep behind the glass and damage the photo matting or degrade the frame’s finish. If the glass requires spot cleaning, apply a small amount of mild glass cleaner directly to a cloth first—never spray it directly onto the frame—and gently wipe the glass surface, keeping the liquid away from the frame joints. Always refer to the manufacturer’s care instructions for specific material recommendations.
Can I mix Kodak frames with other brands in the same gallery?
Yes, you can successfully mix different frame brands in a single gallery wall by establishing a common visual thread. To unify the display, use consistent matting colors, such as all off-white or all black, or stick to a cohesive color palette for the photos themselves. Ensure that the mixed frames share a similar depth profile so they sit relatively flush against the wall together. You can balance the visual weight by placing thicker or more ornate frames strategically throughout the layout, using standard Kodak frames to provide clean, stabilizing lines around them.

Community discussion
Share your experience or ask a question. Comments are reviewed before publication.