
Creating a cohesive gallery wall with multiple digital photo frames transforms a blank wall into a dynamic, living exhibition of your favorite memories. Unlike traditional static art, arranging electronic displays requires a thoughtful balance of visual design, spatial planning, and physical cord management. To achieve a polished, gallery-grade look, you must carefully calculate your layout, select the appropriate mounting hardware for your wall type, and employ clever techniques to conceal power cables.
In Singapore’s modern apartments, where concrete walls and sleek, minimalist interiors are common, managing the logistics of multiple power cords is often the biggest hurdle. By mapping out your layout with physical templates and coordinating your frames’ screen settings, you can seamlessly integrate technology into your home decor. This guide provides a step-by-step roadmap to plan, mount, and optimize a multi-frame digital gallery wall that looks clean, professional, and completely integrated into your living space.
Plan Your Digital Gallery Wall Layout
Before hammering a single nail or drilling into your wall, you must establish a clear visual blueprint. Digital photo frames possess unique physical characteristics that distinguish them from traditional wooden frames, including thicker bezels to house internal components, uniform aspect ratios (frequently 4:3 or 16:9), and power cord entry points that often protrude from the back. These factors mean that haphazard placement can quickly look cluttered or misaligned.
Products mentioned in this guide




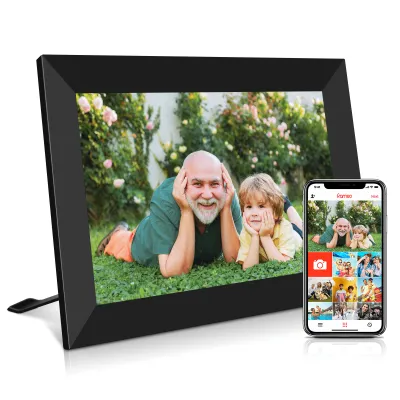


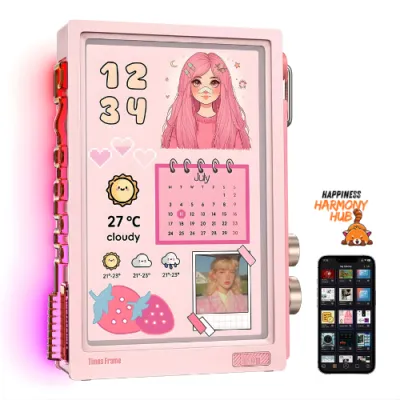
Prices are valid at publication and may change. Please refer to the product page for the latest price.
Choosing a layout style that complements your room’s architecture is the first step. A structured grid layout works exceptionally well for digital photo frames of identical sizes and aspect ratios, creating a clean, symmetrical, and modern aesthetic. If you own frames of varying sizes, a symmetrical arrangement—where a central horizontal or vertical axis balances larger and smaller screens—offers a sense of order without rigid uniformity. For a more relaxed, eclectic feel, a salon-style cluster allows you to mix landscape and portrait frames of different dimensions, though this style requires careful spacing to avoid looking chaotic.
To visualize your arrangement without damaging your walls, create physical templates using kraft paper or cardboard. Trace the outer dimensions of each digital frame onto the paper, cut them out, and label them with the corresponding frame model and orientation. Use low-tack painter’s tape to position these templates on the wall. This physical mockup allows you to step back, evaluate the composition from different angles, and adjust the spacing until the balance feels correct.
During this planning phase, you must account for the physical constraints of electronic displays. Look closely at where the power ports are located on the back of each frame. Some models have ports that stick straight out, requiring deeper mounting brackets or a recessed wall space, while others feature recessed ports with angled cables that sit flush against the wall. Ensure your templates reflect these physical realities, leaving sufficient clearance between frames for both the bezels and the routing of power cables.
Gather the Right Tools and Hardware
Executing a flawless installation requires gathering a specialized set of tools and hardware tailored to your specific wall construction and the weight of your electronic devices. Standard household tools form the foundation of your kit. You will need a reliable tape measure, a pencil for marking reference points, a high-quality spirit level to ensure every frame hangs perfectly straight, and painter’s tape to secure your paper templates.

In Singapore, the vast majority of residential walls in HDB flats and condominiums are constructed from reinforced concrete or solid brick. For these solid surfaces, a standard stud finder is unnecessary; instead, you will need a rotary hammer drill equipped with a masonry drill bit of the correct diameter, along with durable plastic wall plugs (often referred to as rawlplugs). If you are mounting onto drywall partitions—which are sometimes found in newer condominium layouts or partitioned study rooms—a stud finder is essential to locate wood or metal studs, and you must use high-quality hollow-wall anchors or toggle bolts if you cannot align the mounts with a stud.
Digital-specific hardware is crucial for managing the electrical components of your gallery wall. Gather a comprehensive cable management kit, which should include paintable plastic cord covers (cable trunking), adhesive cable clips, and small zip ties or hook-and-loop straps to bundle excess cords. A basic cable management kit typically costs between S$10 and S$30 at local hardware stores. Depending on the distance to your nearest power source, you may also need a flat, low-profile extension cord or a smart power strip equipped with USB ports. Ensure any power adapters or extension cords you purchase carry appropriate local safety certifications, such as the Enterprise Singapore Safety Mark, to guarantee they are safe for continuous electrical operation.
Before purchasing any mounting brackets or hardware, consult the manufacturer’s user manual for each digital photo frame to verify its exact weight and recommended mounting pattern (such as VESA mounts or keyhole slots). Never guess the weight of your electronic devices; using hardware rated below the frame’s weight can lead to costly damage to both your walls and your electronics.
Step-by-Step Installation and Cable Management
Marking and Mounting the Frames
To begin the physical installation, identify the visual focal point of your gallery wall, which should ideally sit at average eye level—approximately 140 to 150 centimeters from the floor. Using your paper templates as a guide, use your spirit level to ensure the top edges of your planned layout are perfectly horizontal. Mark the precise drilling or mounting points directly onto the wall through the templates using a sharp pencil, then double-check the distances between these marks with your tape measure to ensure consistent spacing.
Before drilling, it is vital to check for hidden hazards behind the wall surface. Use a multi-detector or wall scanner to verify that no electrical wiring, water pipes, or structural steel reinforcements run behind your marked points. If you are drilling into concrete, select a masonry bit that matches the size of your wall plugs, drill to the depth specified by the plug manufacturer, insert the plastic plugs flush with the wall surface, and secure your mounting screws or brackets. For drywall, pre-drill small pilot holes and carefully install your heavy-duty hollow-wall anchors.
Safety must always be your top priority during this process. Always read the manufacturer instructions for both the digital photo frame and the specific mounting hardware you are using. If the instructions conflict, or if you are unsure of your wall’s composition or structural integrity, stop immediately and consult a qualified professional or structural engineer. Never attempt to drill into walls near electrical outlets or light switches without first isolating the power at your home’s main distribution board (DB box) to prevent accidental electrocution.
Routing and Hiding Power Cables
Concealing the power cords is the single most important step in transforming a cluttered collection of screens into a high-end, professional-looking digital gallery. The most accessible and popular method is using paintable plastic cord covers (cable trunking). These slim profiles can be adhered to the wall using damage-free adhesive backing, routed vertically down from the frames, and painted to match your exact wall color, making them virtually invisible from a distance.
When routing the cables from the back of each frame, you must leave a small amount of slack near the connection port. Pulling a cable too tight can put physical stress on the frame’s delicate power input port, potentially damaging the internal circuitry or pulling the frame out of alignment, causing it to hang crookedly on the wall. Group the individual cables together behind the frames using hook-and-loop straps or cable sleeves, funneling them into a single, organized bundle before they enter the main trunking channel.
If your home features hollow drywall partitions and you wish to run the cables inside the wall cavity for a completely wireless look, you must check local building codes and fire safety regulations first. Standard low-voltage power adapters and cords supplied with digital frames are typically not rated for in-wall installation; running them behind drywall can pose a serious fire hazard. If in-wall routing is permitted and safe, you must use specialized, code-compliant in-wall cable routing kits that feature integrated, safety-certified power outlets behind the frames, which should always be installed by a licensed electrician.
Optimize Screen Placement and Lighting
The visual appeal of your digital gallery wall depends heavily on how the screens interact with the ambient light in your room. Unlike traditional paper-based art, digital screens emit their own light and are highly susceptible to glare, reflection, and color distortion when subjected to poor lighting conditions. To ensure your photos look vibrant and lifelike, avoid placing your gallery wall directly opposite large windows where intense, direct sunlight can wash out the display and cause the internal processors of the frames to overheat.
Positioning the frames at the correct height is equally critical for maintaining optimal contrast and color accuracy. Most digital photo frames utilize either In-Plane Switching (IPS) or Twisted Nematic (TN) liquid crystal displays; while IPS panels offer wide viewing angles, TN panels can suffer from severe color shifting and darkening when viewed from below or from sharp side angles. Mount your frames so that the center of the display cluster sits at or slightly above the eye level of a standing or seated viewer, depending on whether the room is a high-traffic hallway or a formal living room.
For rooms that receive a significant amount of natural light, prioritize digital frames equipped with anti-glare, matte-finish screens, which diffuse incoming light and minimize distracting reflections of windows and light fixtures. Take the time to access the settings menu of each frame to adjust the built-in brightness and color temperature. Setting the brightness too high can make the screens look artificially harsh and consume unnecessary electricity, while setting it too low will make the images hard to see during the day. Many modern frames feature ambient light sensors that automatically adjust screen brightness to match the room’s lighting conditions, as well as programmable sleep schedules to turn the screens off during the night to conserve energy.
Blend Digital and Traditional Frames Seamlessly
Mixing digital photo frames with traditional, static framed artwork is an excellent way to create a rich, layered gallery wall that feels balanced and integrated. The key to successfully blending these two mediums lies in maintaining strict spatial consistency. Aim for a uniform spacing of 5 to 8 centimeters (approximately 2 to 3 inches) between all frames, regardless of whether they are digital screens or traditional matted prints, to establish a cohesive visual rhythm across the entire wall.
To unify the display further, select frames that share common design elements. If your digital frames feature sleek, black plastic or dark wood bezels, choose traditional frames with matching finishes, widths, and profiles. If your digital frames have a wide, white digital mat border around the screen, frame your physical prints with physical white cardboard mats of a similar width. This visual continuity tricks the eye into seeing the collection as a single, curated art installation rather than a disjointed mix of technology and paper.
When arranging the layout, position your digital frames as dynamic focal points within the larger composition. Because the human eye is naturally drawn to motion and light, placing a digital frame at the center or along a key diagonal axis of your gallery wall will anchor the display. Surround these active screens with static, understated traditional art—such as black-and-white photography, line drawings, or textured canvas prints—to balance the visual energy of the space. Keep the transition speed of your digital frames set to a slow, gentle fade (e.g., changing images once every few hours or once a day) to prevent the wall from feeling overly busy or distracting.
Frequently Asked Questions (FAQ)
Can I use adhesive strips to hang digital photo frames?
While heavy-duty adhesive strips are highly popular for hanging lightweight traditional frames, they are generally not recommended for digital photo frames. Electronic displays contain heavy internal components, glass screens, and sometimes built-in batteries, making them significantly heavier than standard wooden or plastic frames of the same size. Furthermore, Singapore’s high relative humidity can degrade the adhesive bond over time, increasing the risk of the frame falling and sustaining expensive damage. If you must use adhesive strips, carefully check the exact weight of your digital frame against the strip manufacturer’s maximum weight capacity, ensure the wall surface is completely smooth, clean, and non-porous, and never use them on textured plaster, wallpaper, or freshly painted walls.
How do I manage power cords if my outlets are far away?
If your nearest electrical outlet is far from your gallery wall, you can use flat, paintable extension cords designed to run discreetly along your floor baseboards or ceiling cornices. Secure these cords tightly using adhesive cable clips to prevent them from drooping or creating a tripping hazard. Never stretch power cables tightly across walkways, run them under heavy rugs where heat can build up, or pinch them behind heavy furniture, as these practices can damage the insulation and create a fire hazard. For a permanent, completely seamless aesthetic, we highly recommend consulting a licensed electrician to install a new, code-compliant electrical outlet directly behind your gallery wall layout.

Community discussion
Share your experience or ask a question. Comments are reviewed before publication.